I went through each clip individually in the clip attributes and discovered a few that were 60fs, so changed them to 30fs.
Changing the frame rate in clip attributes is something TOTALLY different.
If you are rendering at 30fps, then as above, 60fps is an exact multiple and not an issue (It just renders every other frame).
Changing the clip attributes from 60fps to 30fps changes the play speed and duration … basically that clip will appear at half speed.
I rendered one clip in its native 30fps in ProRes 3840 × 2160 and it was jerky. I tried again raising the frame rate to 60fps (which I appreciate would slow it down) but it wouldn’t let me do it.
Of the clip (clip attributes) or the render?
If you change the fps of a clip recorded at 30fps to 60fps using clip attributes, you’d speed it up.
I think I’m out of my depth here! I need to do some reading and understanding of all of this. Tinkering around the edges without understanding the consequences of an action is a waste of time. Thanks for your help Dave. I shall go away and consider…
Using clip attributes, the only thing that doesn’t change is the number of frames in the clip.
What changes is how DR treats that clip when added to the timeline.
So, same number of frames, but changing from 30fps to 60fps (in clip attributes) uses those frames twice as quickly .. ie speeds it up.
Whatever the source video’s native fps, and whatever the timeline’s fps, adding the video to the timeline will maintain the duration of the clip.
Re-timing is only needed to ensure badly matched fps (non perfect multiples , as above) don’t appear jerky due to lost frames when rendered. This is when the tools in DR do a superb job to “hide” this issue.
I have uncovered the most peculiar issue with DV this weekend. I am using 19 but this is the first fault I have encountered.
When colour grading a clip taken from my mobile phone camera, if I middle mouse click the clip to match the grade of a previous clip, it makes the entire clip shake, wobble and zoom. Its almost like you have used the camera shake effect. Once done, no matter what you do (reset the grade, undo the grade) the clip stays screwed. I have to then remove it from the time line, and reselect it from the media pool to correct it and start again. It makes no sense whatsoever.
If you manually grade the clip it is fine, but as soon as you middle mouse click one, same thing happens. It has meant I have had to waste loads of time manually grading each clip taken from my mobile rather than middle clicking.
If all the clips on the timeline are from the same phone and need the same grade, you could grade at the timeline level.
Hmmm, not sure how to do that. But, even so, I don’t understand why selecting a grade in the colour page and applying it would then permanently apply this problem to the clip even after it has been reset. You can literally see the black outsides of the clip as it shakes and vibrates in the editor. It is the bizarrest thing I have encountered so far and I have lost weeks of my life working in DV. Although I admit I am still probably using 1% of it.
Does the grade you are copying from have any stabilisation applied?
Yes it does…
Then that’s what’s been copied and applied to the new clip.
They are mobile videos of inside of a house, and I stabilize them all to match the drone footage. The feature works very well - other than the issue. So should I colour first and stabilize last? I also find that I get some thumping when transitioning where the edges or outer egdes of the clip merge, where the stabilization has obviously stopped
Ah ok, so its stabilizing twice in essence?
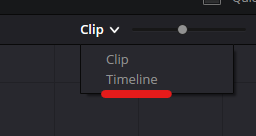
Top right of the node panel ..
Bloody useful for single source grading … all CSTs and/or LUTs can be done once and forgotten.
Back to clip mode for single clip tweaking.
Not fully sure what you’re copying .. but it seems it’s applying the stabilisation from one clip to the one that doesn’t need it, or needs it’s own stabilisation. (Hence why I asked. ![]() )
)
Yes its a good shout - I did wonder if that is what was causing the issue
If you’ve stabilised the first clip in the colour tab .. that gets copied too.
In which case, make sure you use one node JUST for the stabilisation .. then after the copy you can select that node, reset, and do the new stabilisation.
Im stabilising in the edit inspector. Then going to colour to do the grade. Can you stabilise in a node on colour page?
