Hi All! I am currently having a bit of an issue with Davinci 19. I have been rendering a film I am making, at leat 8-10 times, with various changes made along the way, but the end results are just not satisfactory. I have the free version, so subtitles are inputed manually. That was fine. The first time I rendered with the subs, it worked ok, but the film quality was basic at 1080p. Having then done some fine tuning, I then upped the quality to 4K, initially using ProRes and the subs disappeared. I’ve checked the Render settings, making sure the subs are set as embedded captions, but no change. When I play the film (in Davinci) on my Mac, the subs are all there. I really don’t understand what I am doing wrong and would appreciate some advice.!
Screenshot all your render settings and I’ll try replicating (.. albeit I’m in 20β - Wndows 10.
I’ve just tried using the default ProRes 422 HQ , and the subtitles have rendered OK.
Just used “a clip” (![]() ) - added voice over - created subtitles - rendered in default ProRes setting in 4k .. which I can’t post here directly, so created a gif (no audio) from that ProRes clip.
) - added voice over - created subtitles - rendered in default ProRes setting in 4k .. which I can’t post here directly, so created a gif (no audio) from that ProRes clip.

I’ve checked something on QuickTime Player. Something I hadn’t considered!! I switched from Auto to English and suddenly the subtitles appeared. Is that normal? I would have thought that if the subs were embedded they would appear automatically. Evidently not!


Another thing that confuses me is the film quality setting. I set it UHD but the resulting render is 1080p and it is noticeable, with colour banding in the sky, despite it being a pretty sizeable file at 13+gb. It has the feel of a relatively low res render. Am I missing something? Most of the film used is native 4K, including my iPhone.
“Embedded” includes them as a subtitle track that players can identify, and superimpose over the video track.
If you want them visible in any video player, then you need the “Burn into video” option ..

.. which I used in the above.
In your settings, you are rendering as H264 - not ProRes ..
Yours ..

Pro Res ..

Just click the button at the top to set the default ..


OK so 1080p isn’t HD? But it isn’t 4K. I see the pixel dimensions match the setting I put in. My apologies. I didn’t look carefully enough. The first render I did with ProRes produced a file that was 129GB and was jerky when I tried to play it back. Is that a Mac processor issue do you think, that is t simply couldn’t handle playing a file that big?
It is - but you said you set UHD, which is 4k/2160p .. which your screenshot says the file is. “3840 x 2160”
If that was ProRes 422 .. the files are large. Far less compression than H.264
Could be - but impossible to say from my remote position.
I’m guessing the Mac has something that monitors performance? (Task Manager on Windows). That would show if there’s a bottleneck somewhere. .. CPU/GPU/HDD, etc.
Could try 1080 ProRes 422 and see the file size and playability.
Thanks Dave, that’s a great idea. Macs have Activity Monitor. I’ll come back to you!
My “9 year old tech” laptop won’t play 4k Pro Res. ![]()
Had to drag it back into DR to see that the subtitles were where I was expecting them. ![]()
And were they there? I’ve rendered a ProRes version and that is still jerky (122GB). With the activity monitor showing the CPU is using about 15-20% whilst rendering

I don’t really know enough to say what the rest of it means
When playing the rendered video?
That’s only what DR is using.
What is the overall activity level when playing the video? That’s what will cause a jerky replay.
However much of the resources are in use whilst rendering won’t impact the render .. just how long it takes to complete.
The ProRes render took about 50 mins. I only had a couple of desktop folders open and Google. Whilst playing this is what the AM was displaying.

Are the frame rates of your source and render the same?
If they aren’t, then you get frame drops that can appear “jerky” in replay.
DR is good a removing this jerkiness if you use all the re-timing controls .. but can’t recall to what extent they are available in the free version.
But far better to ensure that you use the same frame rates for recording and the DR project settings, and rendering .. then you don’t need the re-timing.
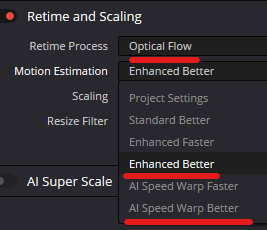
If this is the case, these are the settings I’d use in the clip Inspector .. definitely Optical Flow (in free? ![]() ), but pretty sure AI Speed Warp does fall into Studio (most AI stuff does) so probably “Enhanced Better” is the best you have available.
), but pretty sure AI Speed Warp does fall into Studio (most AI stuff does) so probably “Enhanced Better” is the best you have available.
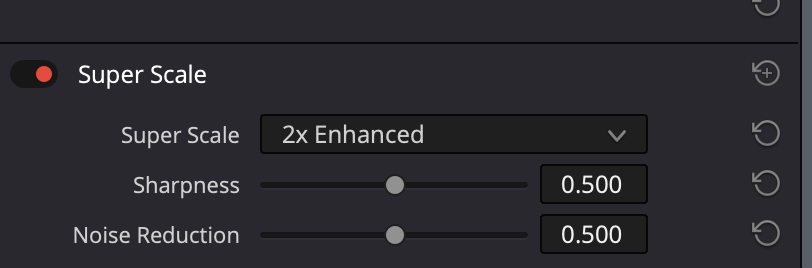
Many Thanks for all that. I have changed a number of settings and will render again see what happens. AI super scale was not one that I have available
If the project/rendering frame rate is the same as the source video (best practice), or the source fps
isn’t a perfect multiple of the render frame rate, the re-timing isn’t needed.
By “perfect multiple” I’m meaning source = 120 or 60fps, and project/render is 30fps .. so source is exactly double/quadruple the render. You’ll need re-timing if you’re source is, say, 30fps and you are rendering at 29.97.
And, if you really want to re-time the video to a different frame rate, expect the rendering to be much slower .. it does a lot of work! ![]()
Nor was it one I was suggesting to use. ![]()
Very little AI is in the free version.
I’ve made sure the frame rates are the same, inputted your suggestions, but when I set it to render, it froze at 6%, saying it would take over 5 hrs to render a 20 min film. I tried it twice and it did the same again, so I suspect there is another issue which I don’t know about.
Were you using the re-timing? Because ..
Render a few minutes with no retiming and upload to YT, and post here, so that the jerkiness can be seen.