Even though I’ve only flown my 5" Nazgul about three or four times, I fancied also picking up a 3" quad for throwing about and learning some acro skills, plus also coming in under 250g so as to make life a tiny bit easier in terms of regulations. The Eachine Tyro79 at £58 for everything (excluding receiver) seemed like a bargain.
I thought I’d pop a few photos up here as I put it together. It arrived on Thursday and, to be honest, you could put the whole thing together and have it up and running in an evening. There’s minimal soldering to do - just motor wires and battery lead onto the ESC. Everything else is done with plugs (mostly).
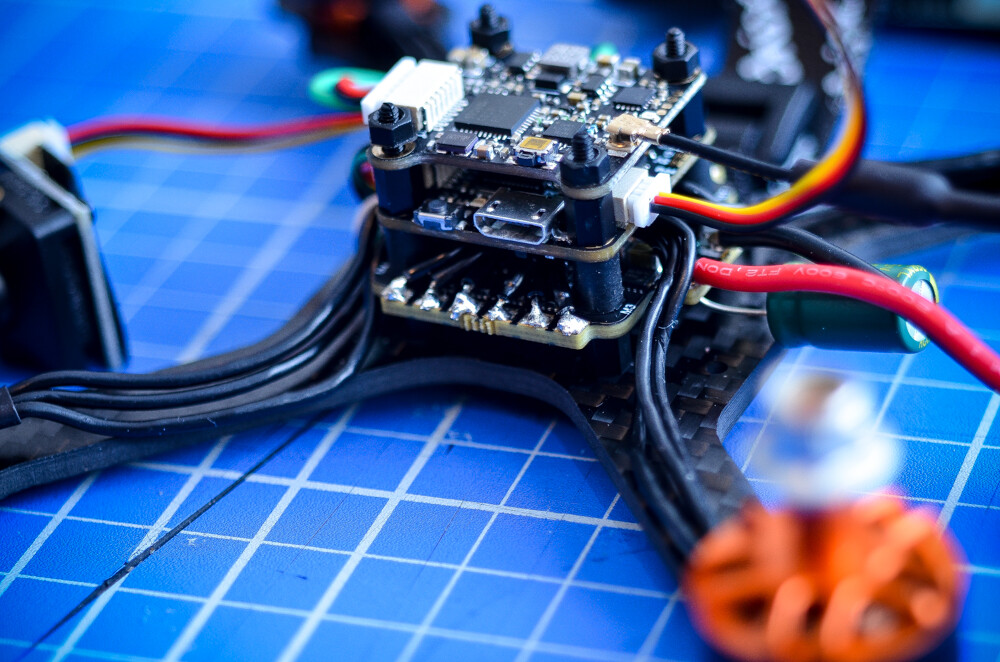
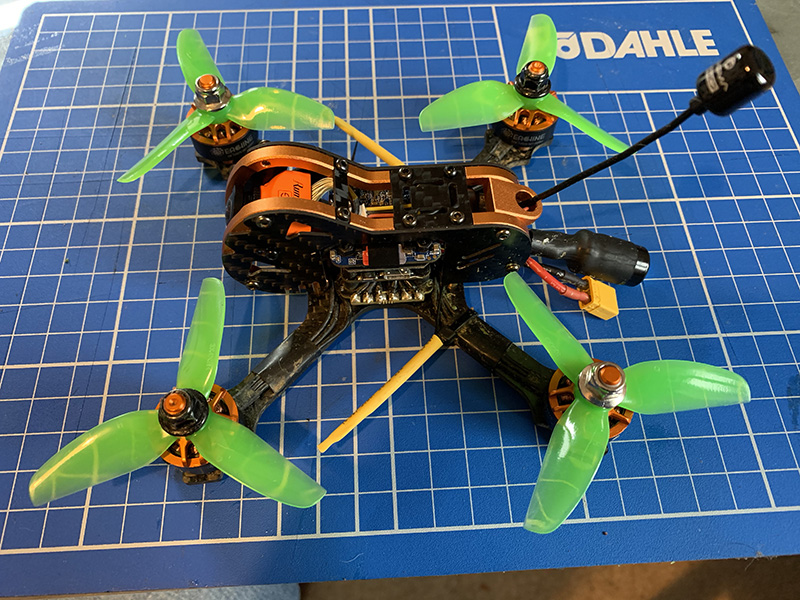
One thing I’ve noticed on the Nazgul, with the motor wires coming out the side of the ESC board, is that if you hold or strap the quad to something around its waist, the solder joints look like they’re at risk of taking some of the strain. So, on this one, I soldered the wires facing inwards and brought them around the standoffs.
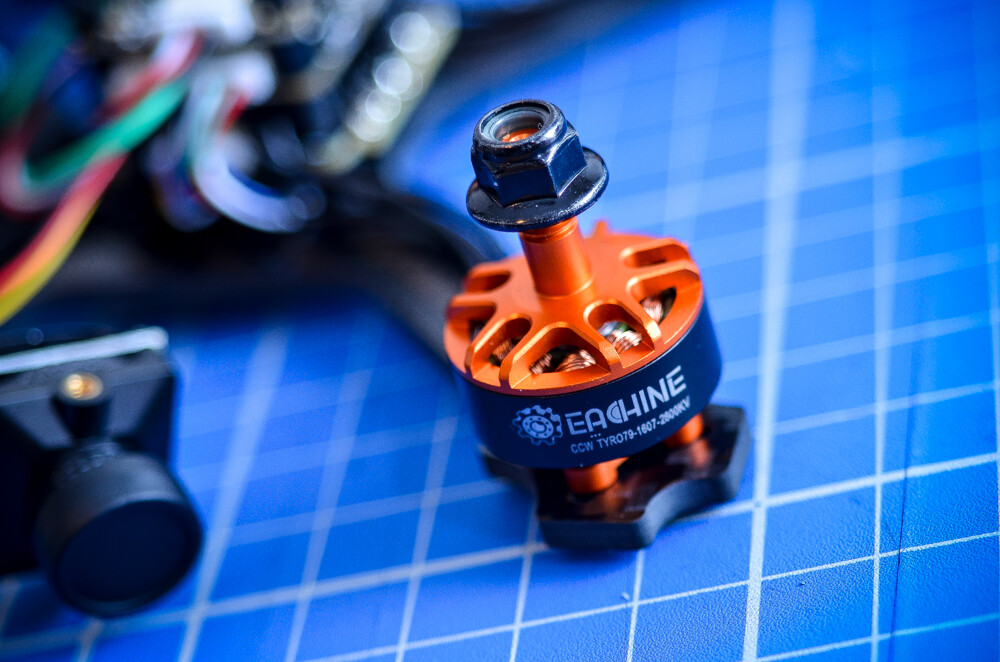
Motors seem ok. A bit notchy perhaps. The nyloc sections at the top of the prop nuts are super tough though - very hard to tighten them up and I still have the marks on my fingers as a result. Hopefully once they’ve been on and off a few times they’ll loosen up a bit.
I said everything connects together with plugs… The supplied VTX cable is missing the Smartaudio lead, which is annoying. So I soldered the green smart audio wire from vtx to FC seperately.
Generally, there’s a fair bit of head-scratching involved in putting this together. All the YouTube videos I found appear to use different components to the ones I got with this with totally different layouts and plug locations. There are no instructions at all and the pad labelling on the FC is pretty fuzzy and ambiguous. Nothing show-stopping though.
To start with, I ran this off the 3D printer to sit over the screw heads and give me a flat surface for the battery to sit against. In the end, I decided to ditch it though…
…it adds too much unwanted weight and height (AUW is coming in at 249g, so every gram counts) and if I stuck it down then I wouldn’t be able to get to those screws easily. Instead, I just popped a bit of velcro there which raises the battery off the screw enough and has the added advantage of keeping the battery secure.
It also covered up the slots for the battery strap
Again, though, I decided not to run the battery strap this way in the end. Once in, it’s impossible to remove without completely disassembling the quad and removing the flight stack. Instead I just pass it under the flight stack and around the outside of the frame. Seems to work fine this way.
I can’t see any way of fixing it, so it’s going to be the usual photos and video to BG and see what they say. I had something similar like this with them before and they were quite helpful, so we’ll see. In the meantime, I just ordered something better looking from a UK store which should hopefully be here in a day or two.
A note on the quality of components in the Tyro… They’re not the best. The frame and motors look sturdy, the electronics boards not so much. Then again, if I went and picked the absolute cheapest components from China that I could find, I’d probably still struggle to put together a 3" FPV quad for under £100, so I can’t complain too much.
Maybe put some plastic over the motor wires. When you crash, the props can bend and sever the wires. Racers use broken props to cover them with masking tape. Or racewire.
On my 5", I’ve routed the wires under the arms because I kept chopping em
Ah, good shout, thanks. I think the 3" props prob have less scope to flex down that far than the 5" ones, but probably worth doing anyway just in case.
This is quite common with Eachine/Banggood. I bought two Tyro129’s in the space of a week. The second one to arrive has a completely different camera with a different pinout and again the wrong cables to mate it and the VTx to the flight controller. It’s for that reason I couldn’t recommend it to a beginner as how many would have the tools to make new cables without scissors and sticky tape?
I agree - not ideal if you don’t know what you’re doing. Although I’m relatively new to quads/drones, I’ve been into DIY electronics for years and have experience with flight controllers and associated bits and pieces on fixed wing planes, so I don’t mind hacking apart a few wires and splicing/soldering things here and there.
Some other observations on the Tyro79…
The supplied cables are only taking a 5V feed from the FC and passing it to the 5V output on the VTX. Whilst this seems to give power to the VTX and makes it work, I’m not sure it’s the best way to power it up and I suspect is not getting the best out of the VTX in terms of power and so on. The VTX does have a 7-24v input which is currently empty. There doesn’t appear to be a suitable voltage output on the FC to feed to this though, apart from taking a line straight from the V+ on the ESC->FC plug socket. Do we reckon that is safe/advisable to do? If so, I’ll do that and then use the VTX’s 5V out to drive the camera from its voltage regulator which might be a cleaner voltage source than from the cheapy FC.
I’d also like to pop a runcam split in there at some point but there is no more room on top of the stack. I’ve seen some creative solutions on Thingiverse which border on being a bit of a bodge. Alternatively, there are a selection of nice looking carbon 3" frames that have a longer ‘coffin’ style layout that should accommodate some more kit inside. Although they’re only about £10-15, it’s starting to get away from the “oh this £58 quad is such a bargain”
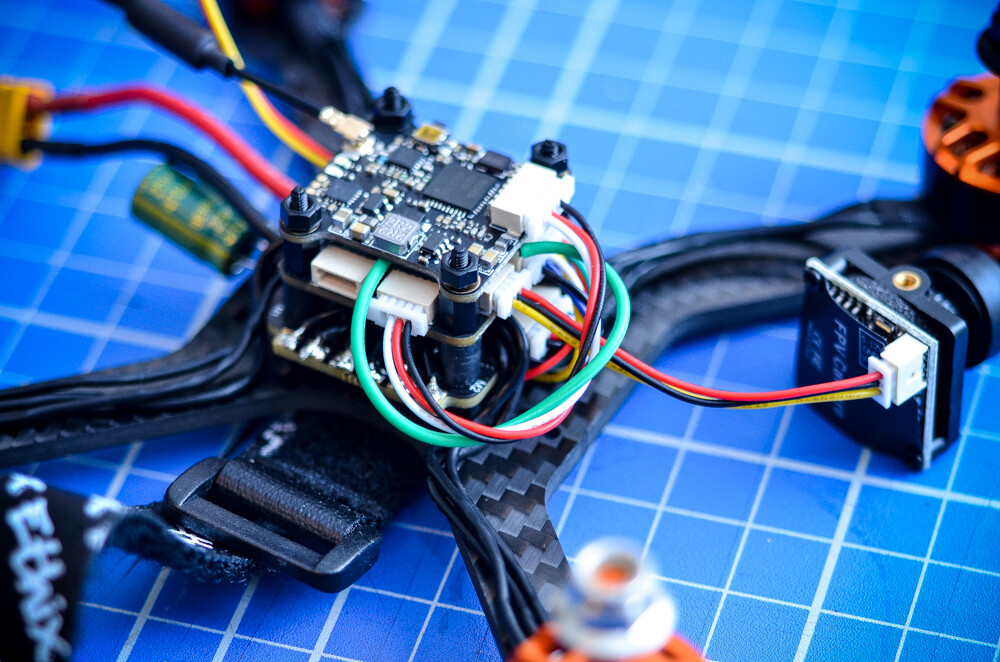
Made a few updates to this. Vtx now being powered directly from the battery pads and camera powered from the vtx 5V output. Also fitted a 1000uF capacitor (yes, I need to shorten those leads out the back!). This seems to have cleaned up the video signal a lot, although I haven’t really tested it properly yet. I also swapped out the rubbish little supplied linear vtx antenna with something a little better.
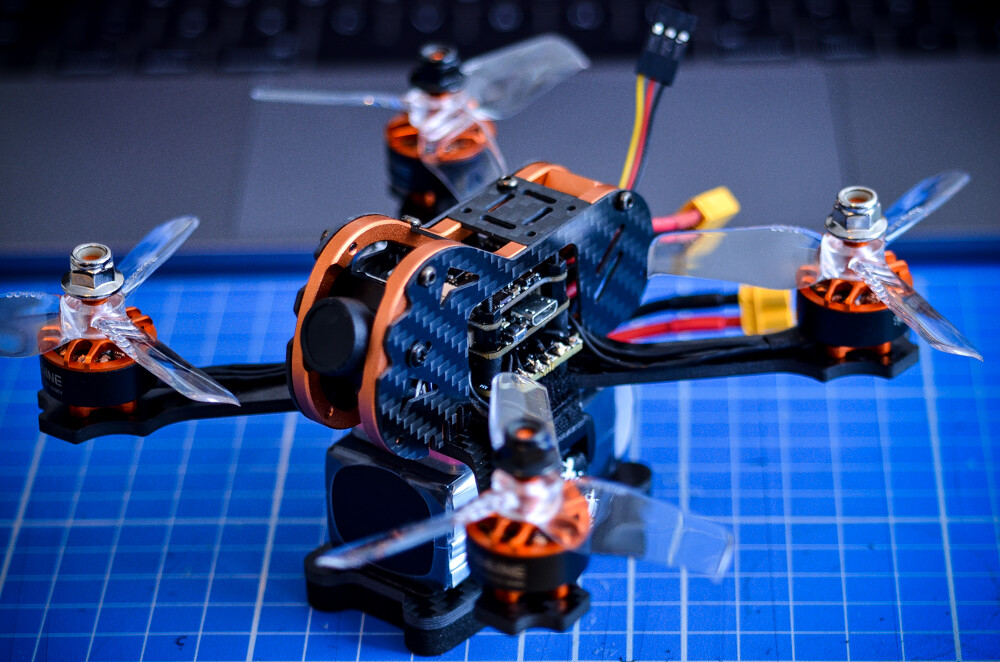
Also raised the body by a few mm with some brass standoffs (you can see in the second picture), which made space for an additional board on the main stack, so I could fit a Runcam Split.
This not being able to get out and fly is costing me loads! I’ve also made a bunch of upgrades to the Nazgul 5" in the past couple of weeks too - TBS Tracer system, a decent TBS vtx and a longer antenna.
Now can we have some nice weather and easing of lockdown restrictions so I can go have some fun with these please!