Update: Fixing Stitchline at Top
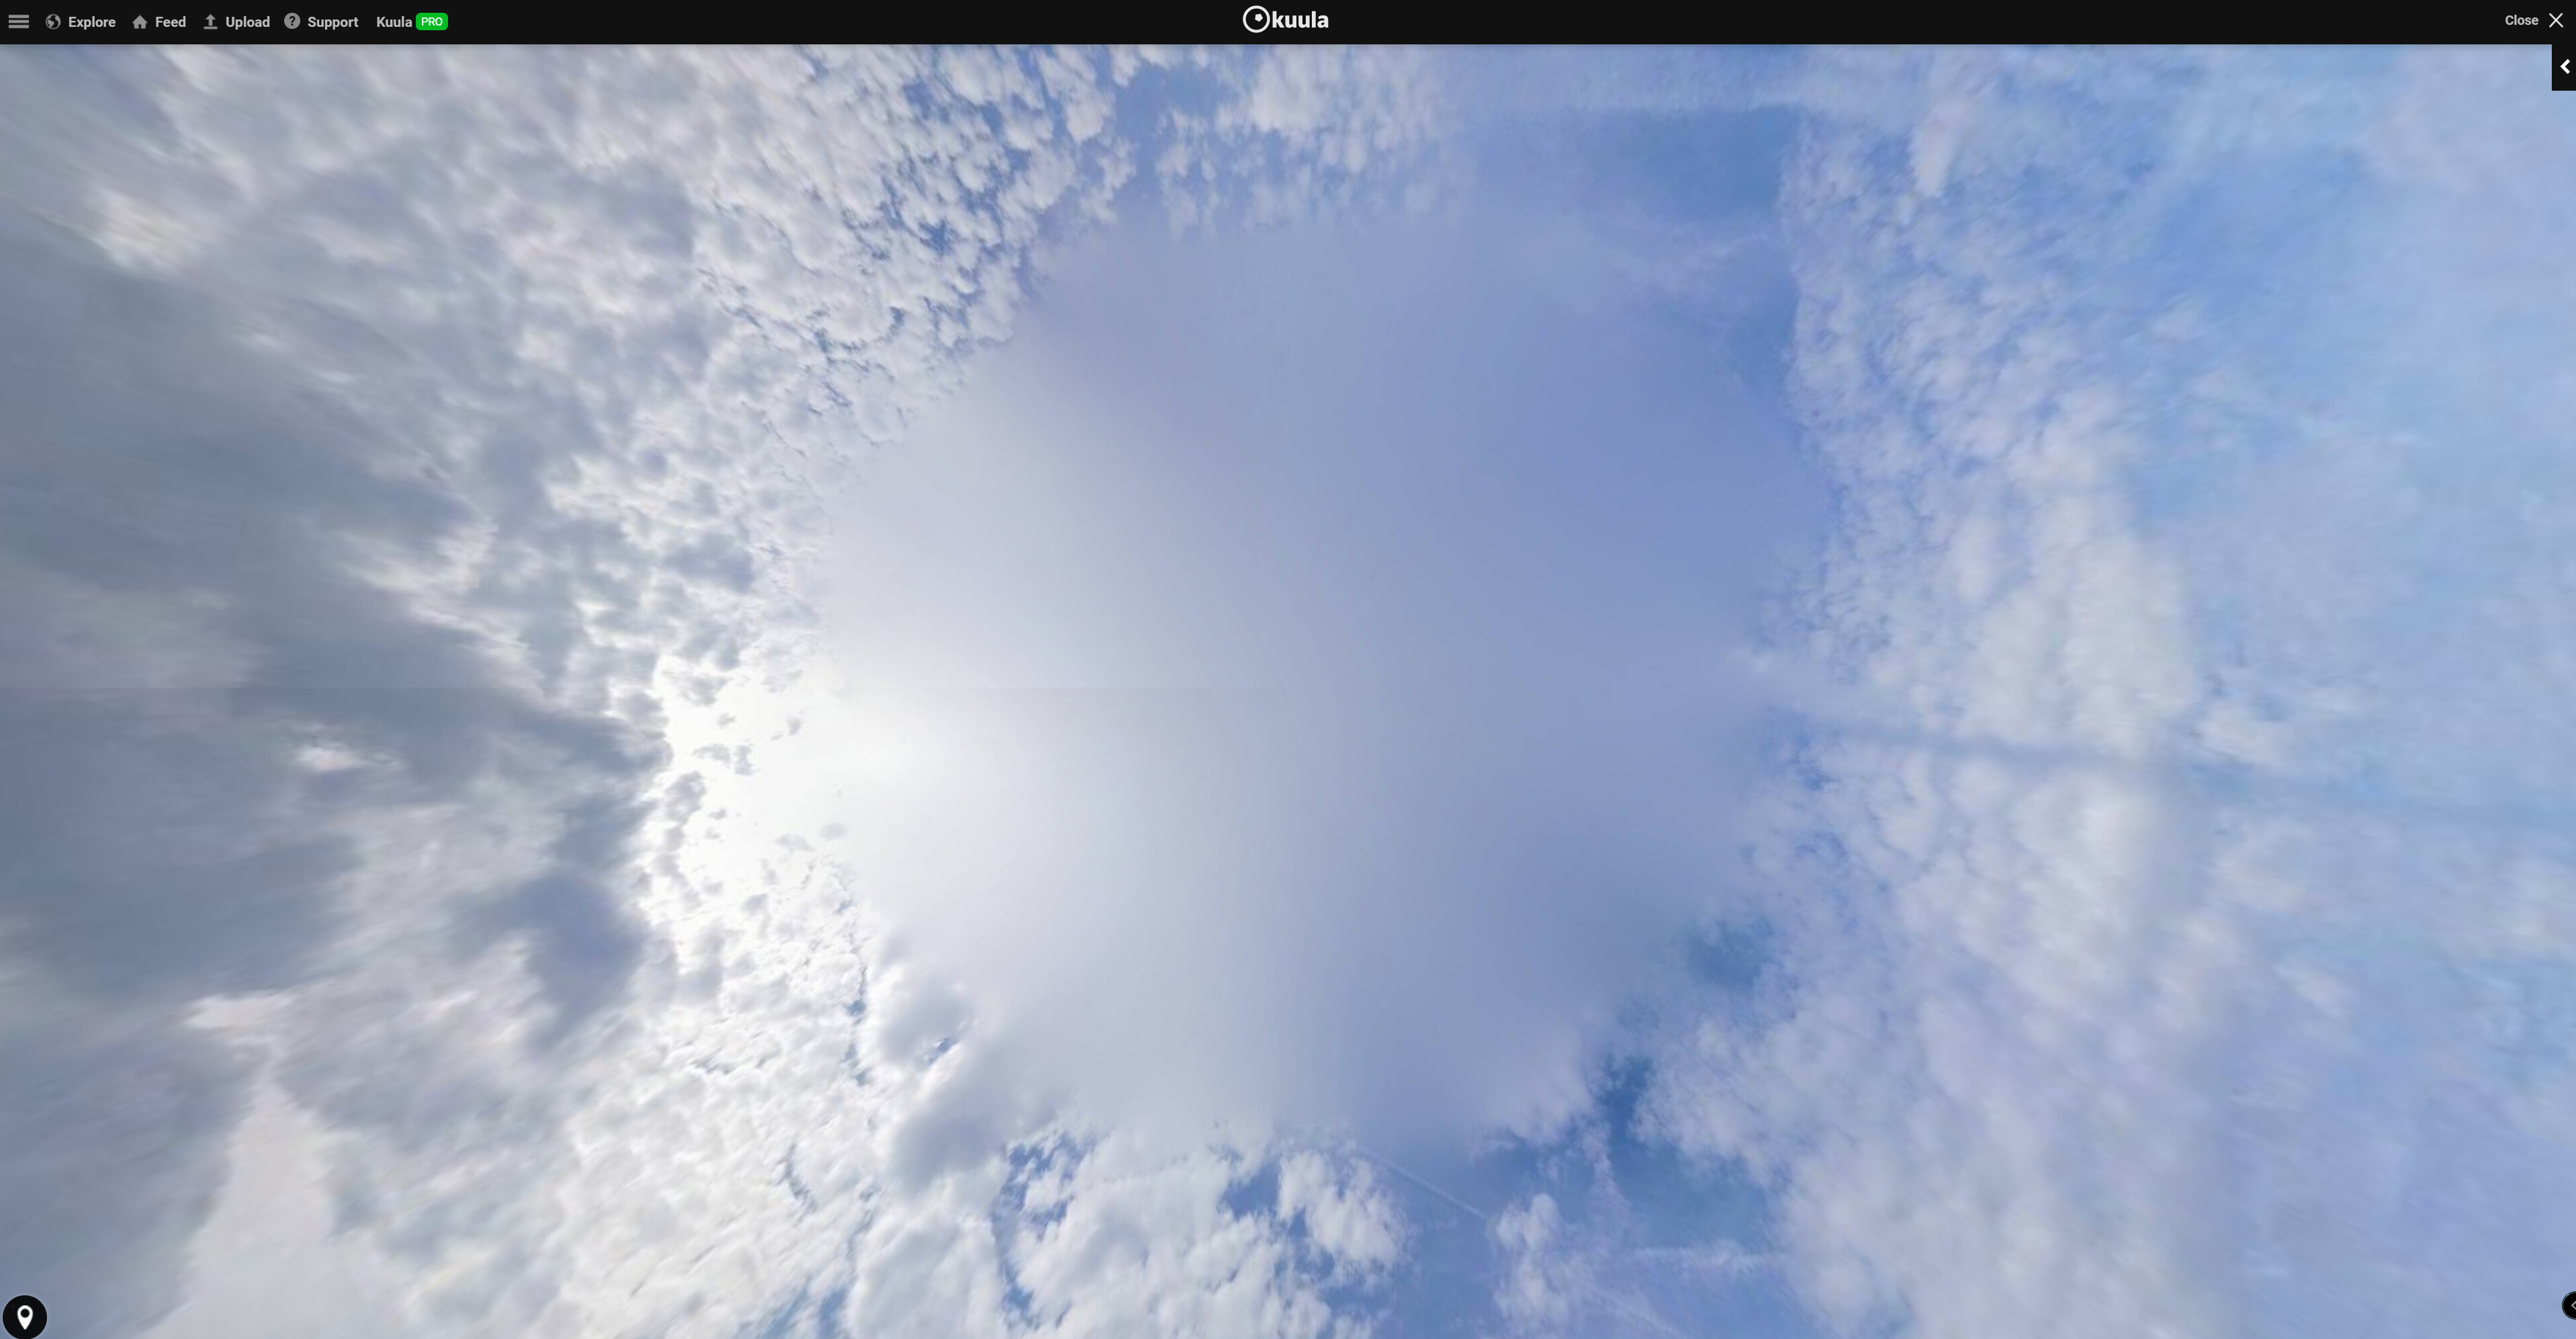
As @Andy601960 has mentioned, there are some visible stitch lines right at the top of the 360 Pano in Kuula using this workflow. Whilst these are only visible if you are looking directly up, there are unsightly, as you can see from the image below:

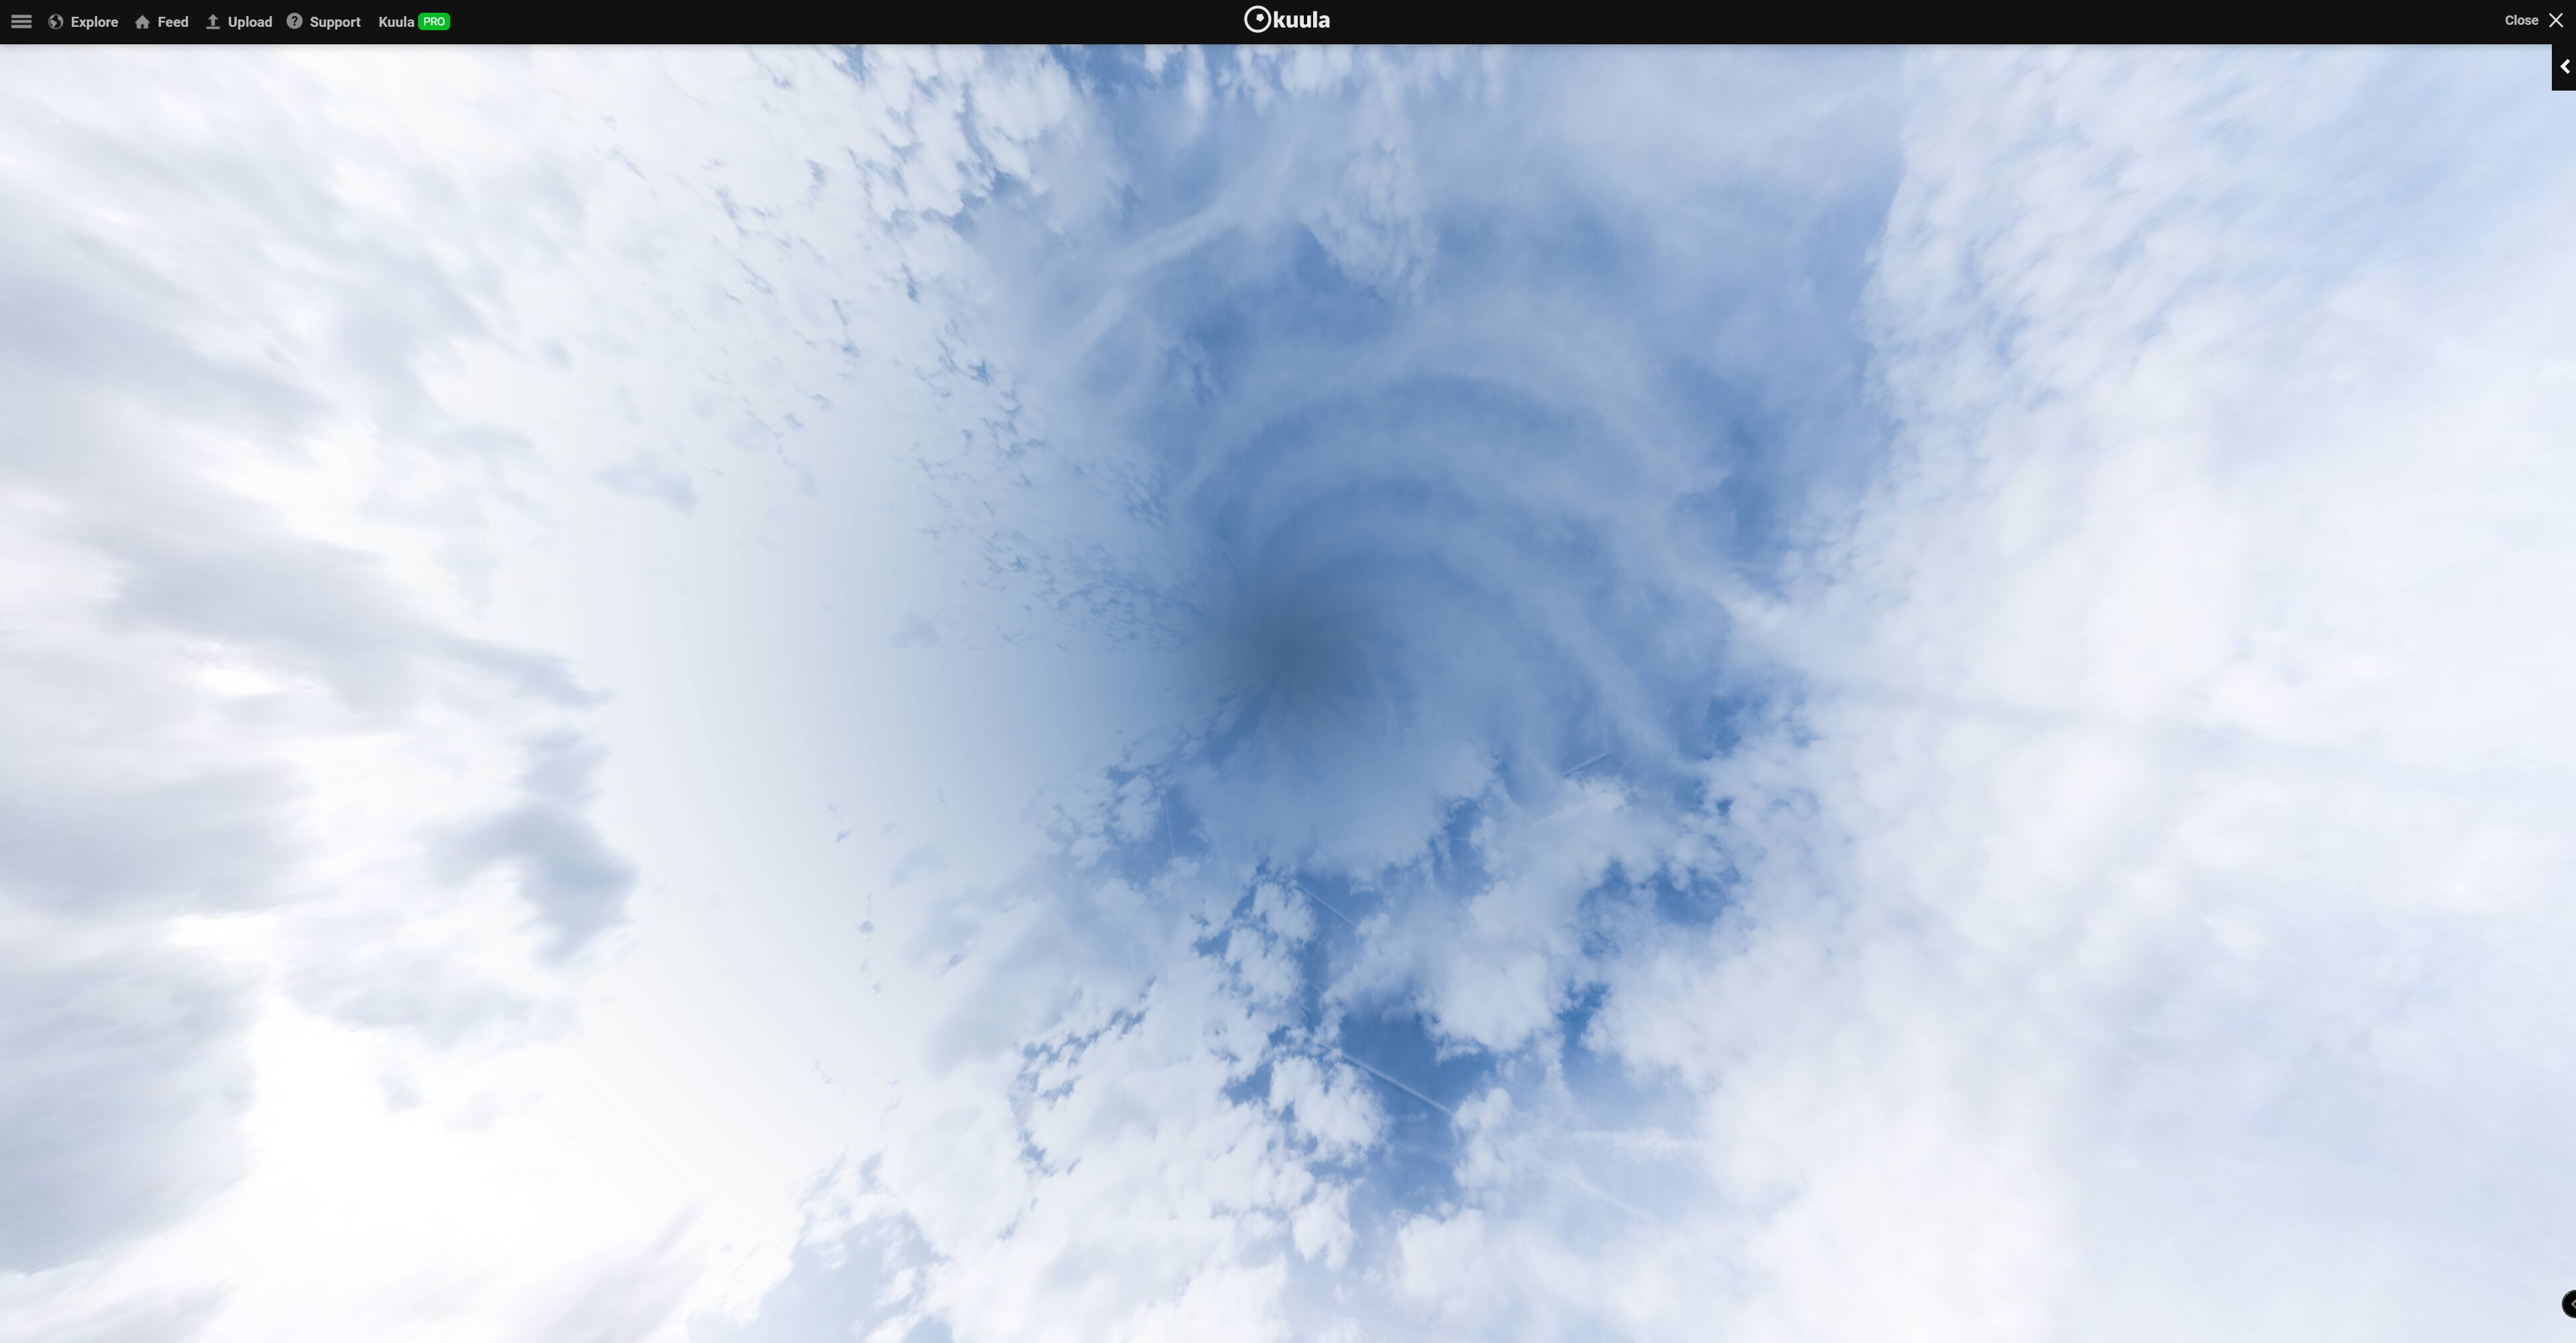
DJI Fly’s method, using the low res JPGs, is to create to blur a circular section at the top covering the stitchlines. The problem with the DJI method is that it still leaves a very obvious (fake) round disc with little blending at the top, looking like an ‘alien spaceship’ (to quote @Andy601960), as shown below:
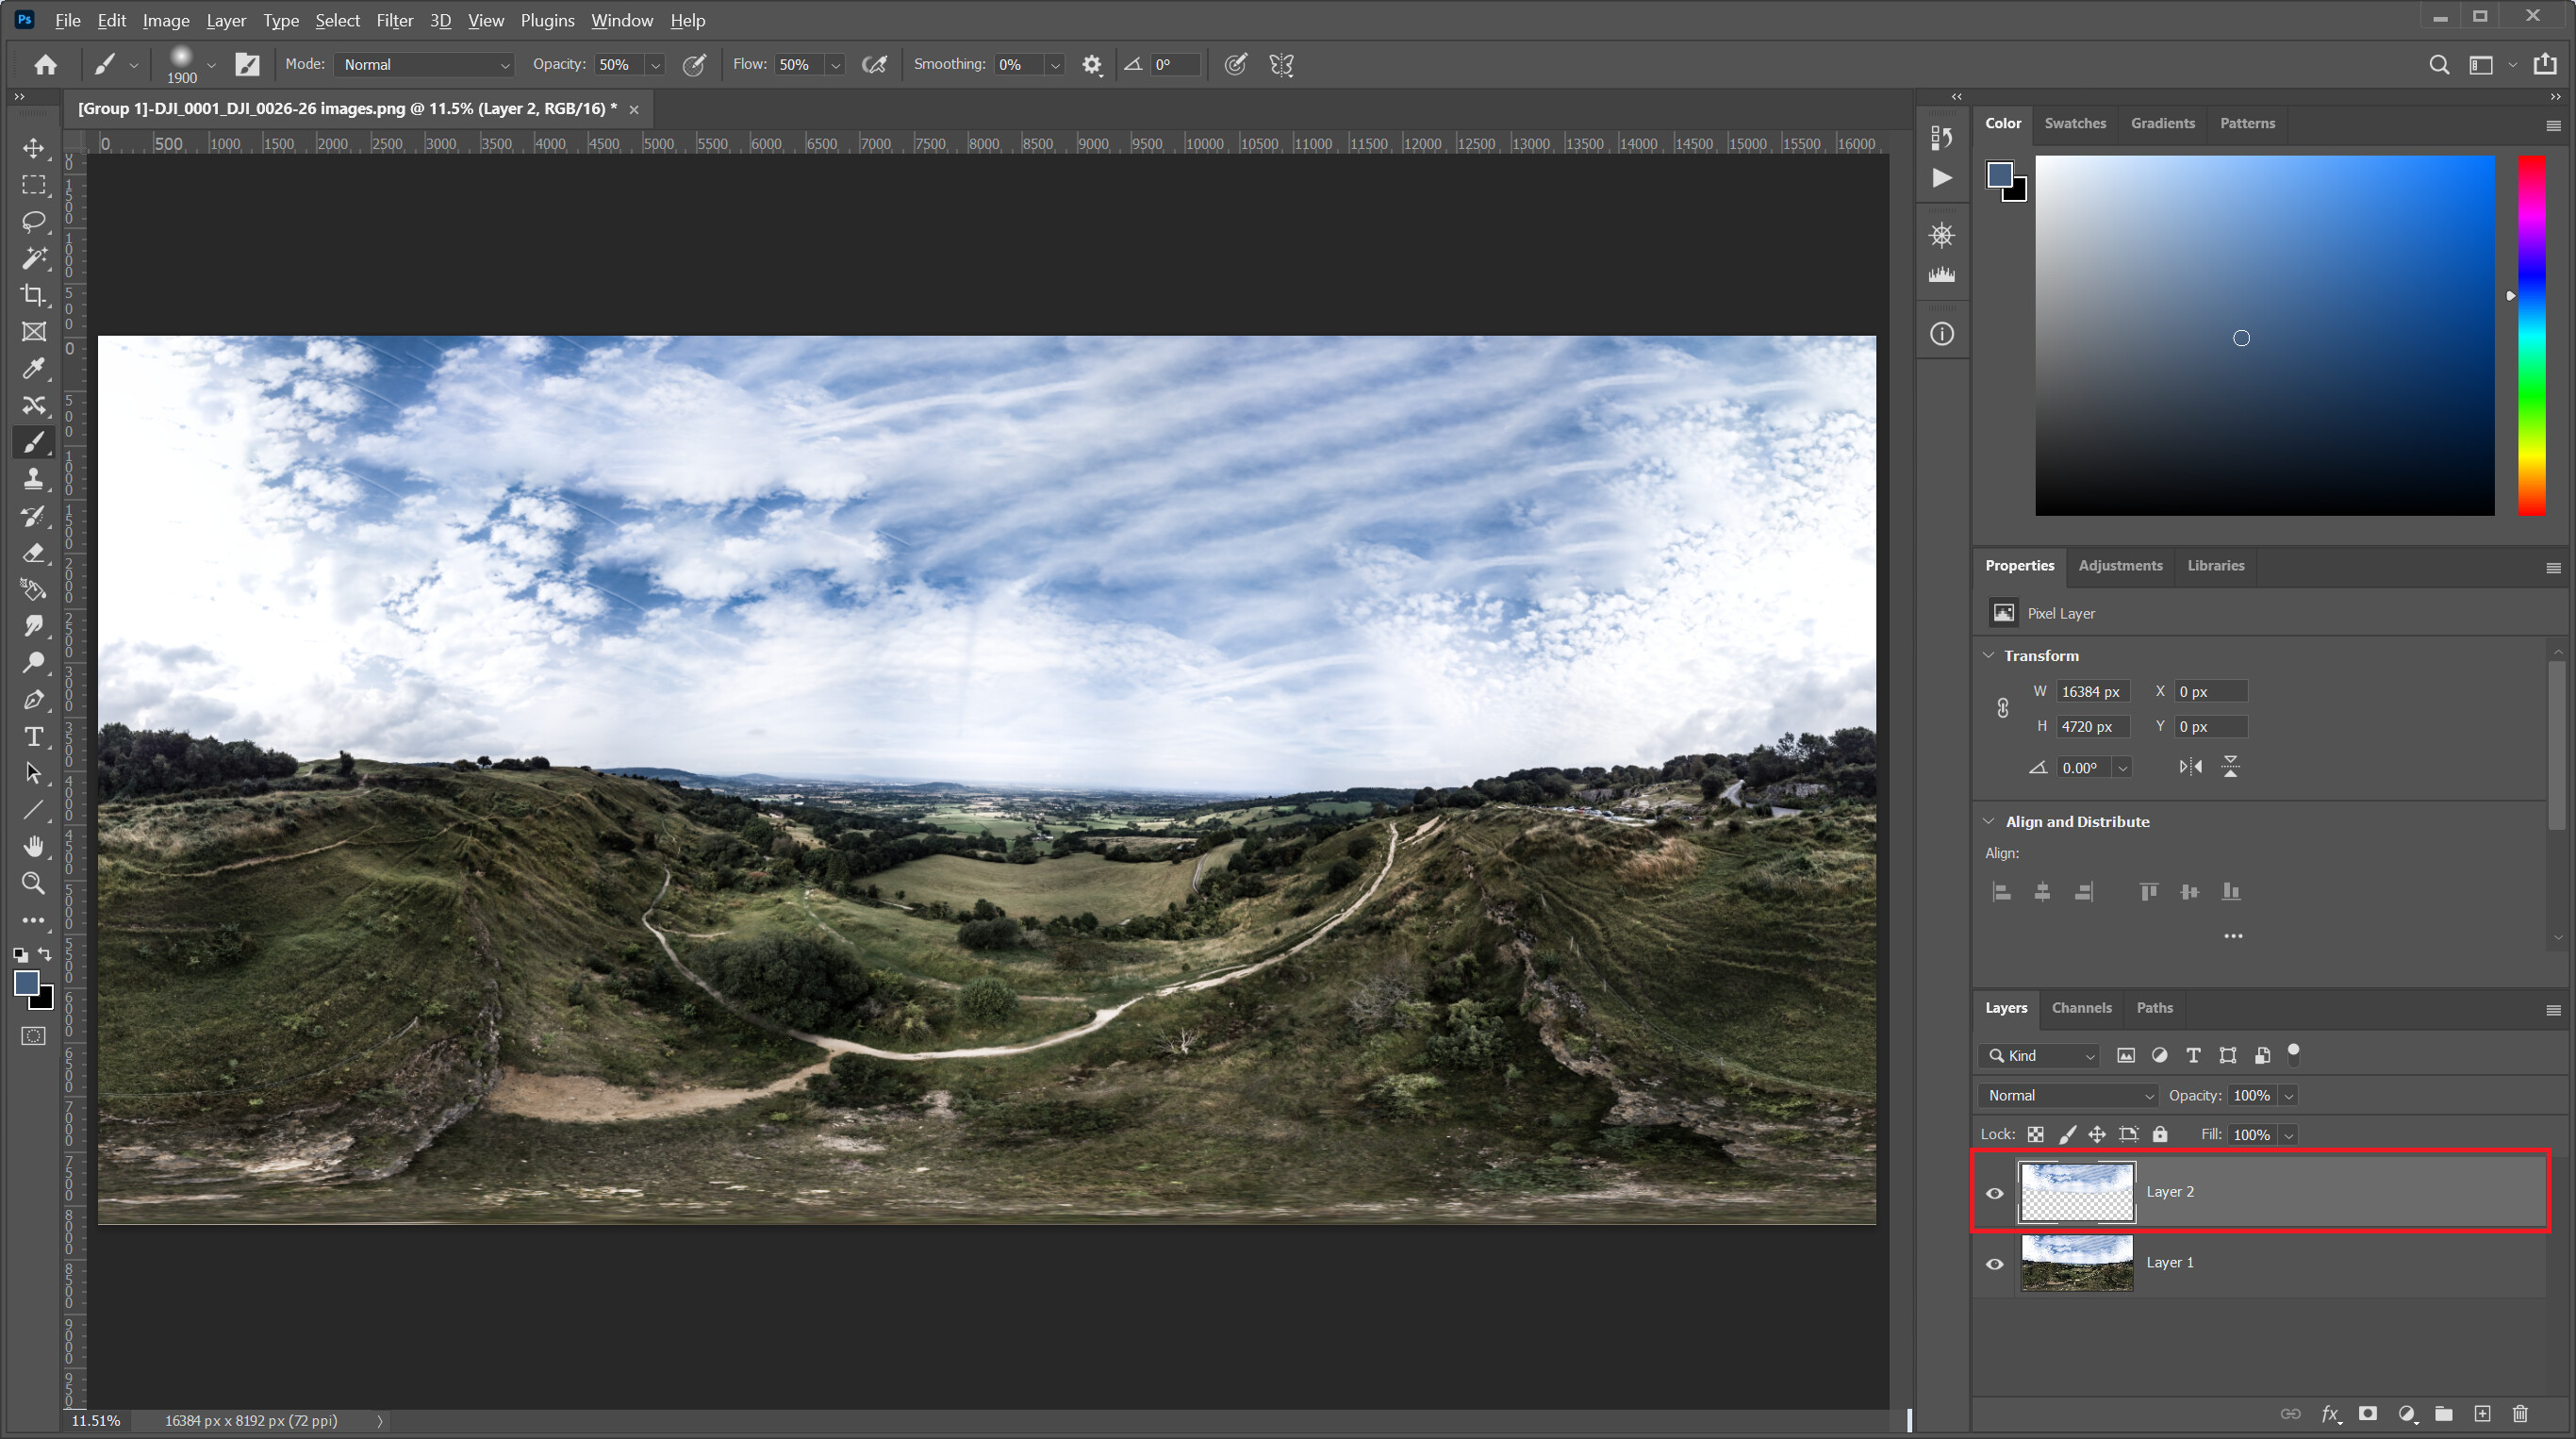
I have added my method below, which still uses the high resolution DNGs, but smooths out the stitchlines and feathers the image, leaving much of the original detail. It is far from perfect, but more realistic than the 2 methods above, in my opinion. See below:
 Fix Top Stitchline in Photoshop
From the Select menu, choose Sky

Then feather the selection, Select > Modify > Feather, or press SHIFT + F6. Add 10px of feather, click OK and then press CTRL + J to copy the selection to a new layer. We only want to edit the sky, nothing else. See box in red below.
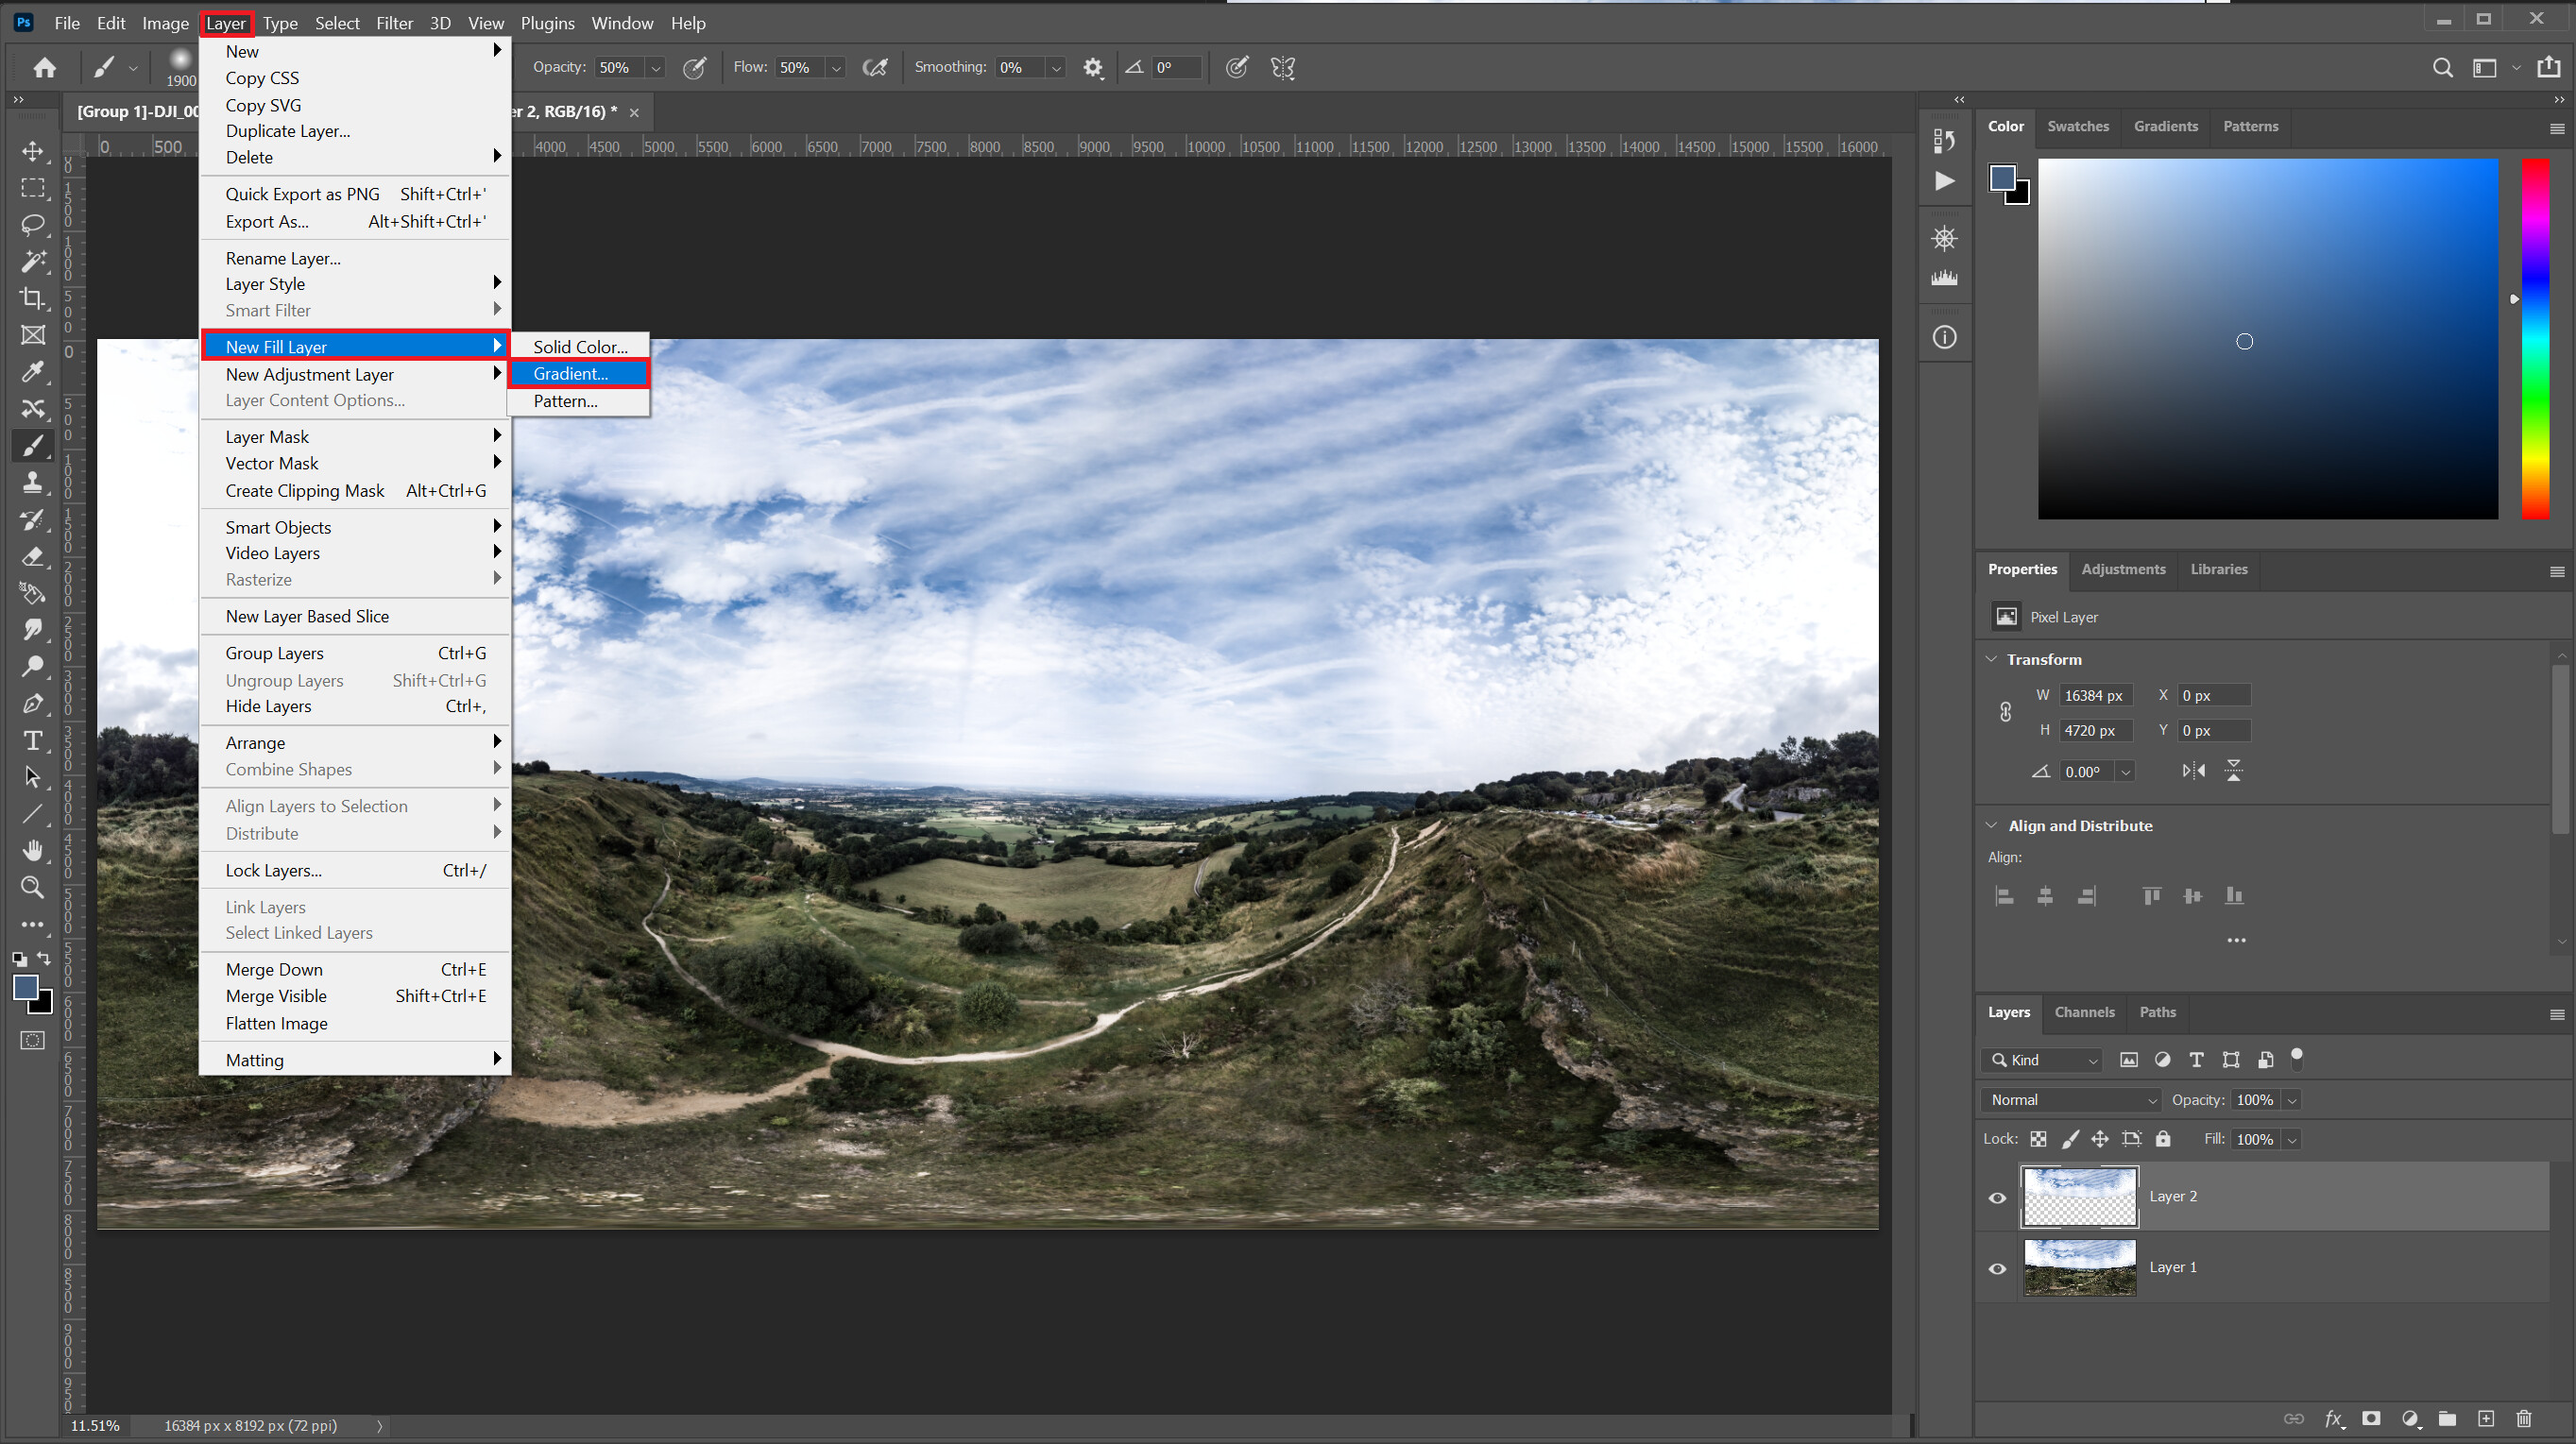
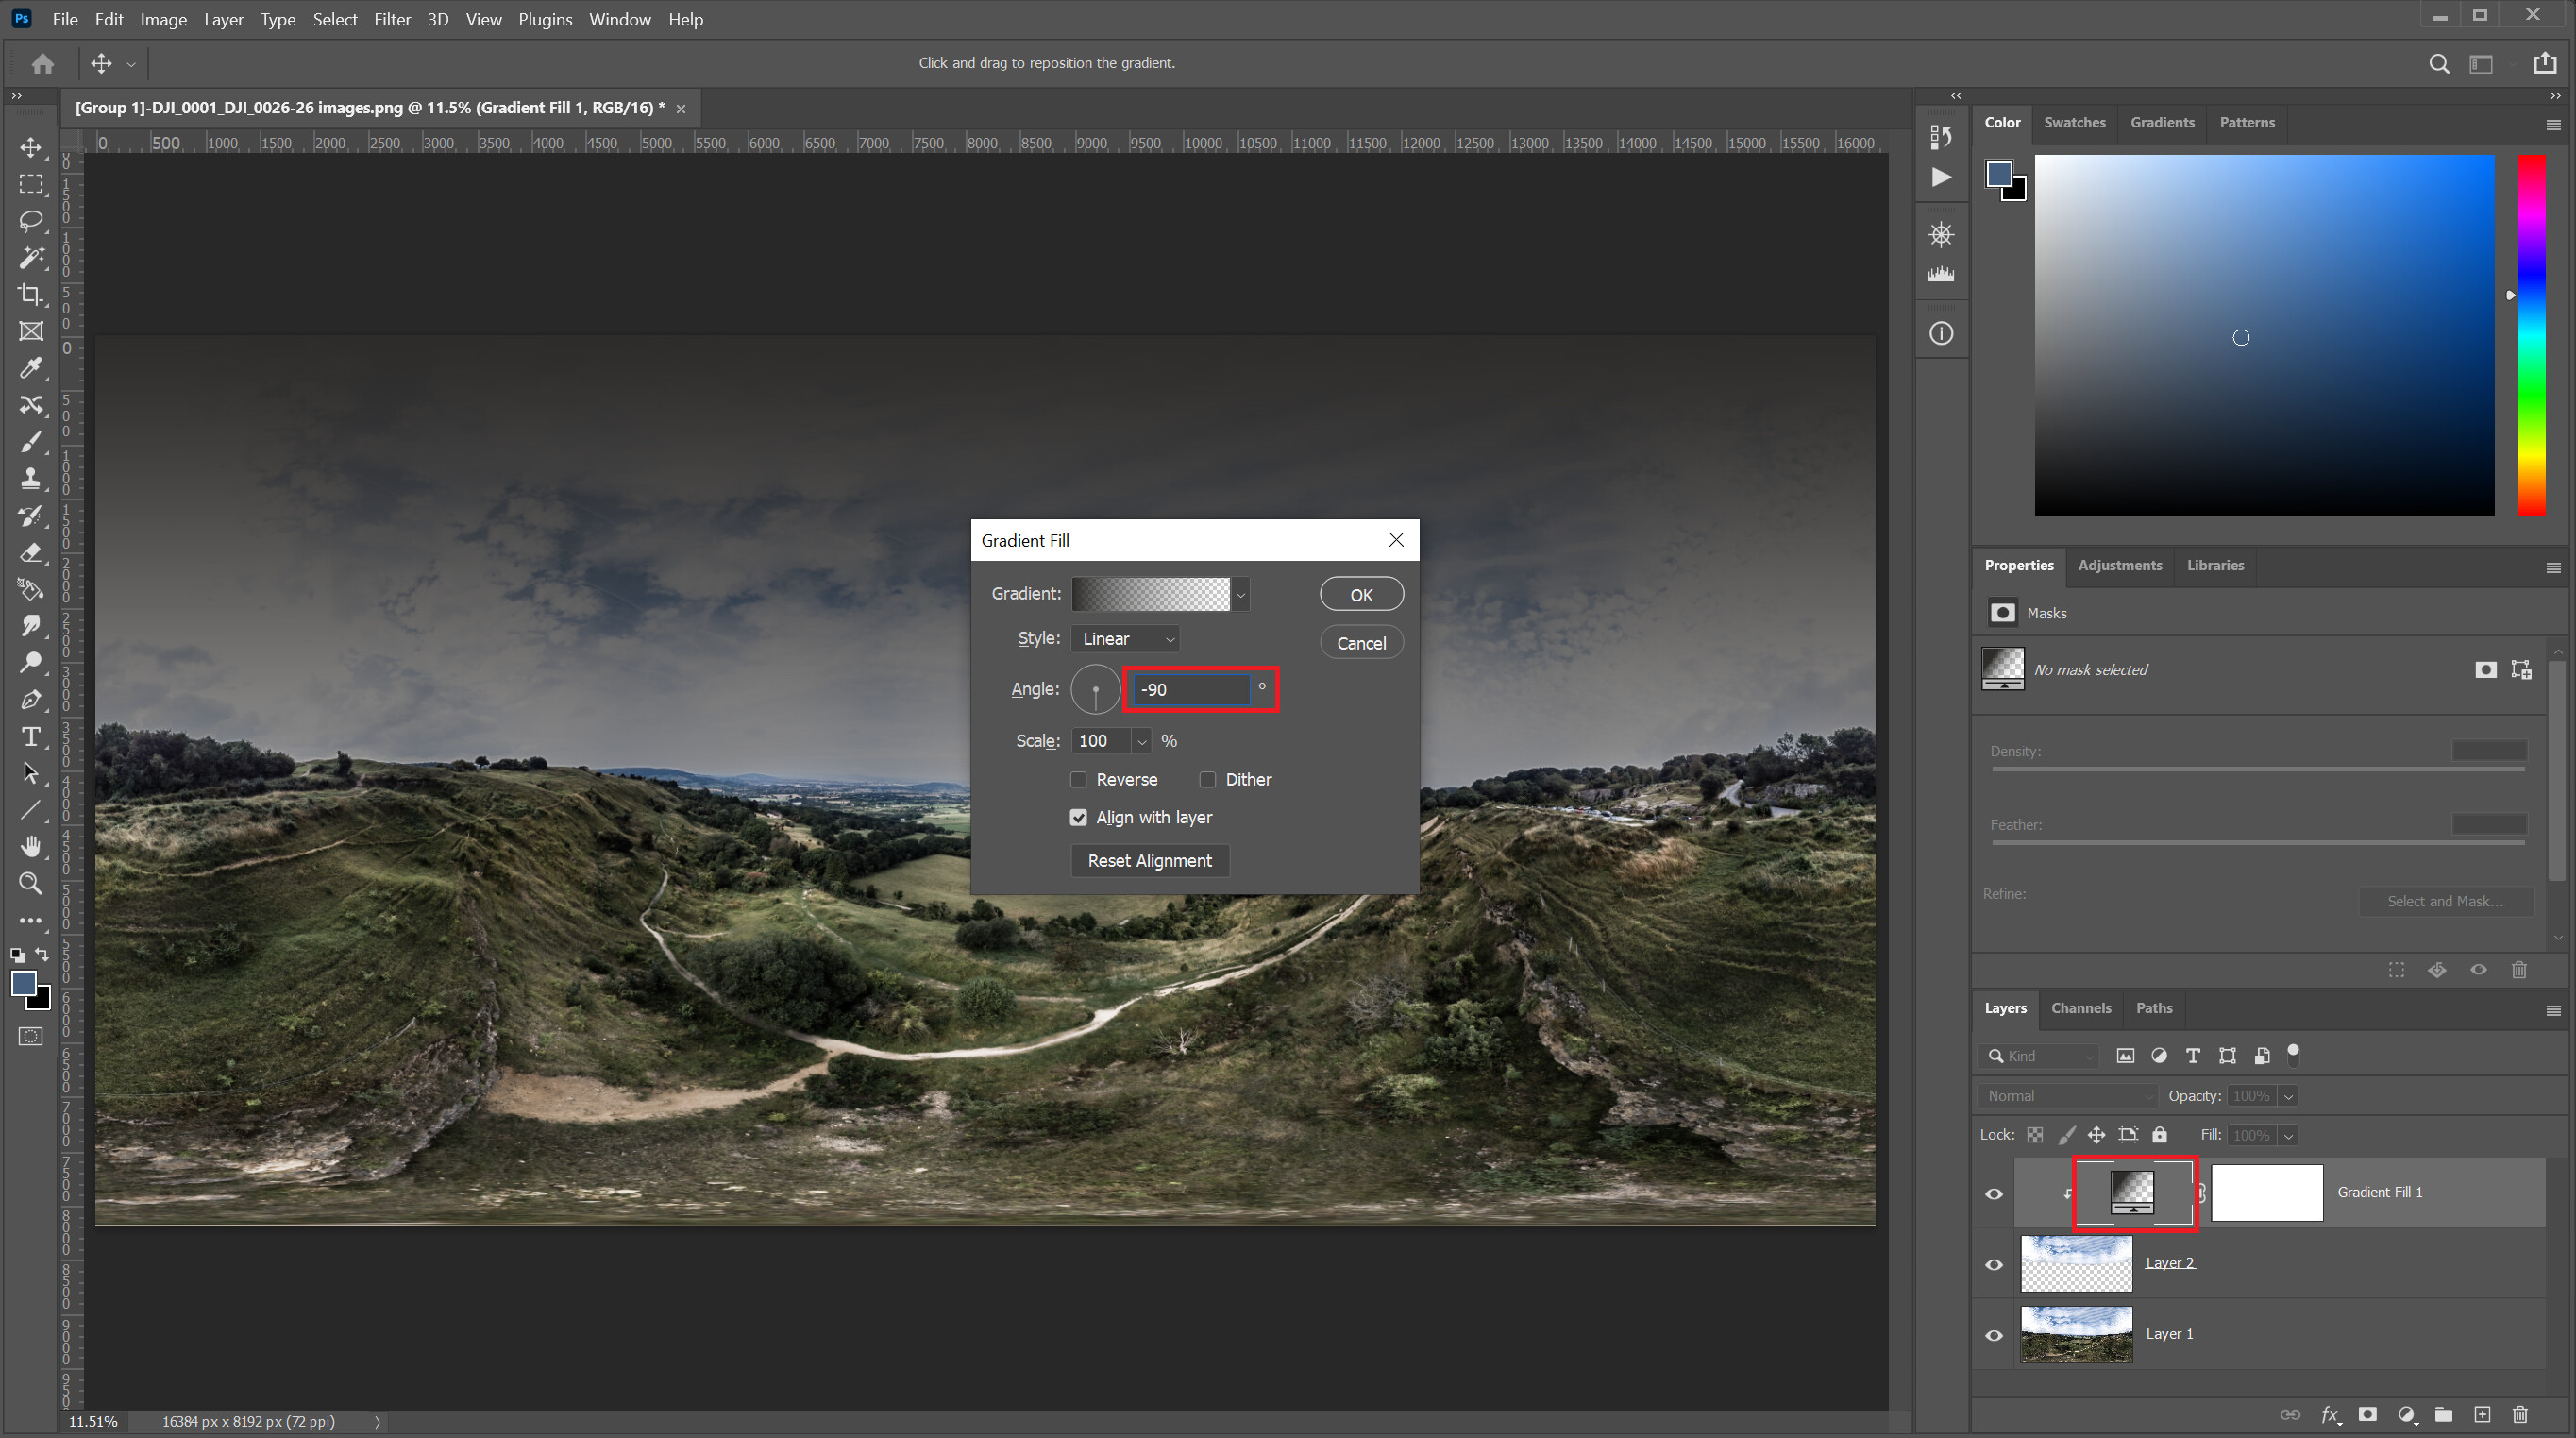
With the new ‘Sky Layer’ selected, we need to add a new Gradient Fill Layer
With the new Gradient Fill Layer selected, we now need to apply it to the Sky Layer only - not all the layers below. We do this by holding the ALT key and clicking between the gradient and the white mask on the line between the layers. I have added a red dot where you need to click.

It should look like this afterwards. You need that arrow in the red box.

Now double click on the gradient (box in red, lower right) and change 90 degrees to -90 degrees.
Then select the gradient to open the Gradient Editor window, you will see slider at the bottom of the new window appear. The left side is the solid colour, slowly blending to the right side which is completely transparent.
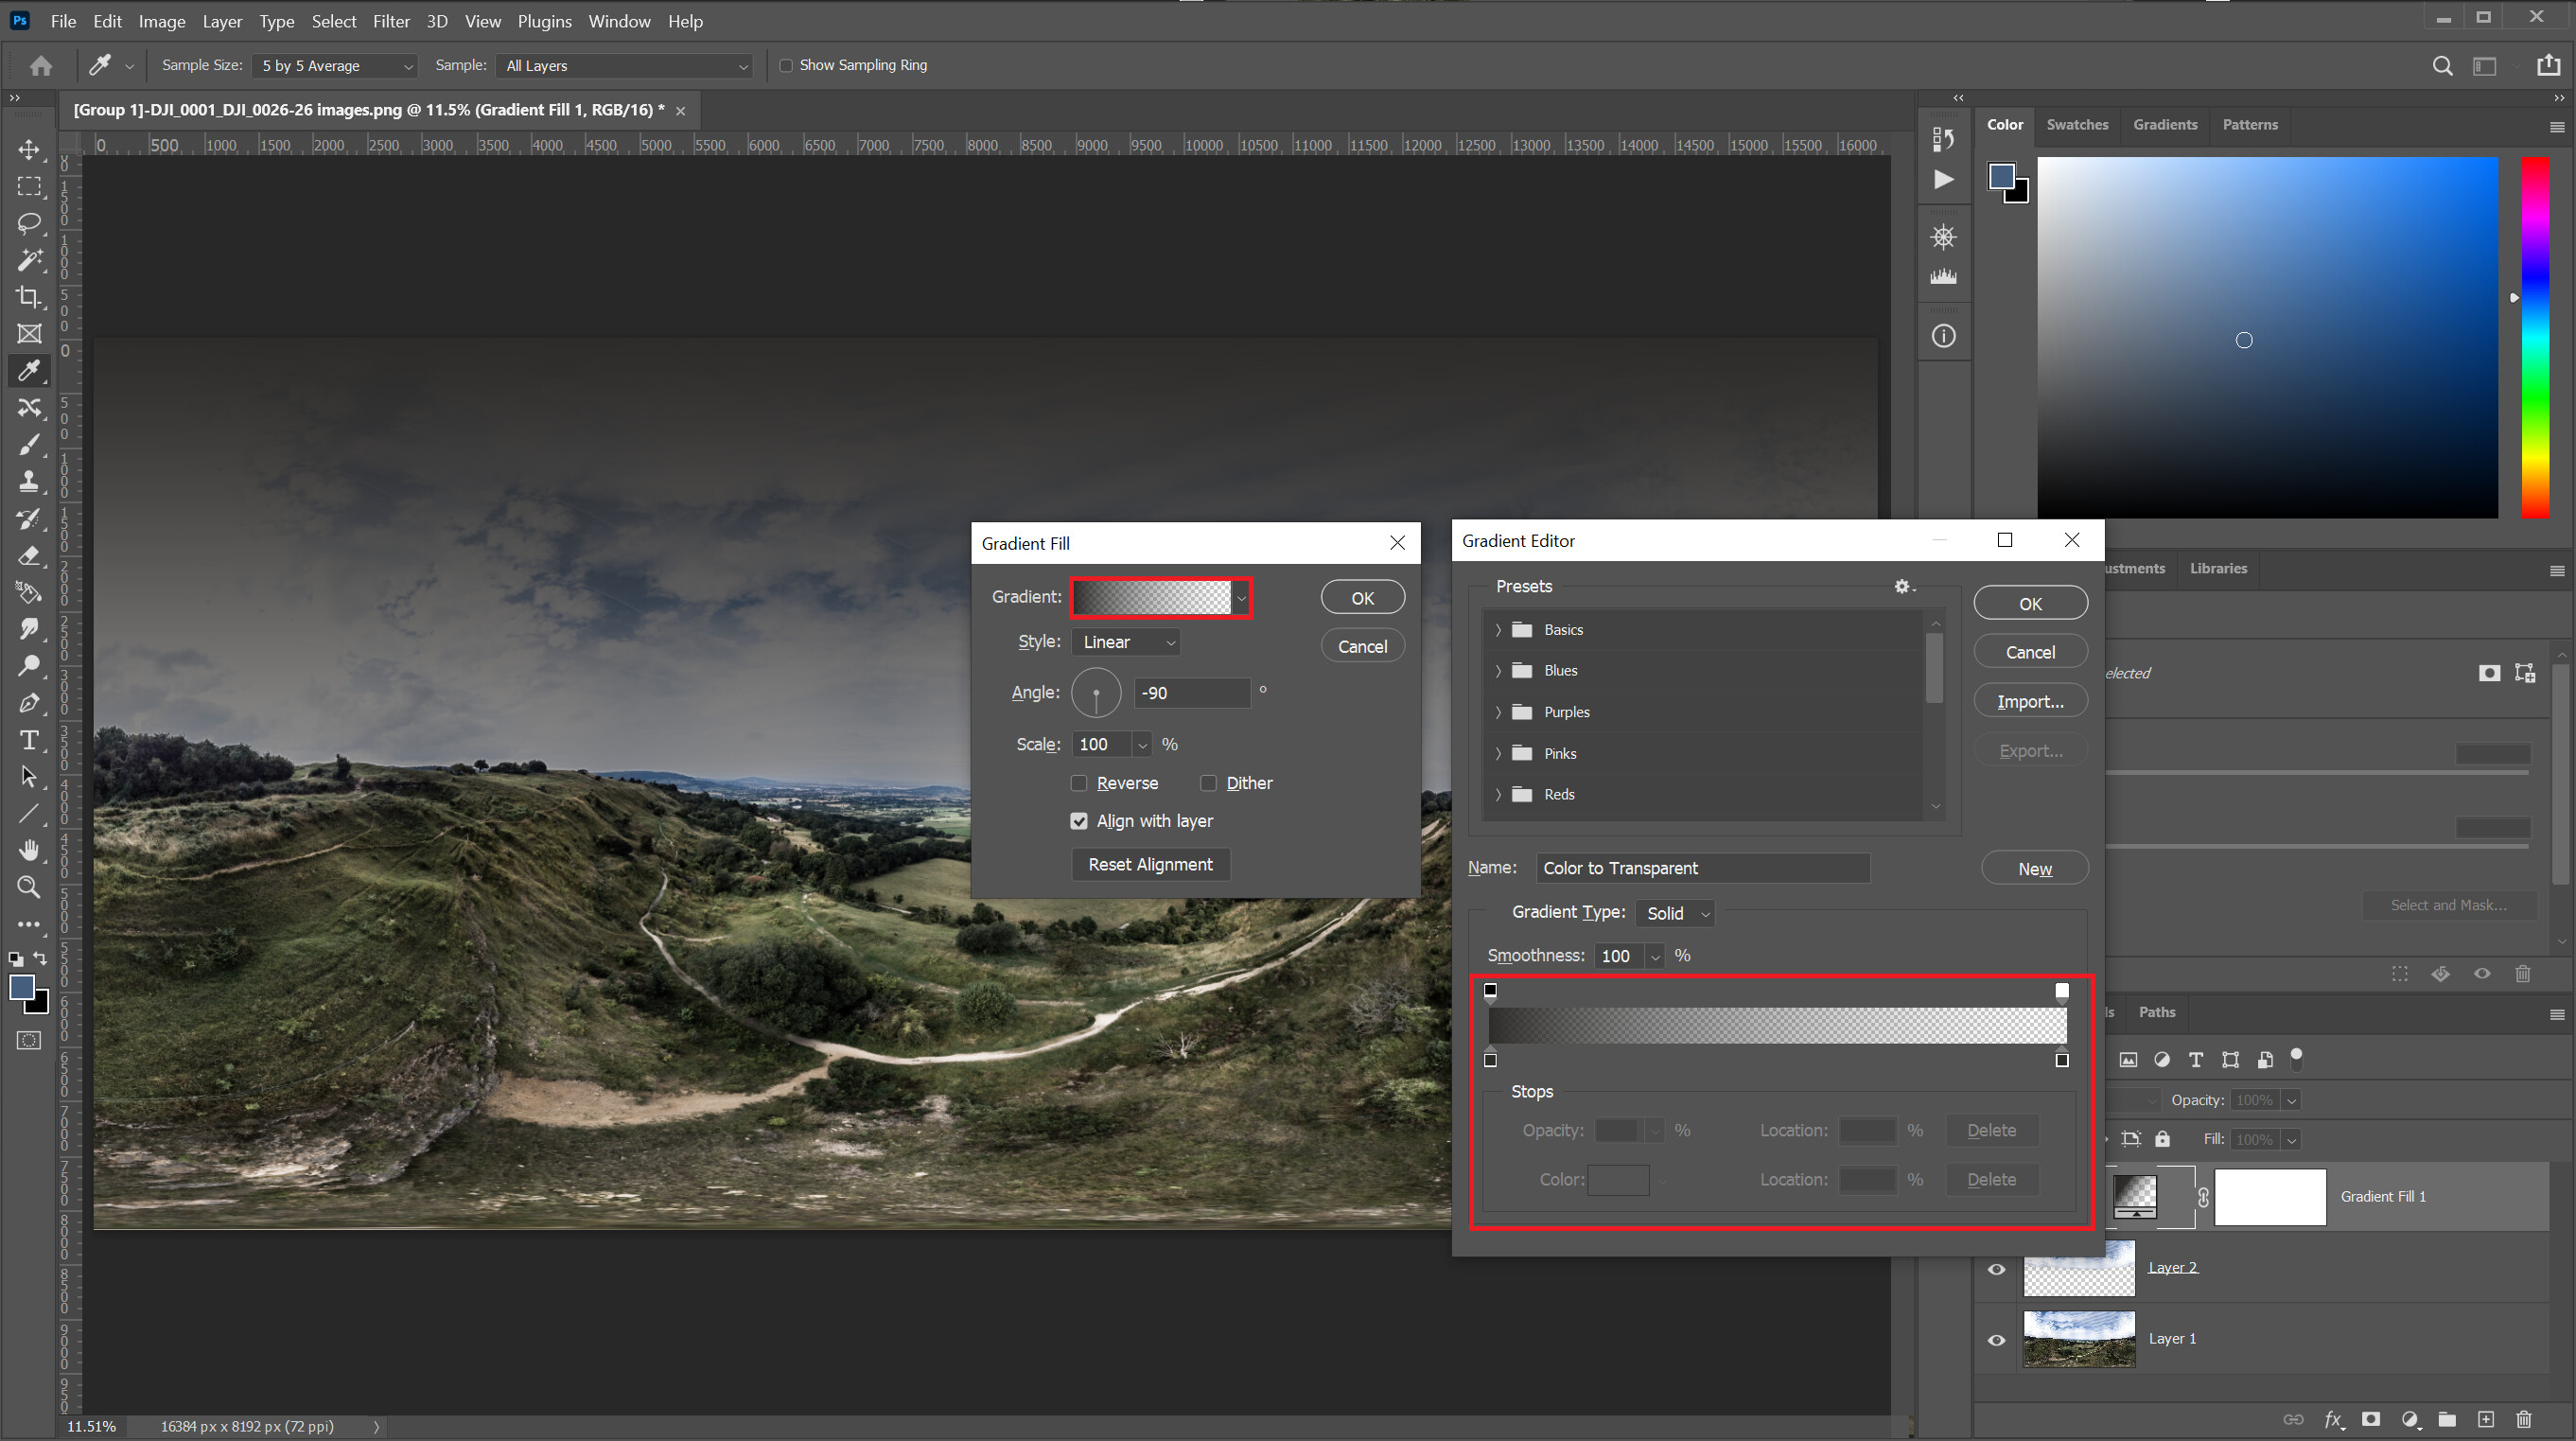
We need to change the left side colour first to match our sky. Follow the numbers in the image with the steps below:
- Click on the bottom left pin under the slider
- Click on the colour field
- Select an appropriate colour to use from the Sky for the gradient
- Click on OK

Your gradient slider should now look like this

We need to add two new points on the slider to change the location of the gradient so that it only affects the top of the sky - where the stitchlines are, and leaves the rest of the sky in tact. Above the slider, click to add a new marker.
- 1st marker set opacity to 50% and location to 20%
- 2nd marker set opacity to 0% and location to 40%

Once done, click OK on both windows, save your image and upload to Kuula.
Result: