How to create high resolution 360 Panoramics

For the past year, I have been trying many ways to improve the quality of my 360 Panoramics. I was never satisfied with the low quality panos that the DJI Fly app produced. Especially knowing that these do not utilise the raw high resolution DNG files that are available (if enabled in settings).

This is my own workflow for creating high resolution 360 panoramics using the DNGs produced by my Mini 2. I am posting it here in case it helps others. I am not saying this is perfect by any means.

Note: If your panoramic images are currently stored on a hard disk drive (HDD), and you have access to a Solid State Drive (SSD), such as your OS drive, I would highly recommend you copy the content to the SSD before starting this workflow. As this will drastically reduce the total execution time.

:green_square: Step 1: Autogiga Pano

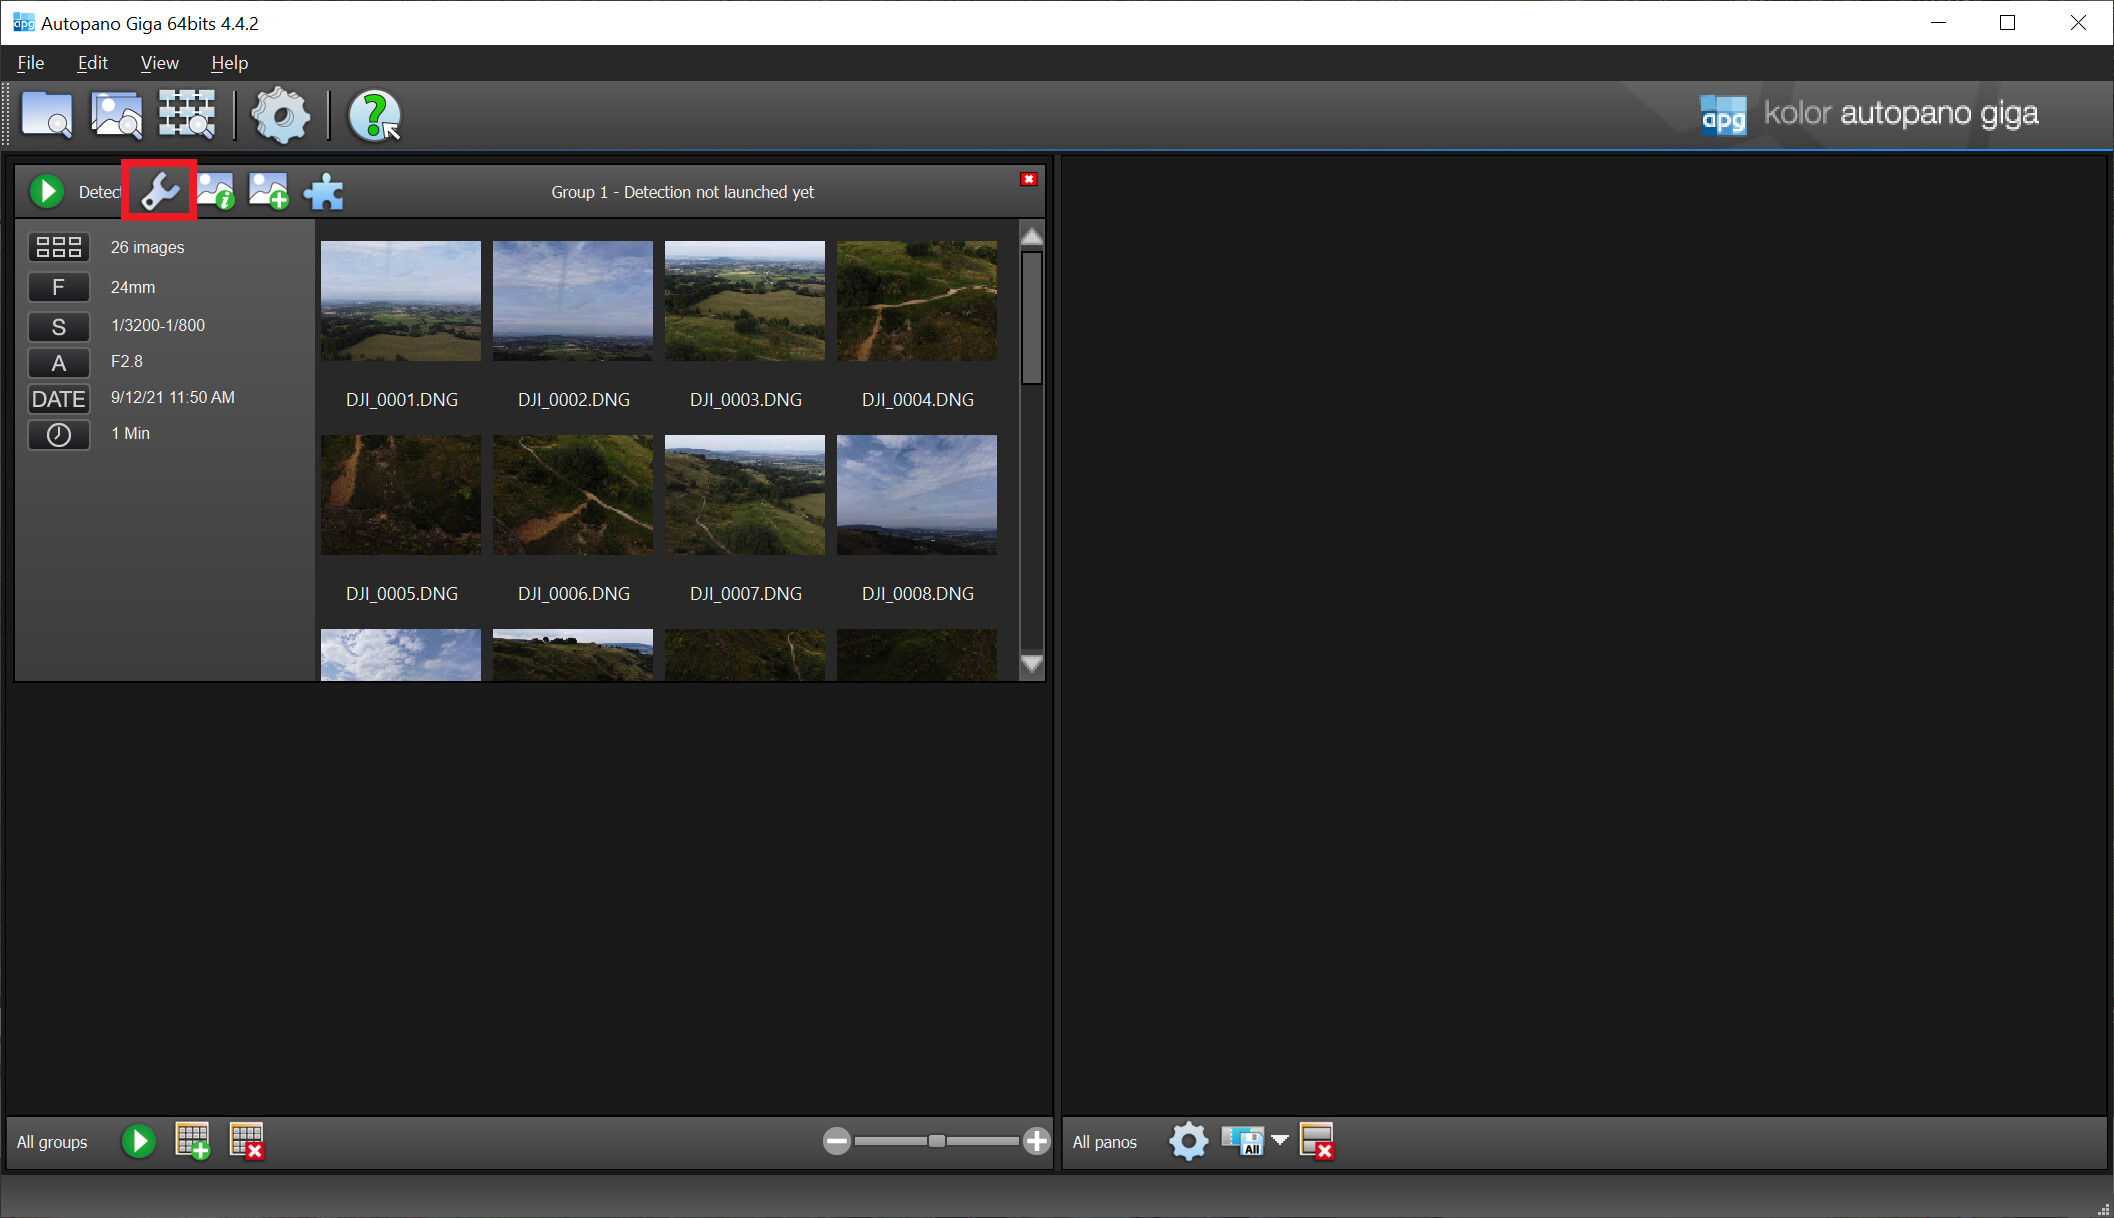
With Autopano Giga (APG) open, select the 2nd icon from the left, this will allow you to select the DNG files from your Pano folder. Typically, there are 26 DNGs for a 360 Pano.

The file selection window will open. If you sort by ‘Type’, this will sort the 26 DNGs so that they can be selected together.

Once the files are selected they will display in the left window. Now select the Settings icon (spanner) next to Detect.

You now need to change some settings, those highlighted in red. On the Detection tab, change the detection to High, 200 and Spherical.

On the Panorama tab, change the Default Projection to Spherical and the Default Crop to Maximum projection range.

On the Render tab, change the Format to PNG 16 Bits, Compression 7.

Click OK, and then click the first icon named Detect.

AGP will now analyse all images and detect the panoramic, this may take some time depending on the speed of your computer.

Once detection is complete, it will display a low quality preview of the pano in the right window

Now click on the Settings icon above the preview panorama

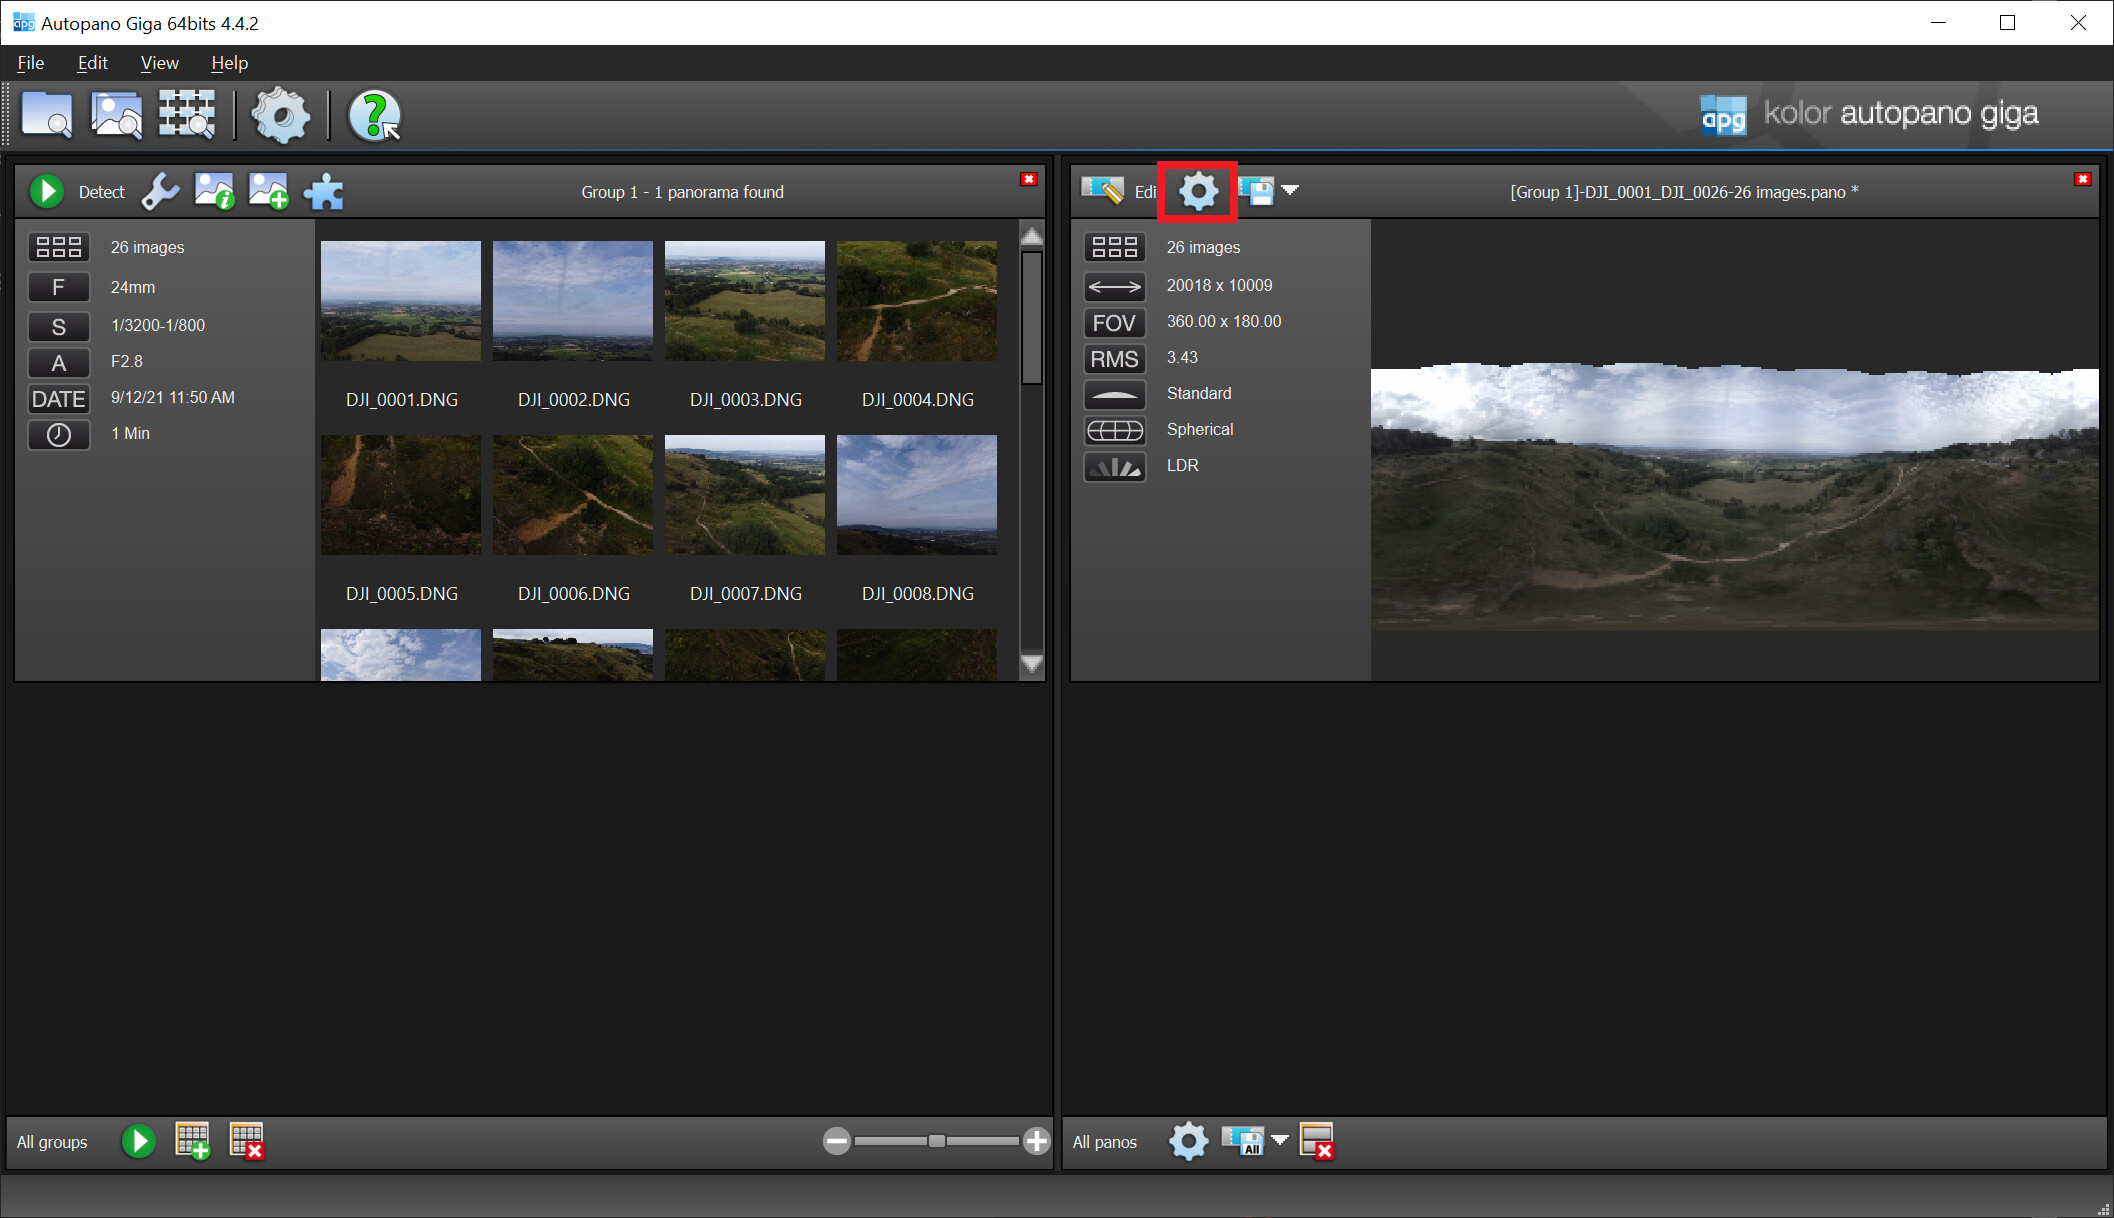
Change the Width to 16384px, as this is the maximum that Kuula can accept. Ensure that the Format is set to PNG 16 bit. Set the location where you want your rendered pano saved to, and then hit Render.

The Batch renderer will display the progress of the rendering task. Again, this can take several minutes to complete, depending on your computer.

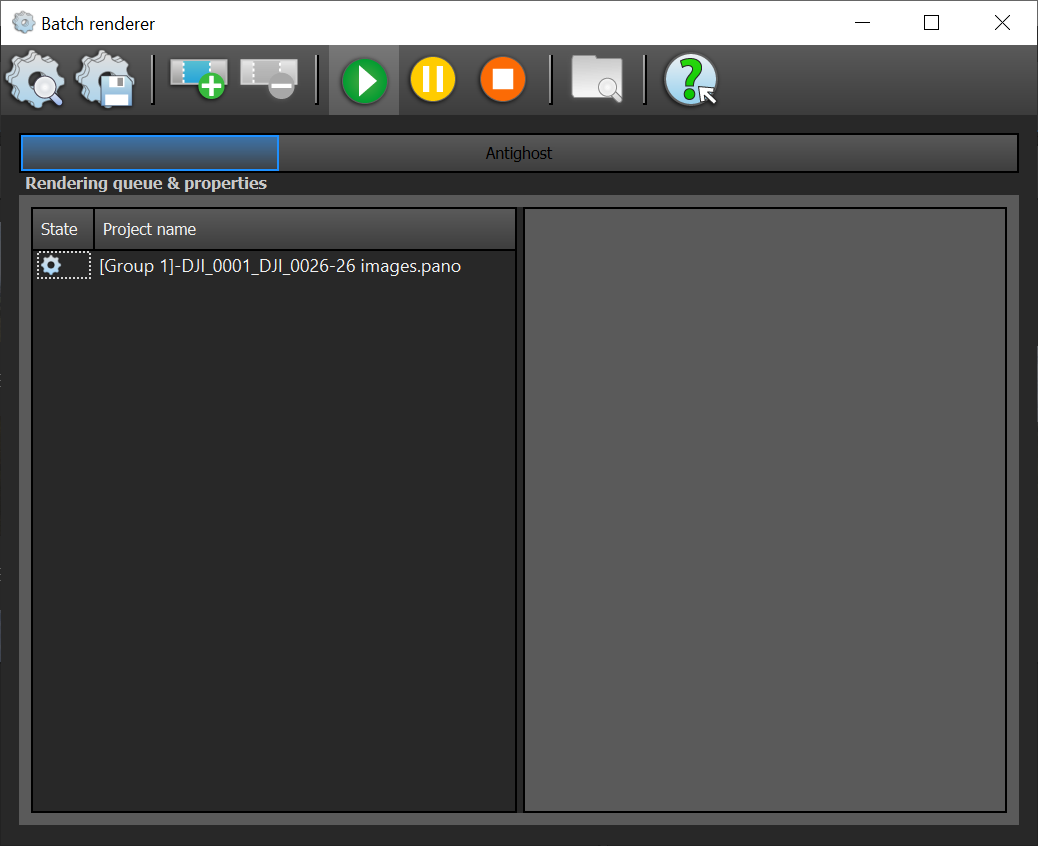
Once the render is complete, you will here an audio notification and the Batch renderer window will show details about the final render.

:green_square: Step 2: Photoshop

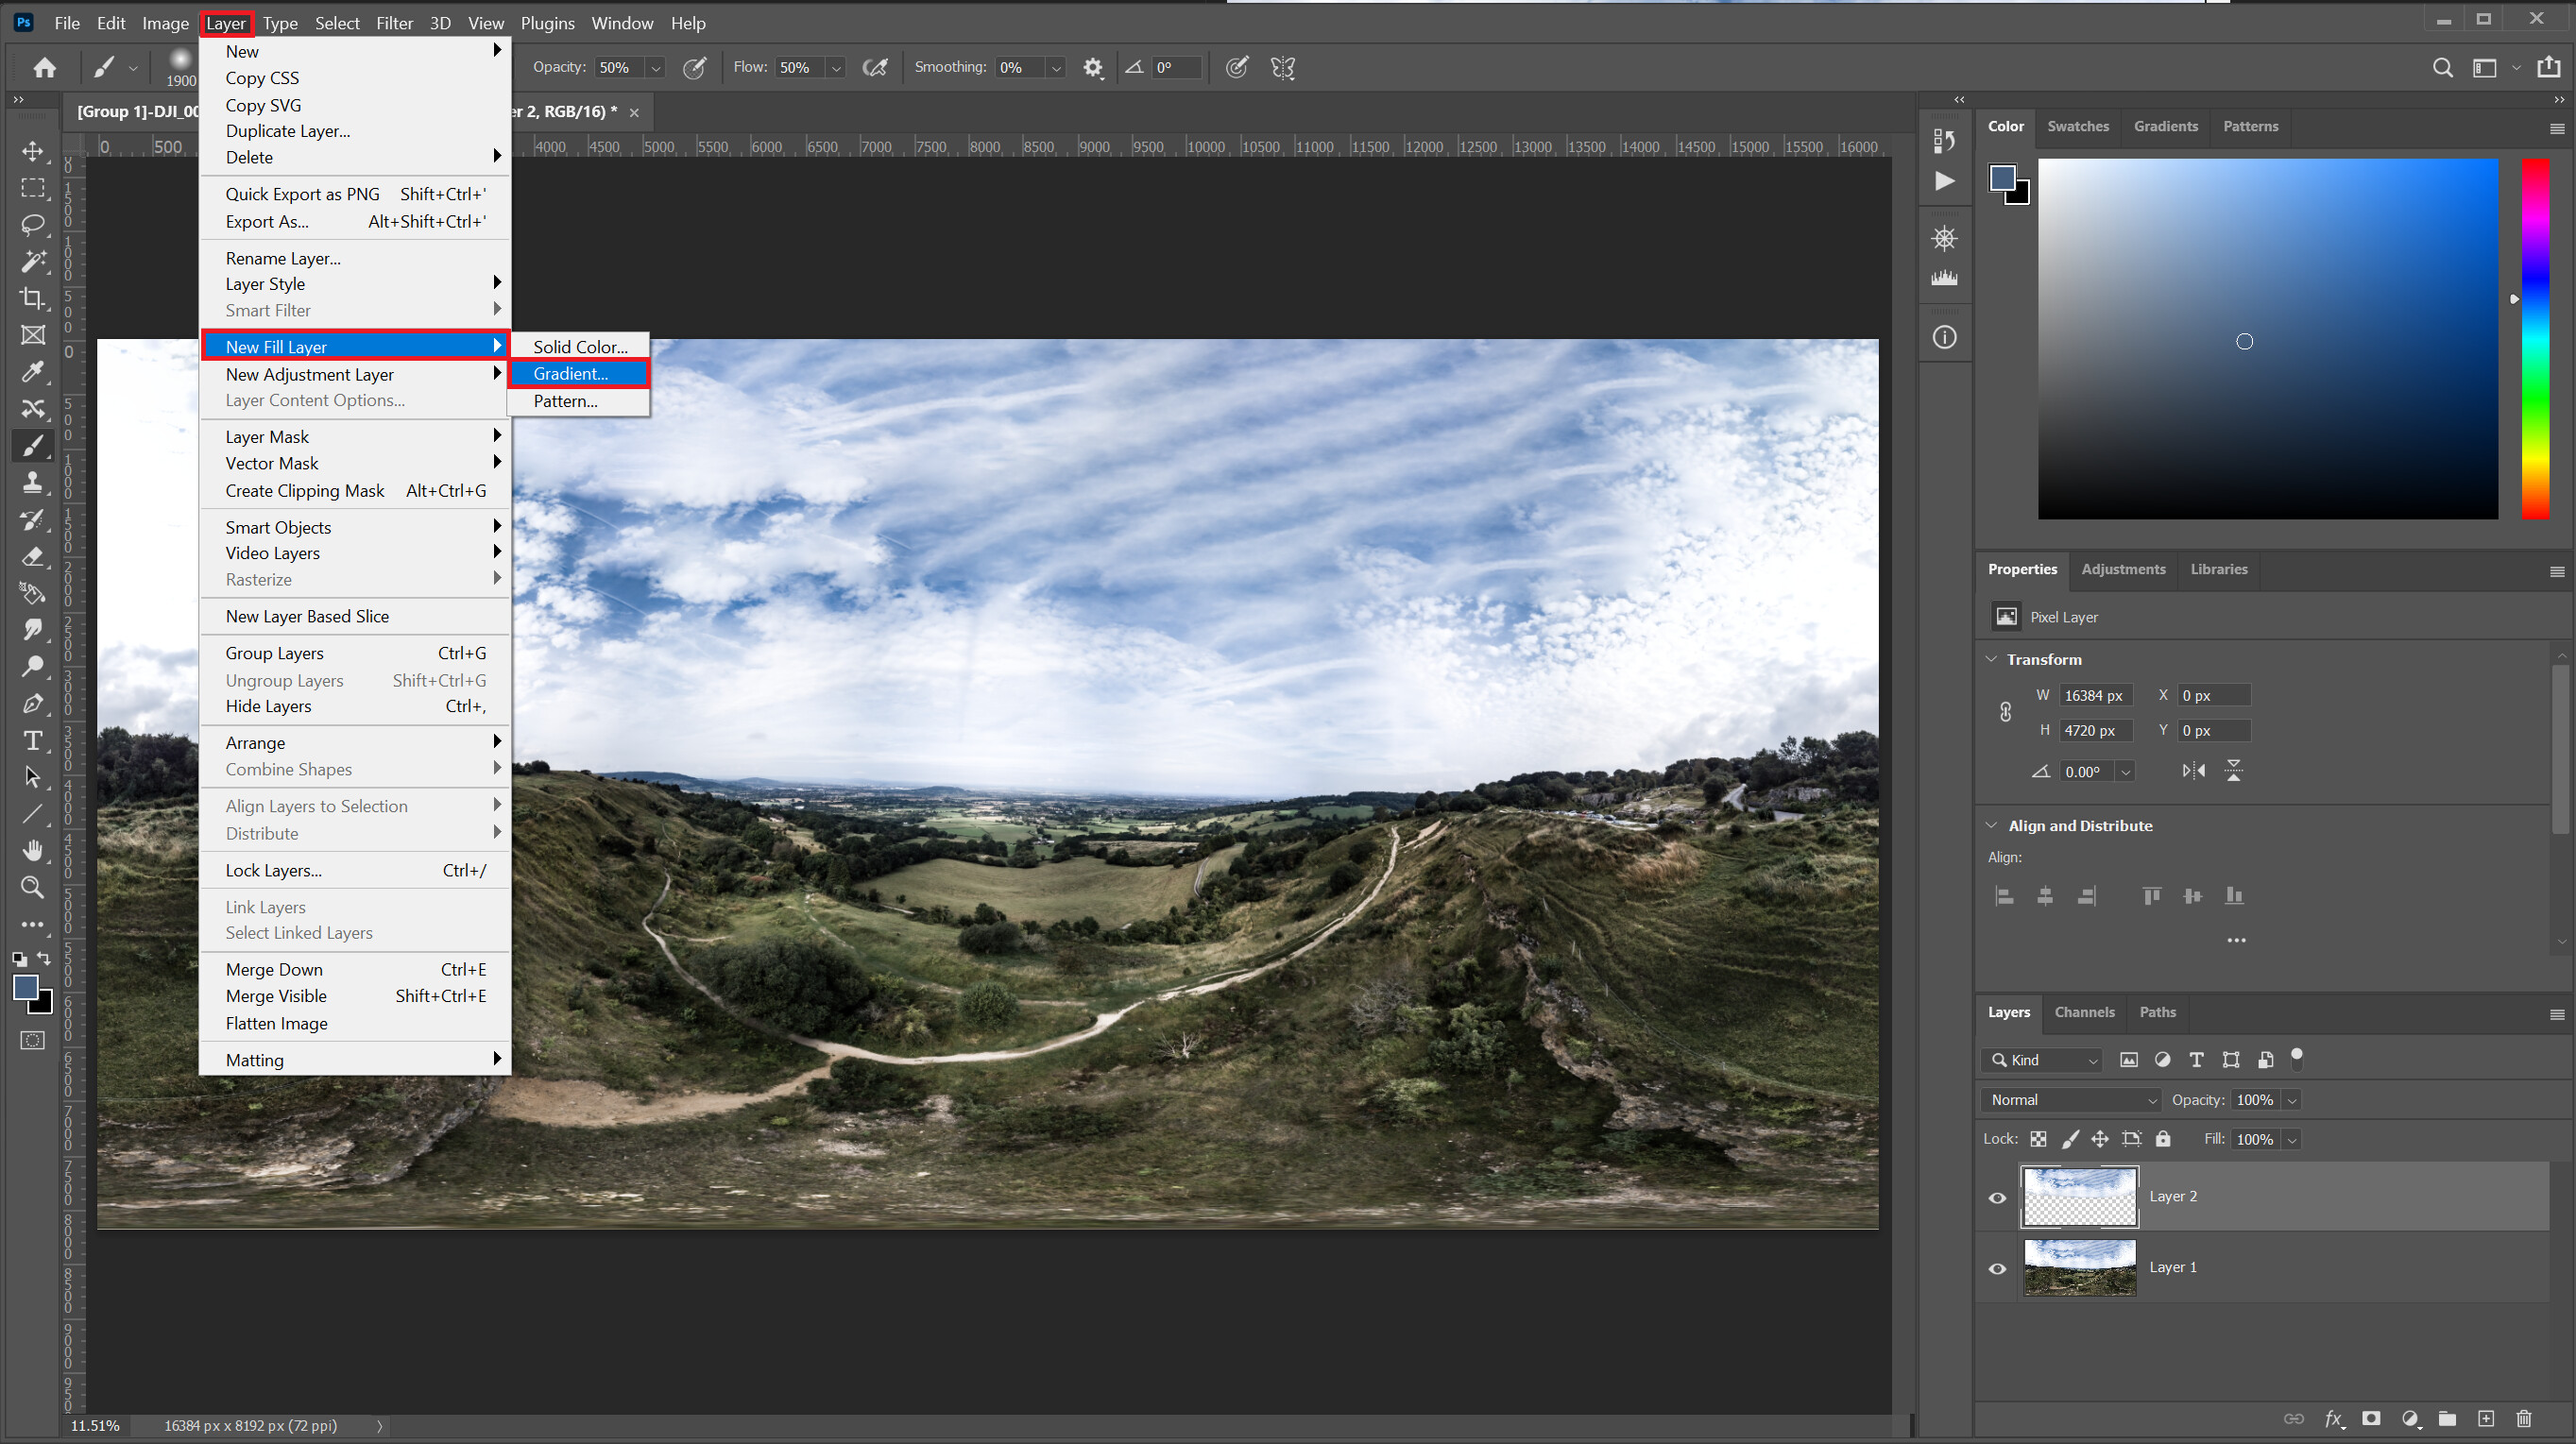
You can now close APG and open your image editing software, mine is Adobe Photoshop (PS), so the remainder of this workflow reflects that.

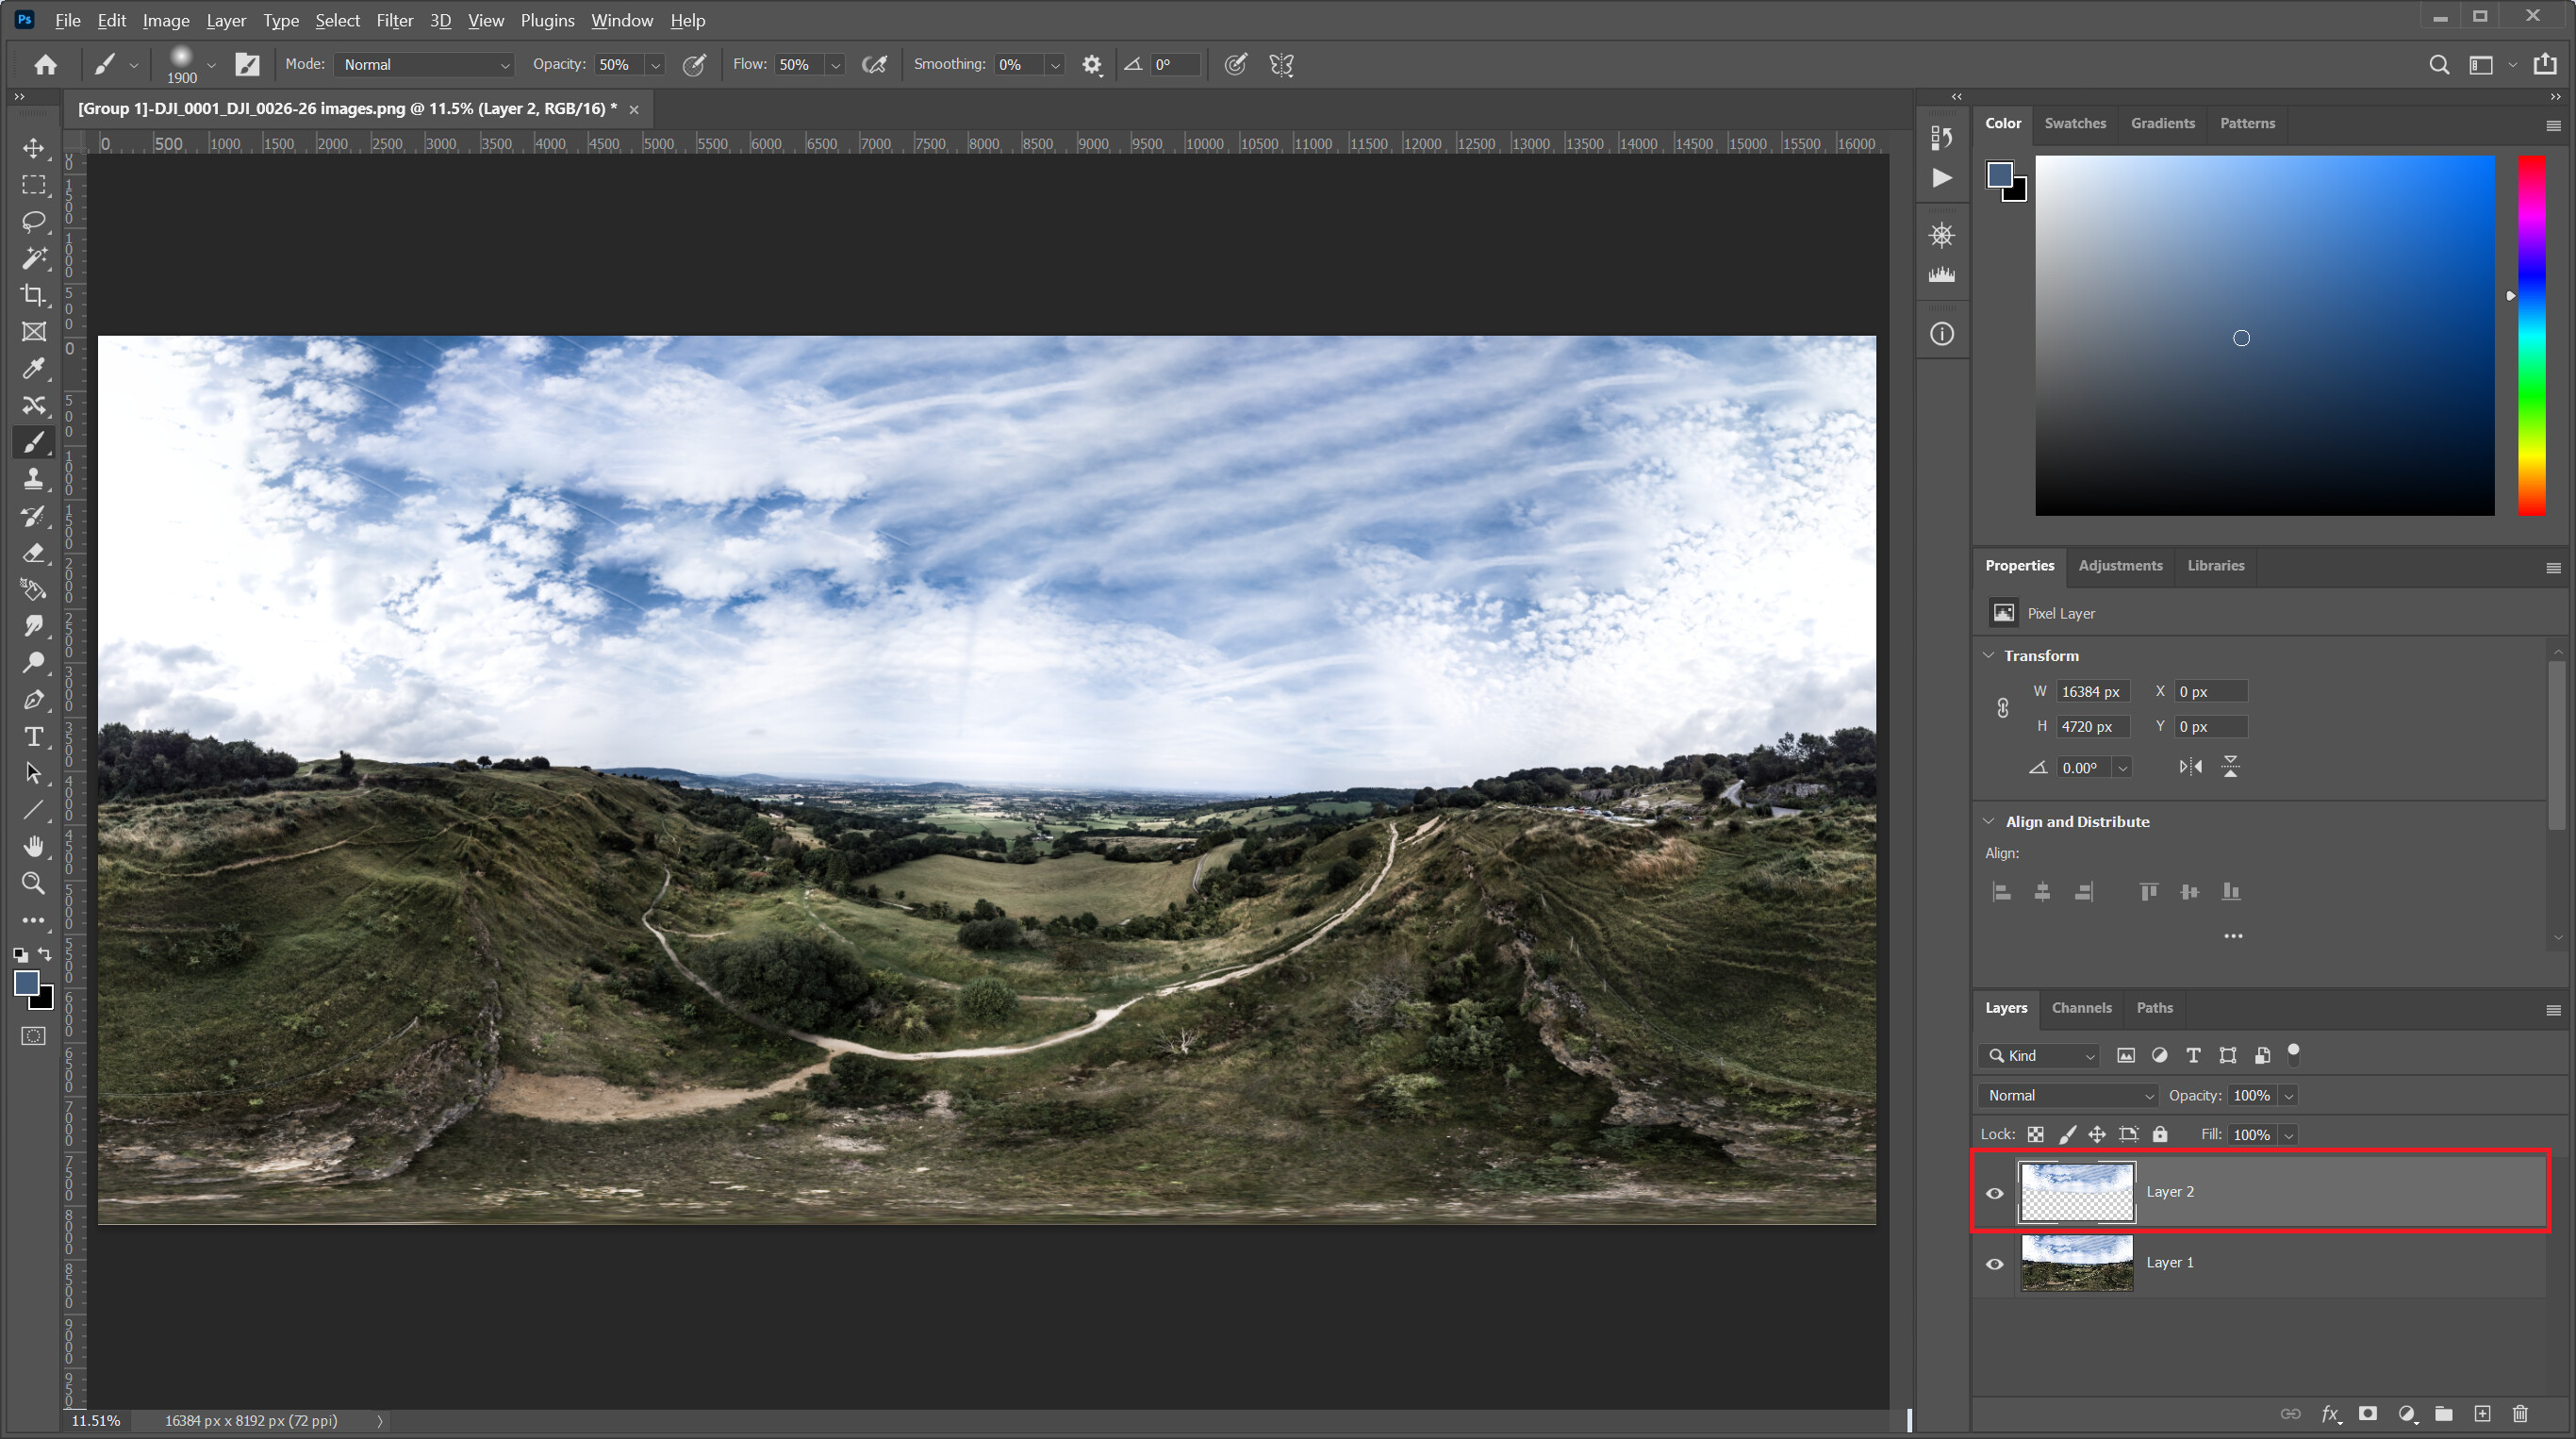
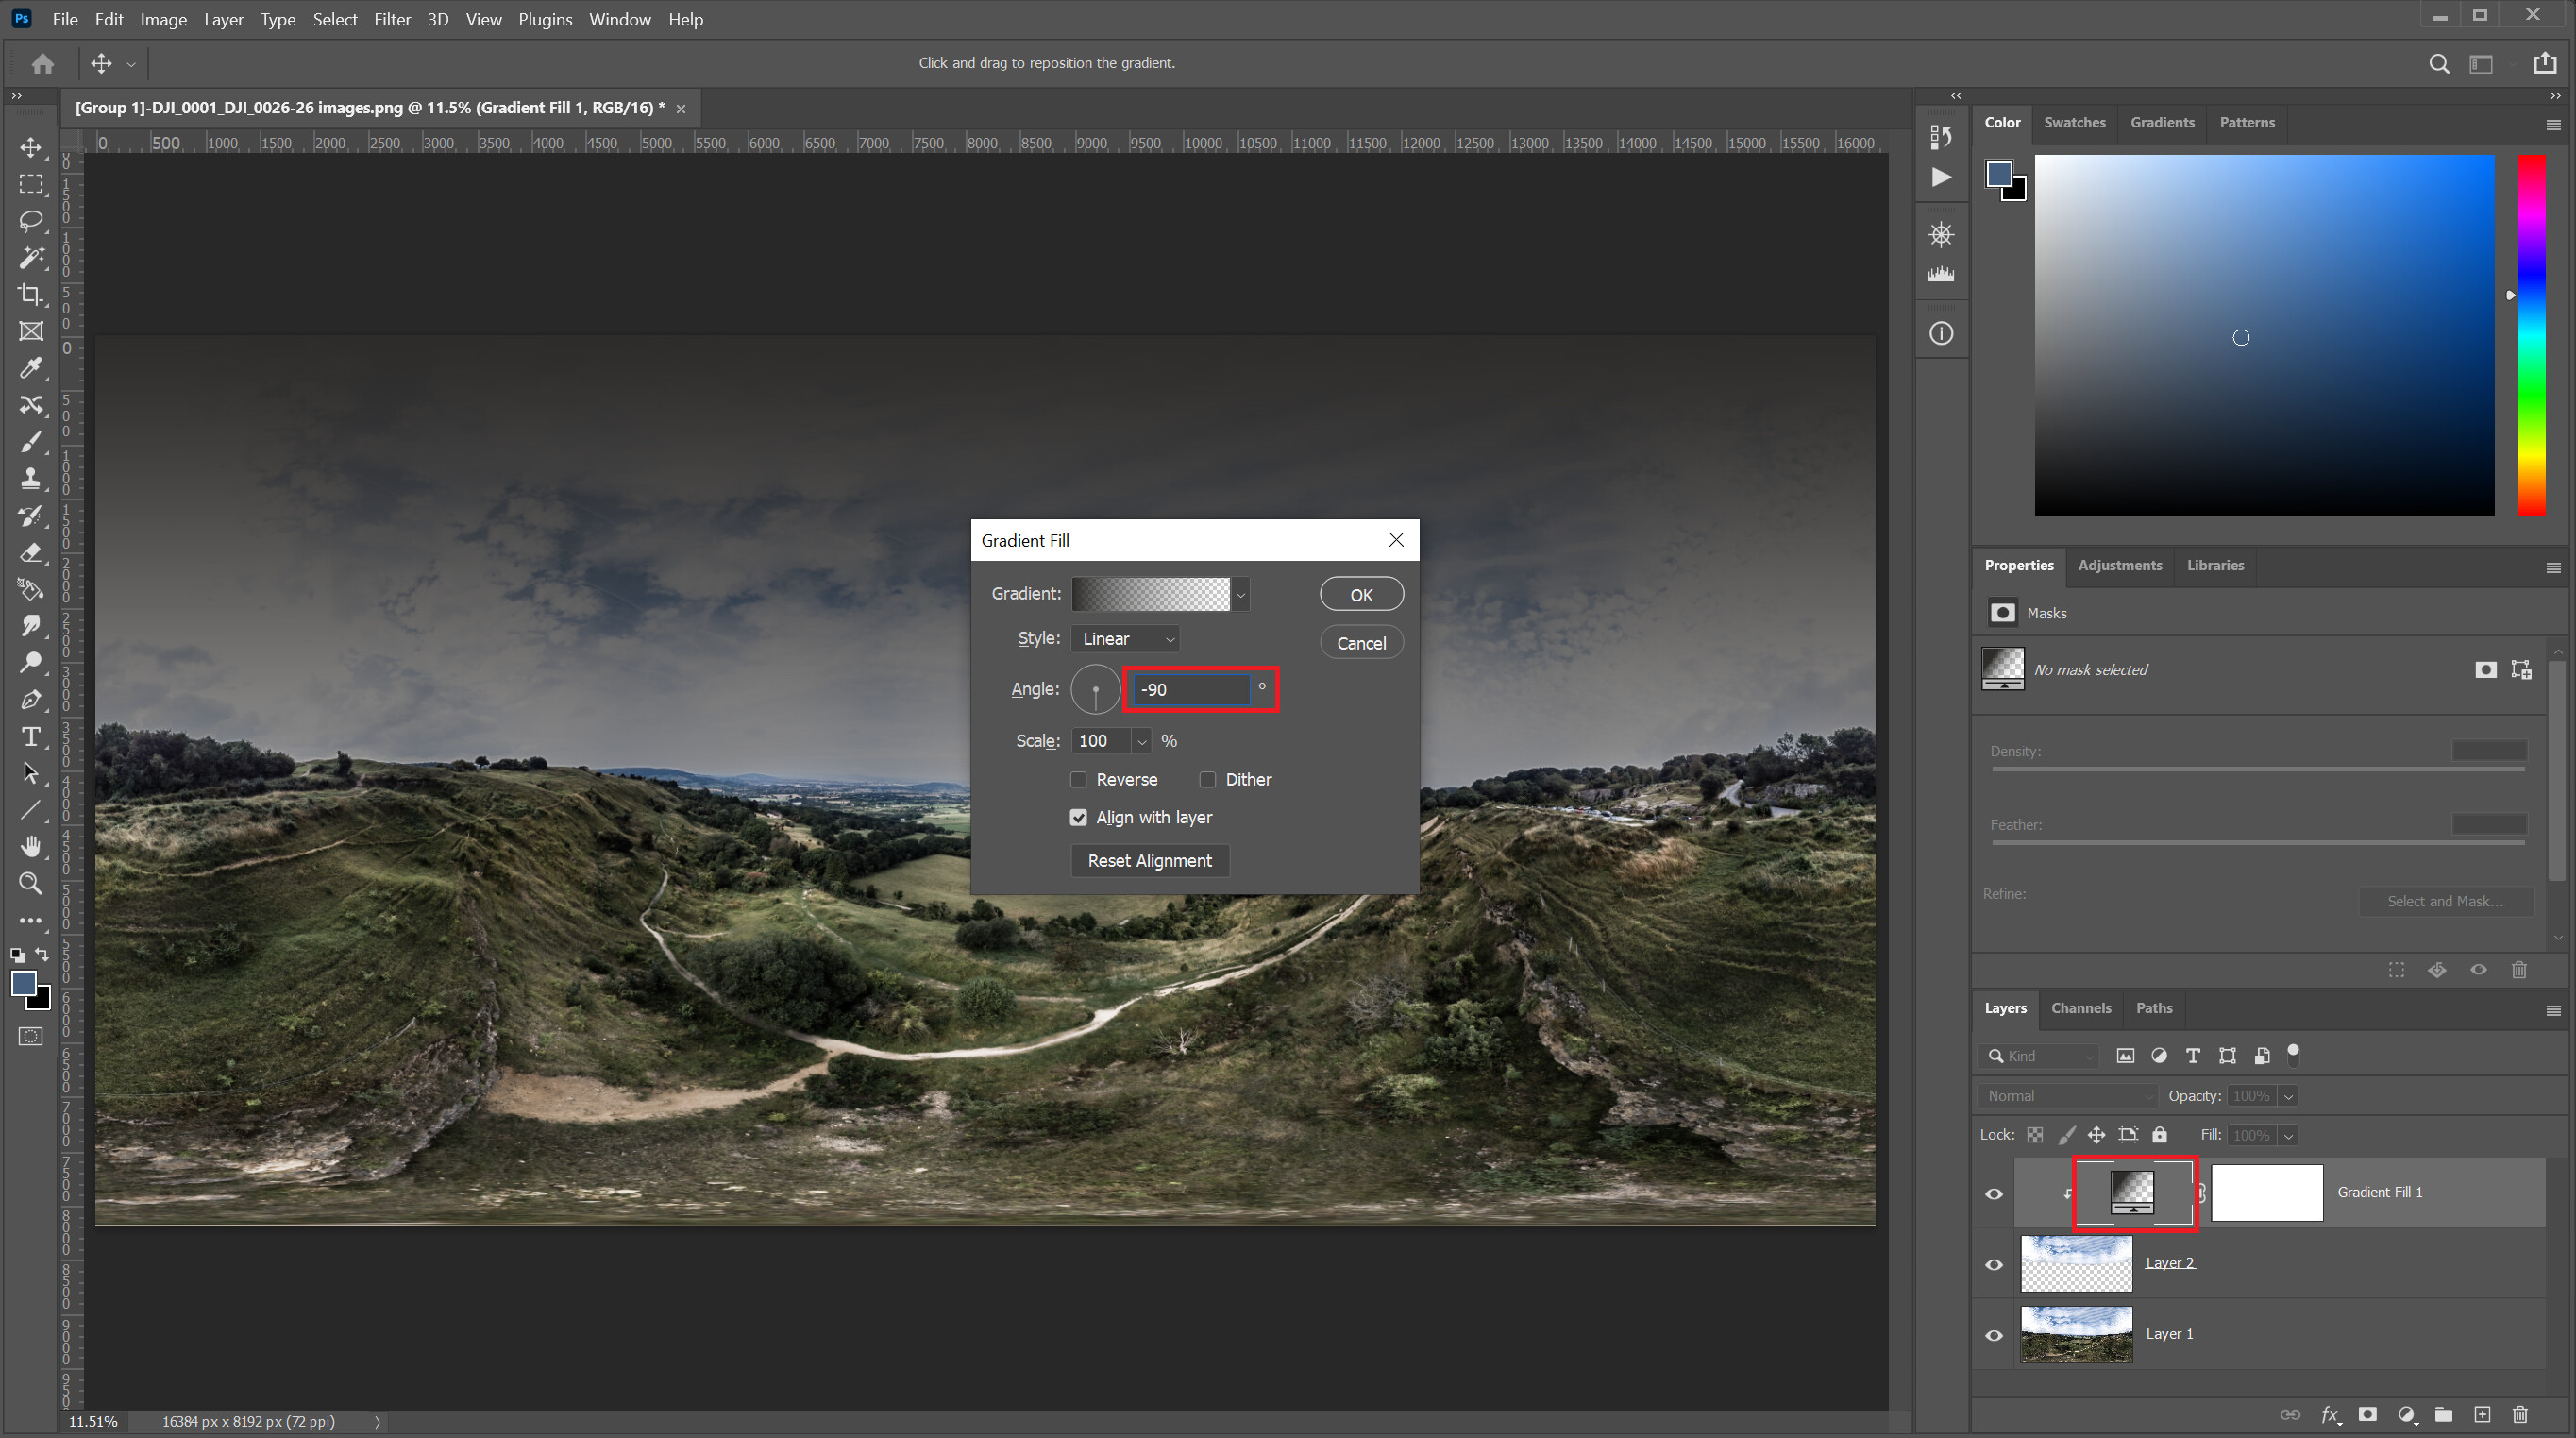
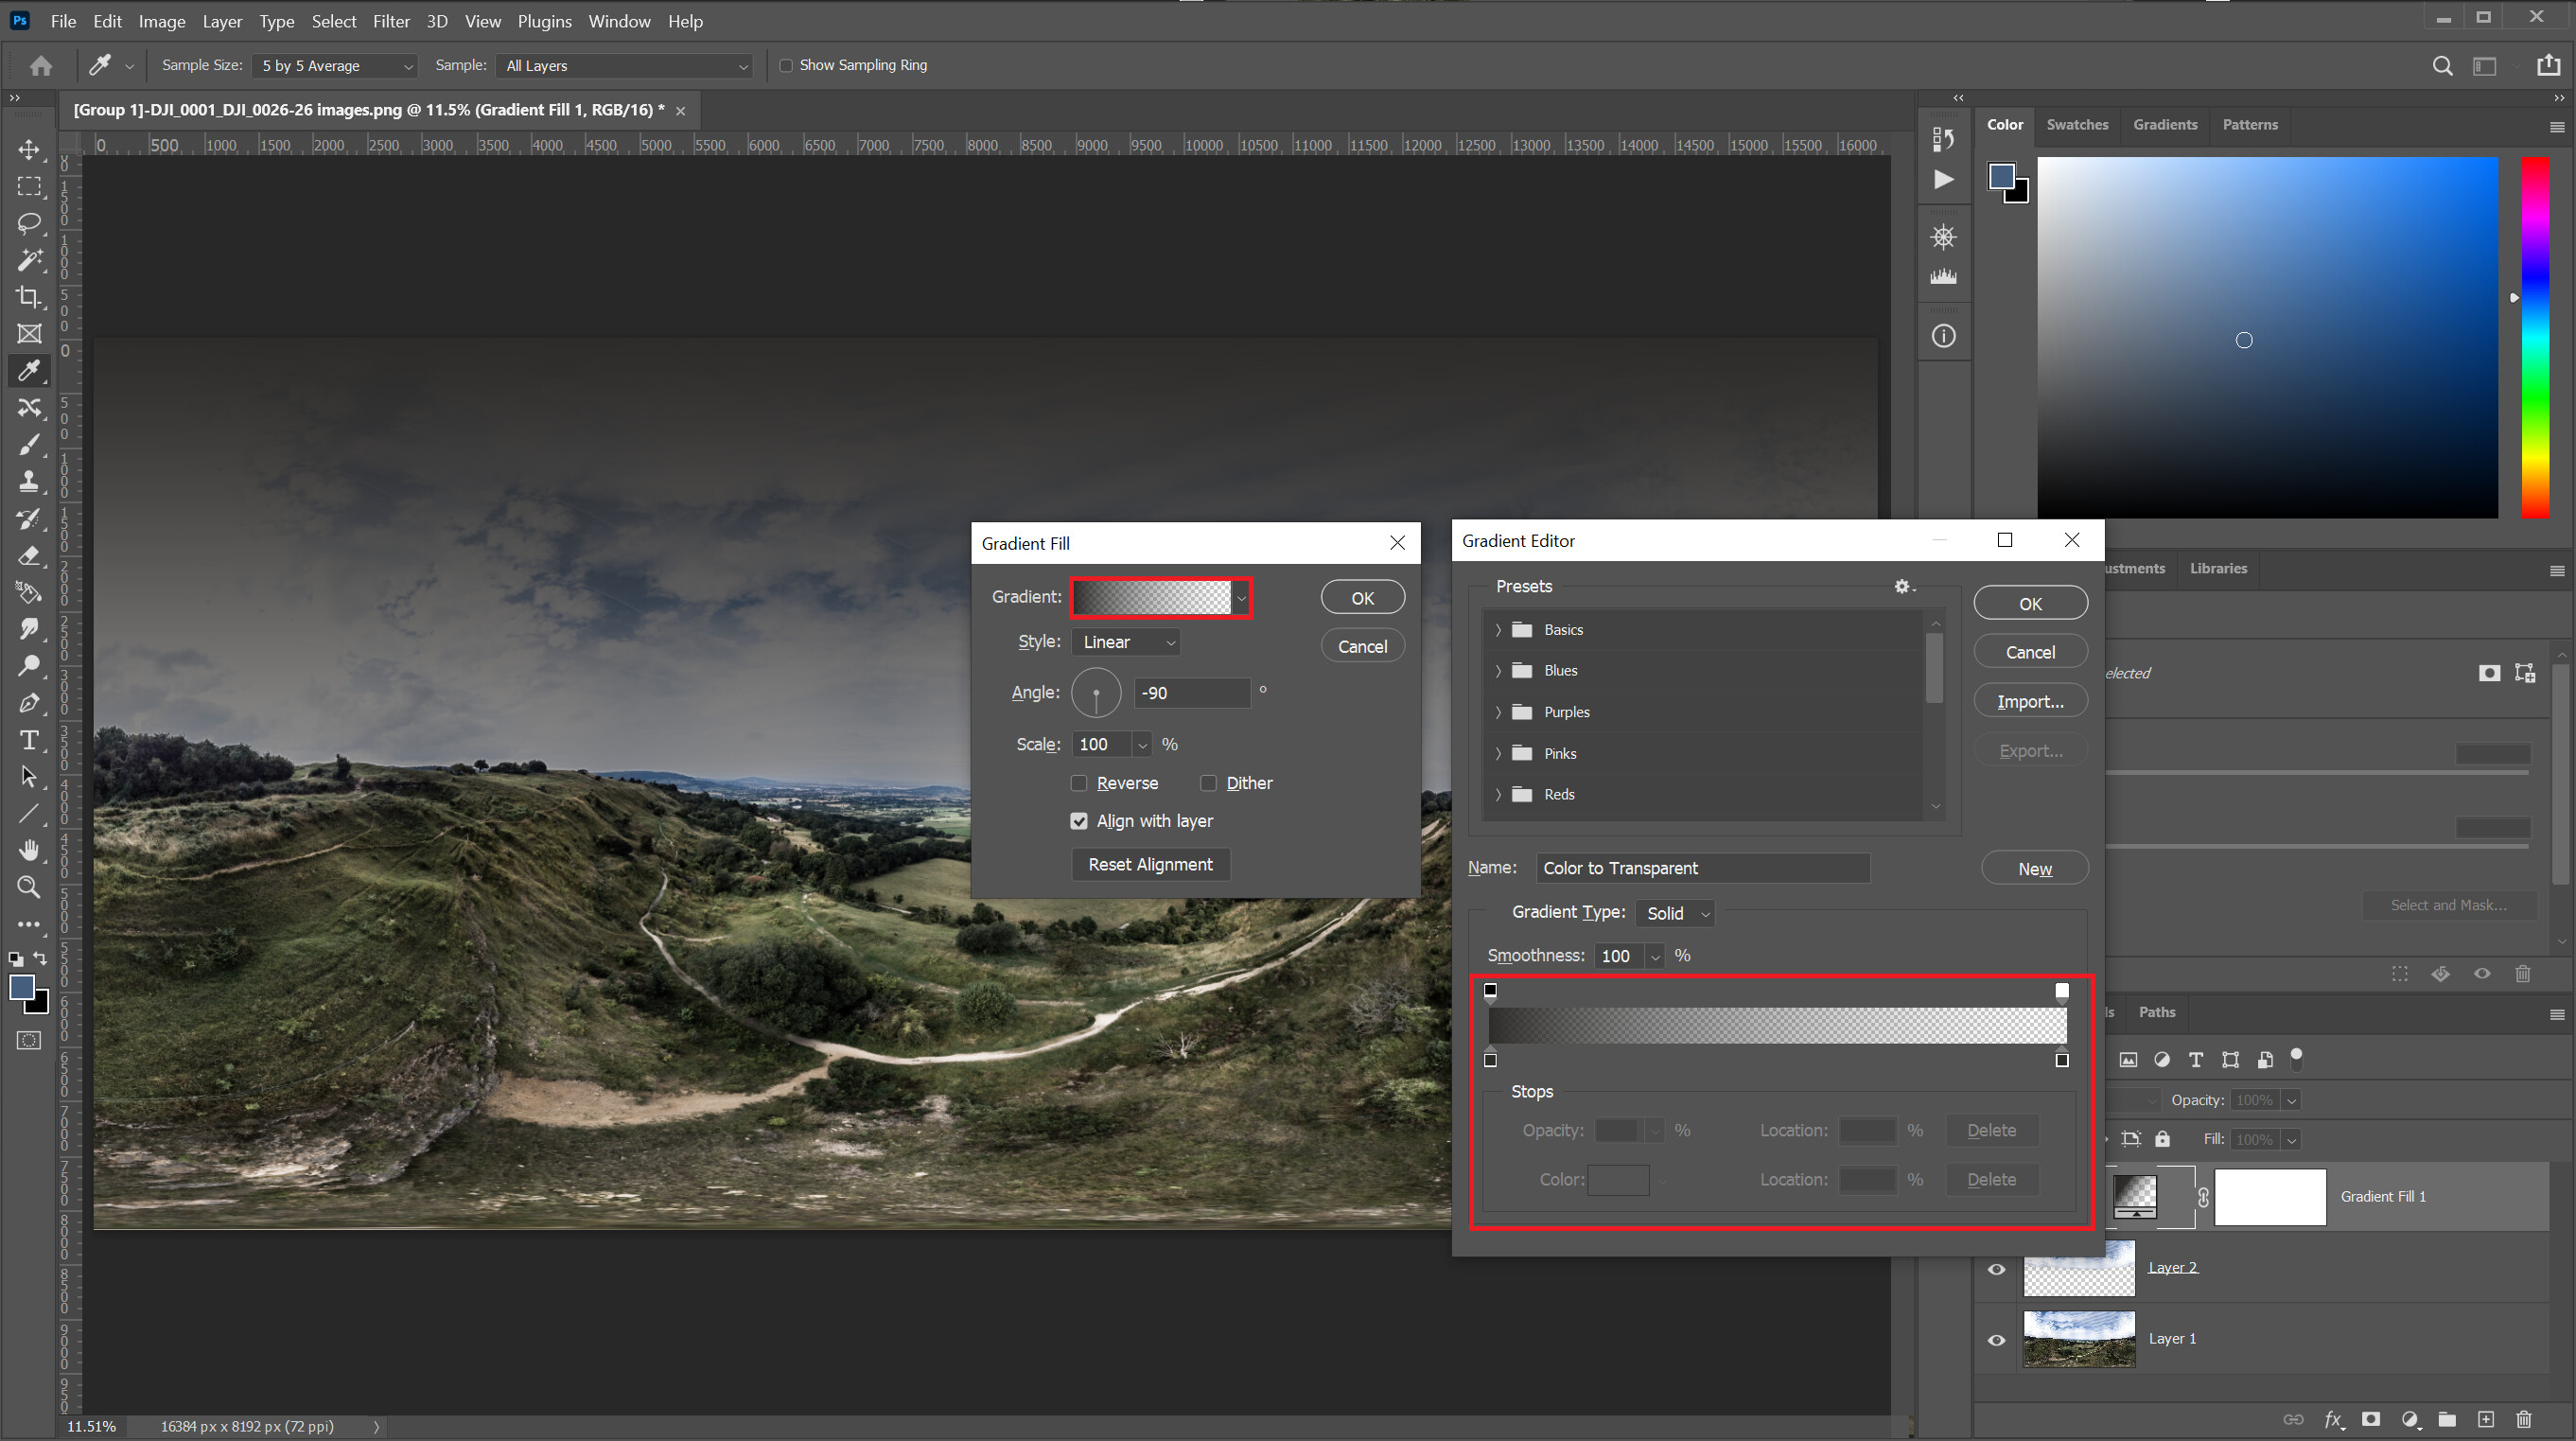
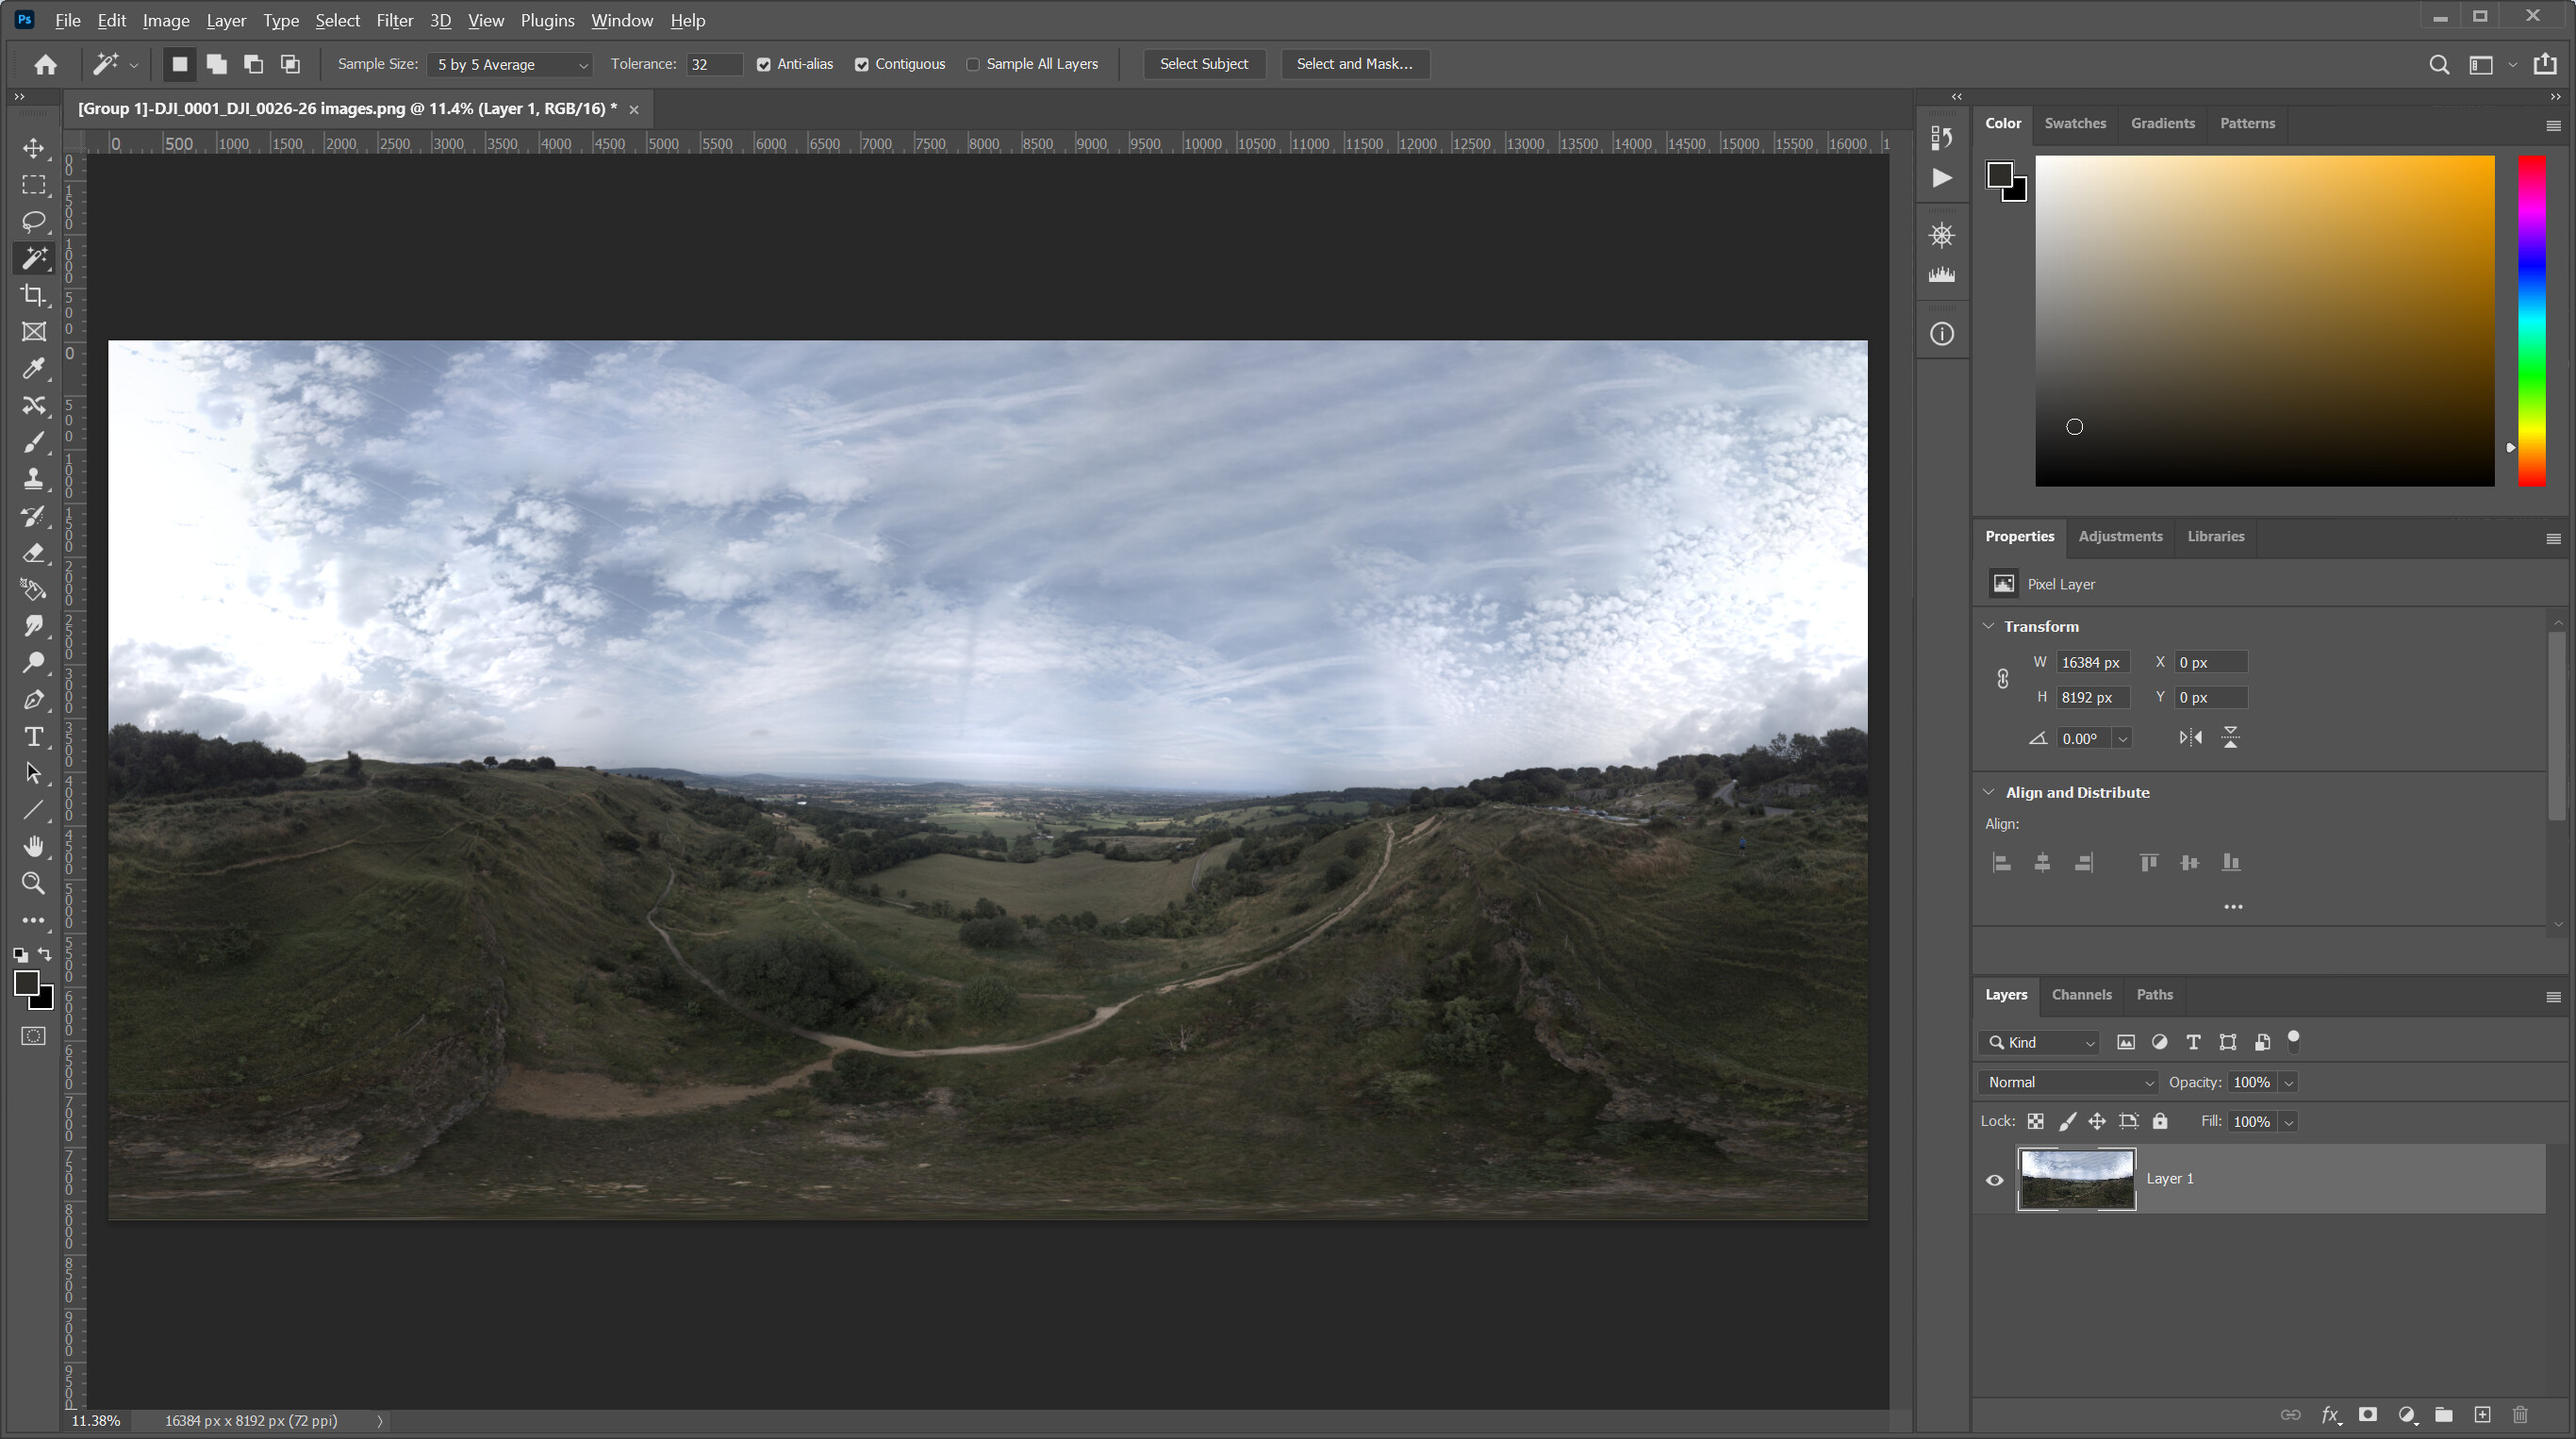
With 360 pano opened in PS, select the Magic Wand Tool (W) and then select the blank portion of the sky. When it is selected, you will the blank section is highlighted with a dotted line.

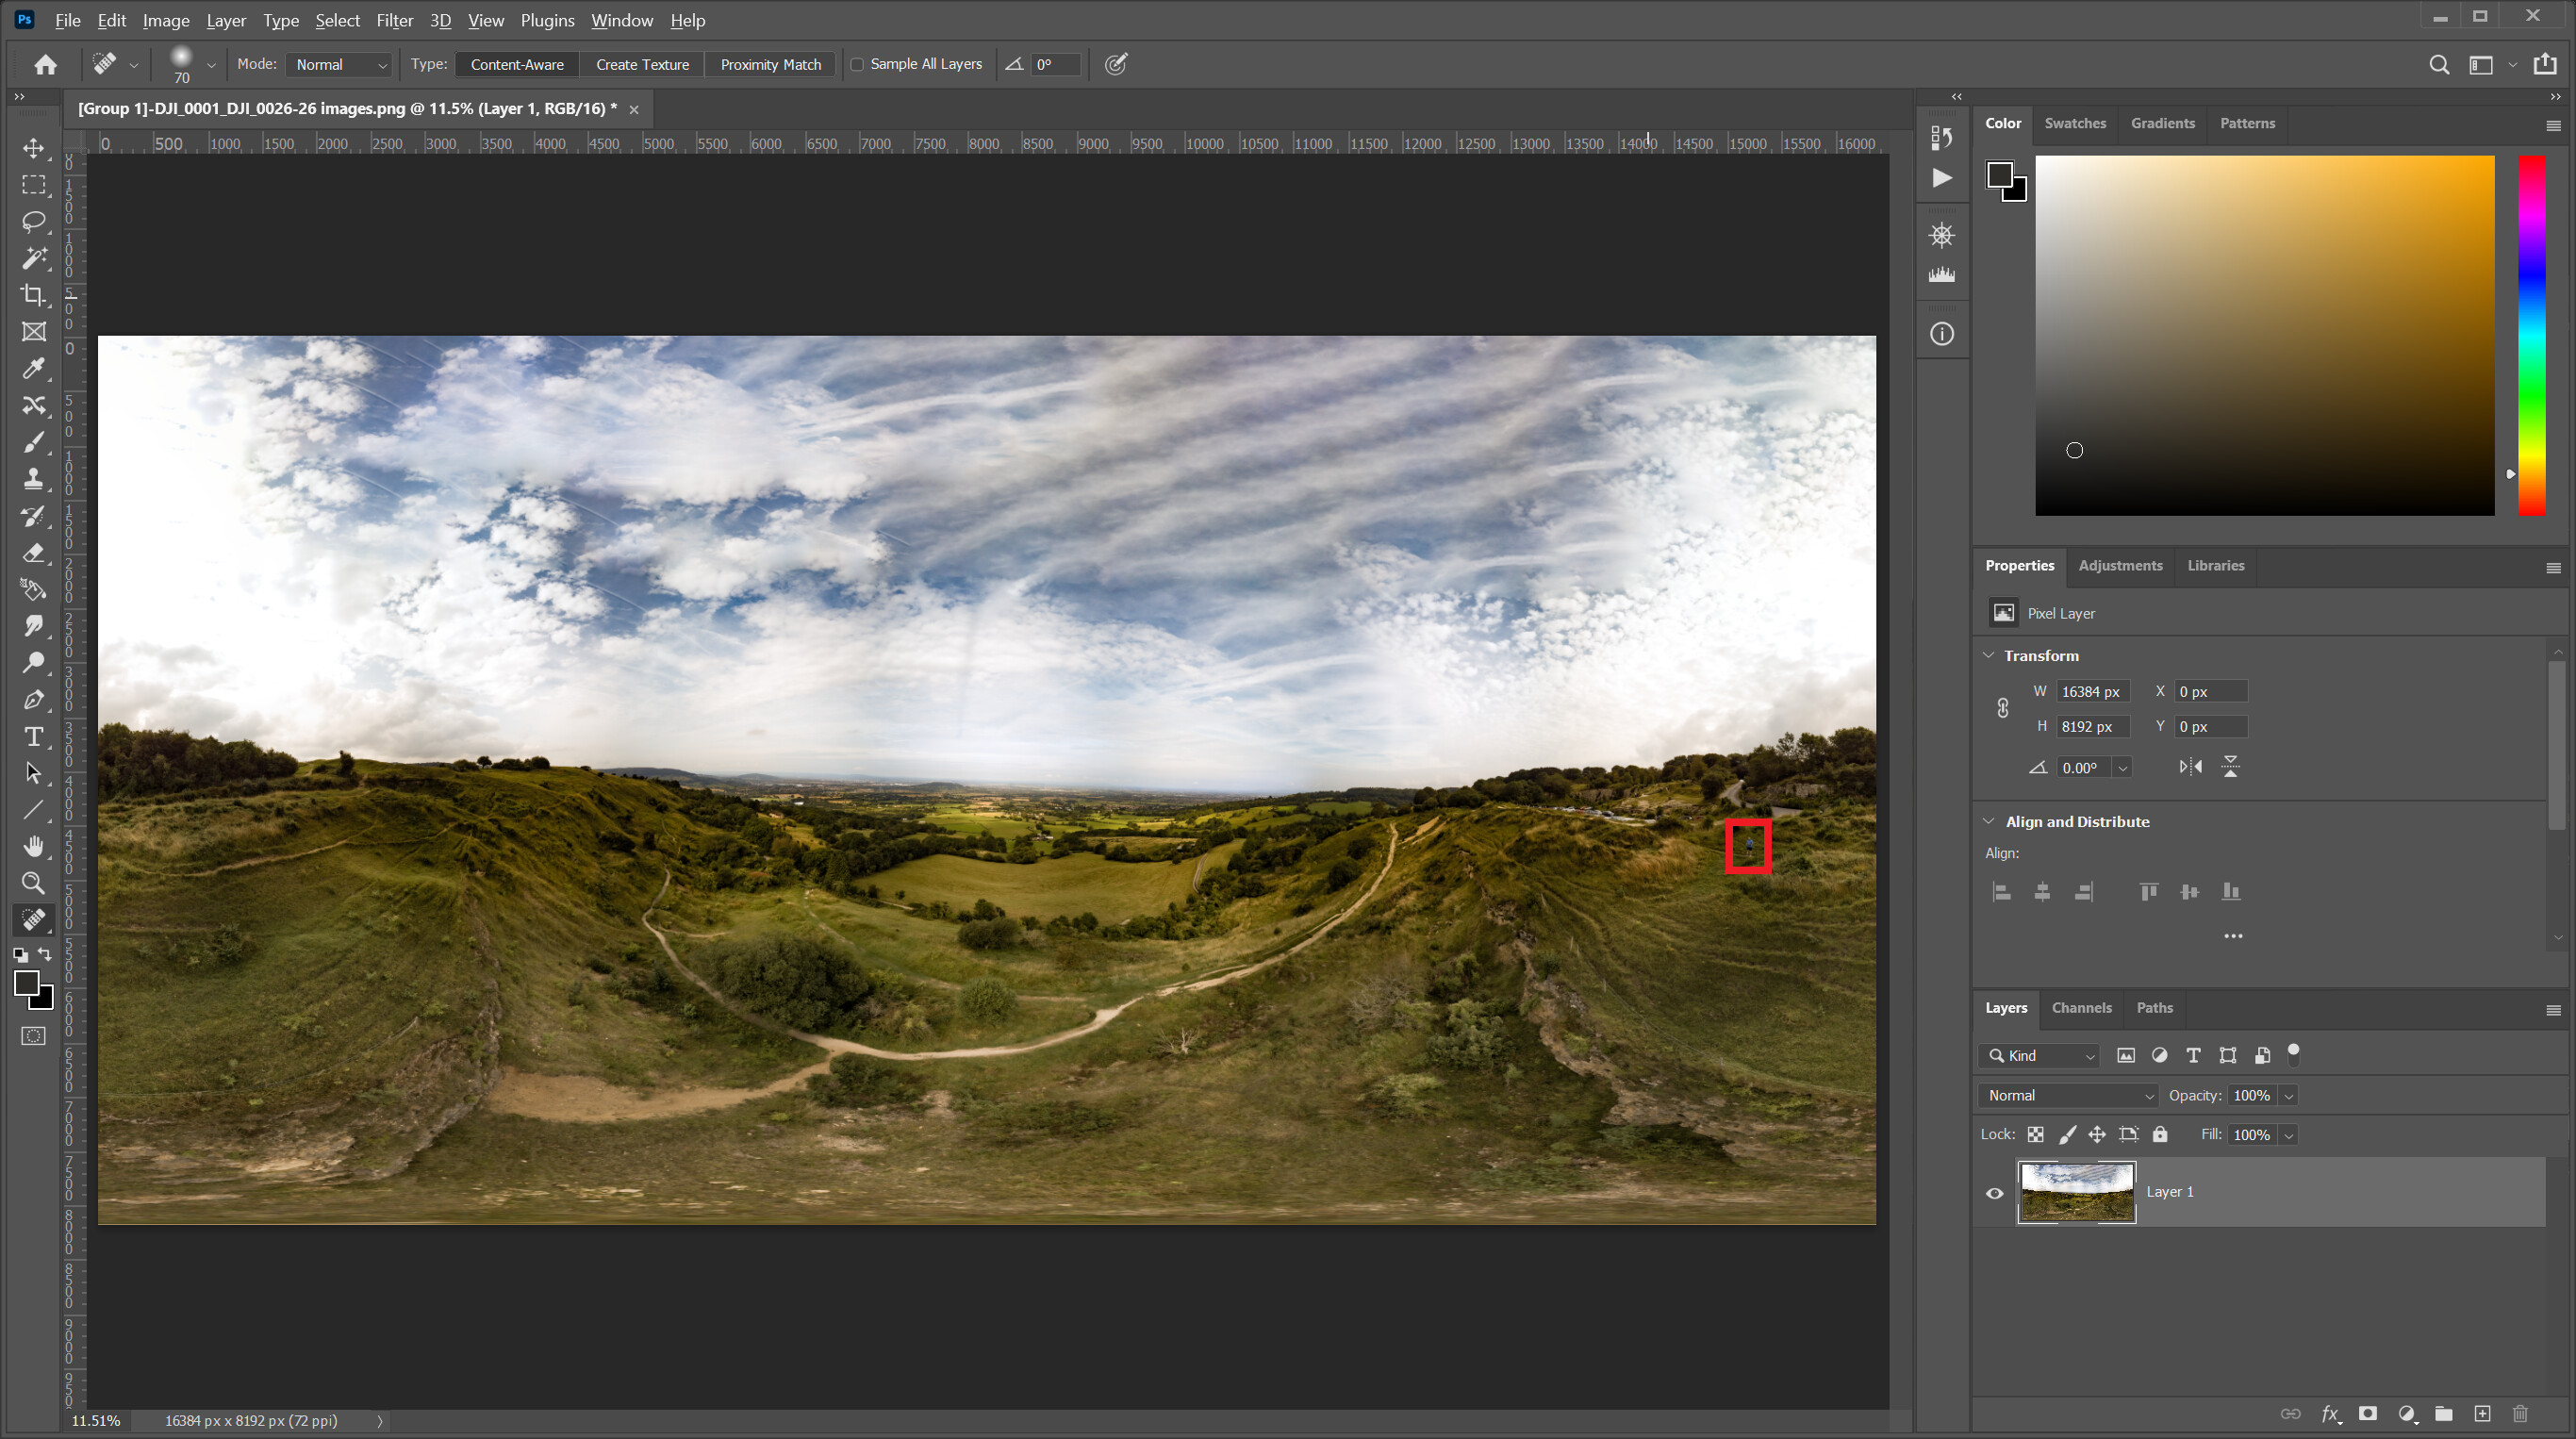
Occassionally, when filling selections, you are left with visible stitch lines. To prevent this, you need to expand the selection by 5px. To do this, from the Select menu, chose Modify > Expand and set the value to 5px. Note, when you click on OK, you will not see any visible change, don’t worry, it has done its thing.

Now you need to fill the blank Sky with ‘more sky’. To do this, I use Content-Aware. You can either select Fill from the Edit menu, or press SHIFT + F5.

image

Since there is a lot of blank space to fill, this may take some time. But once done, press CTRL + D to deselect the original selection. The sky should now be filled looking something like this …

You can now perform and post editing to boost the image. Quite often with 360s, I appear in the image, so I remove myself (and anything else I don’t want) using the Spot Healing Brush Tool (J).

:green_square: Step 3: Kuula

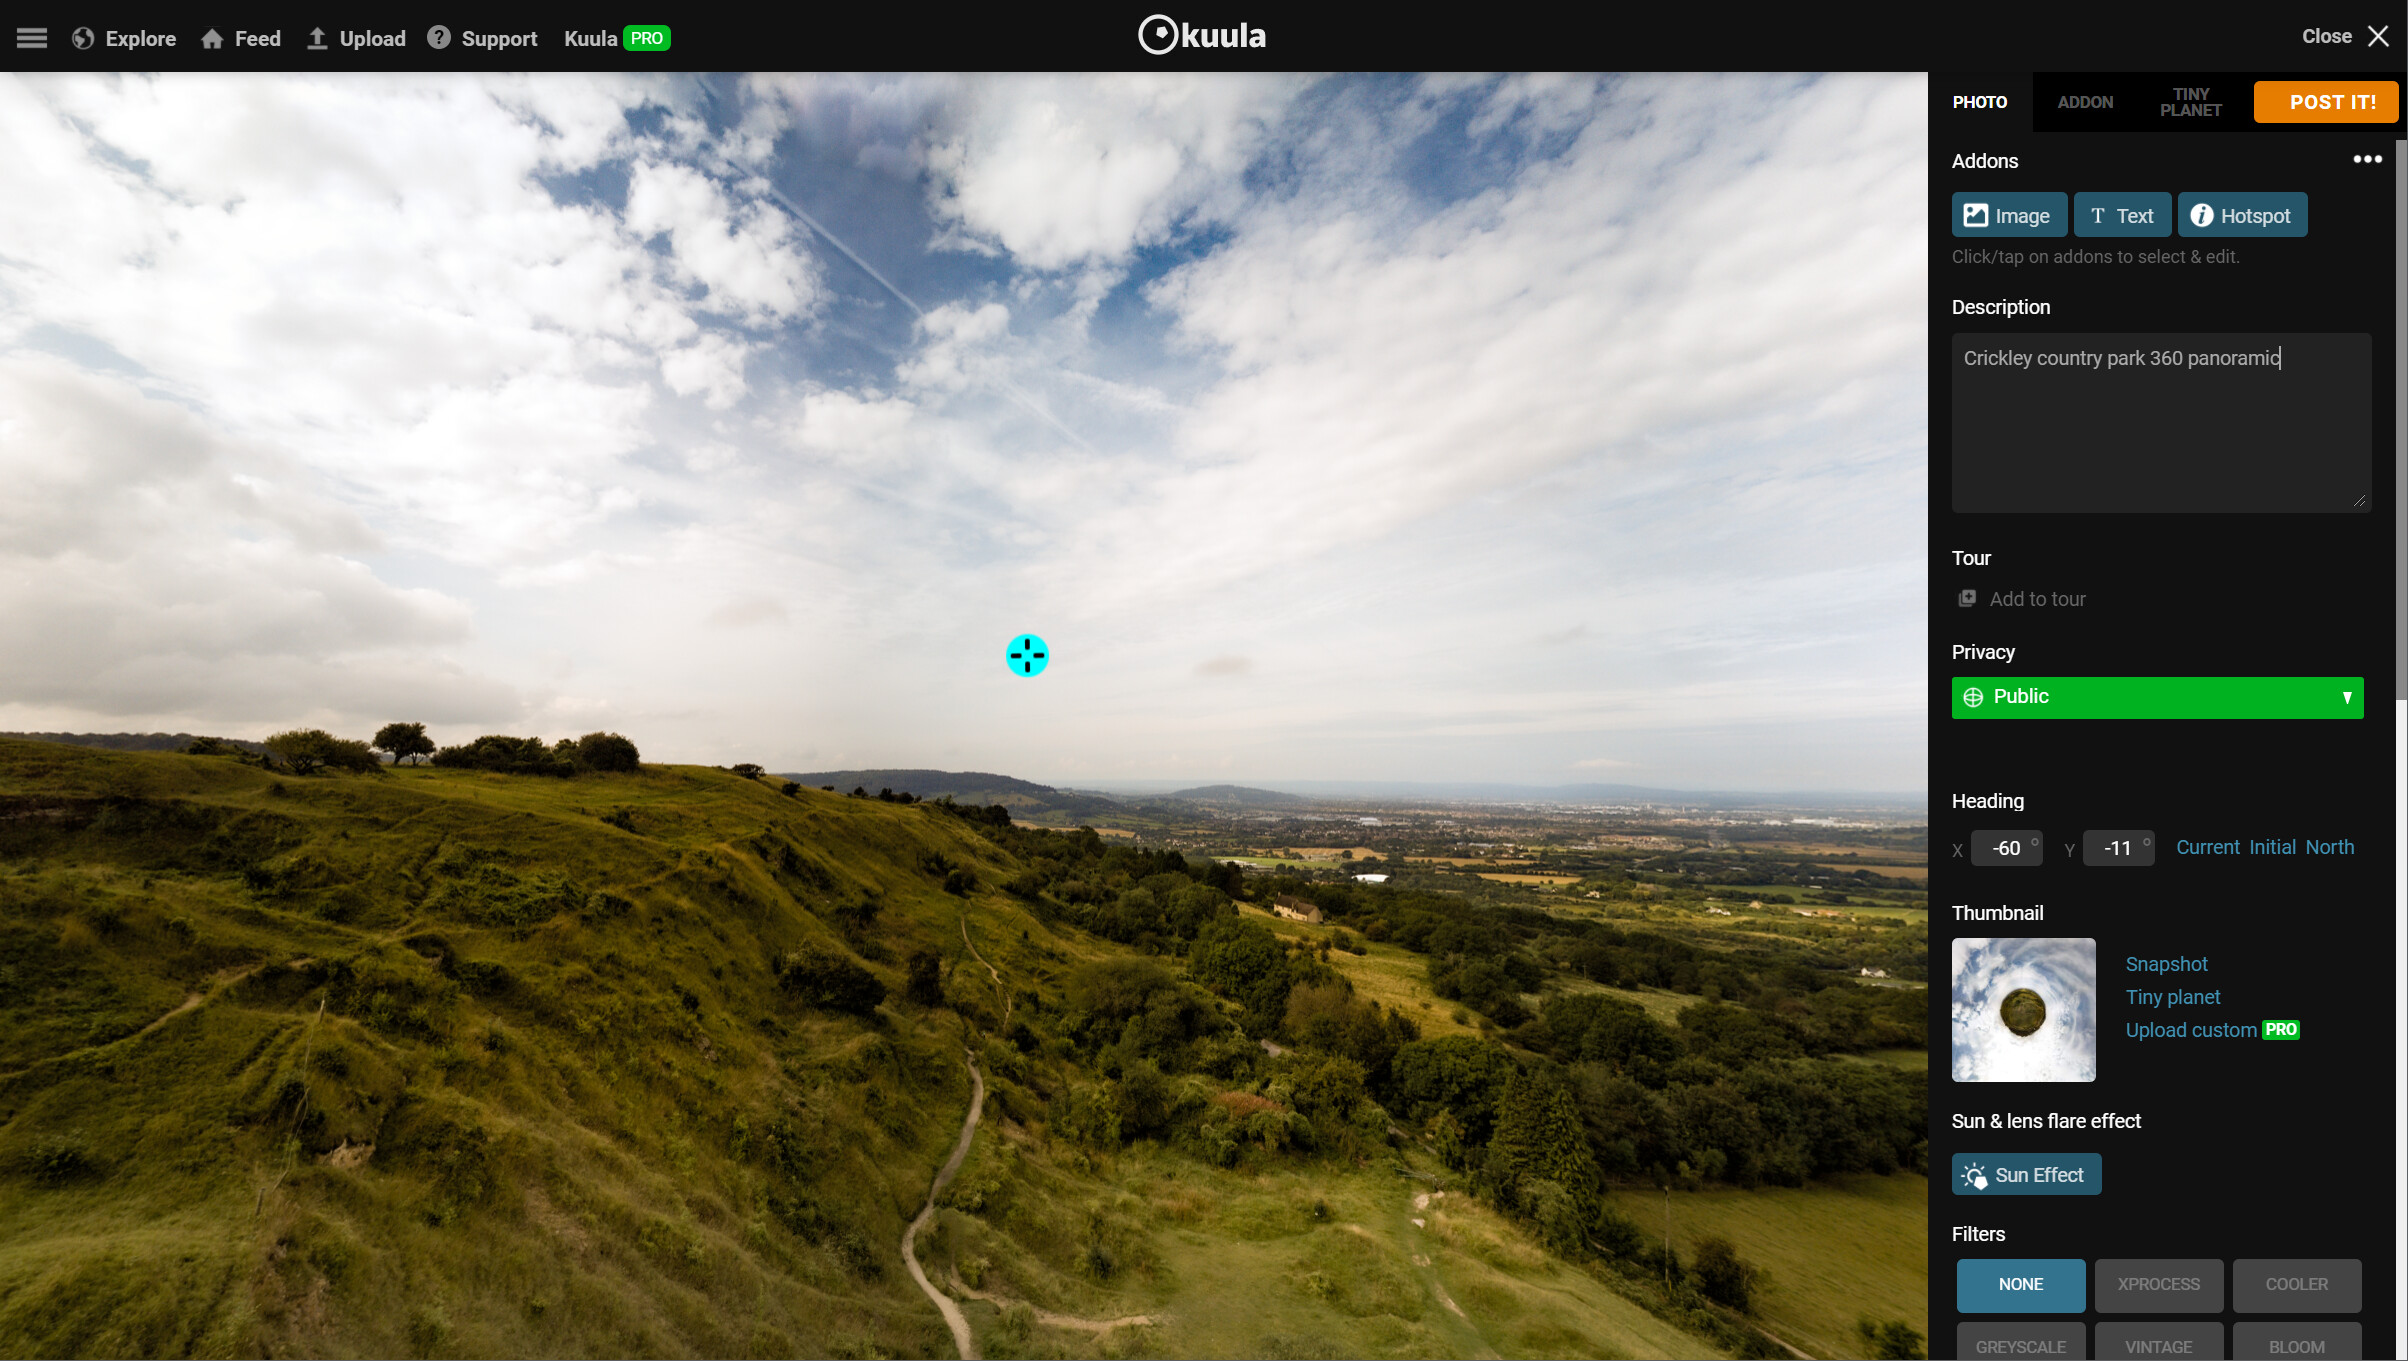
When you are ready to upload to Kuula, save the image. You can use JPG or PNG, but I opt for the latter - although this does increase the file size. With Kuula open, select Upload > Single Image …

Browse to the saved 360 pano and upload you image. Place the blue crosshair where you want the 360 to be centred on, complete the metadata section on the right and select ‘Post It’ and you are done.

:green_square: Comparison

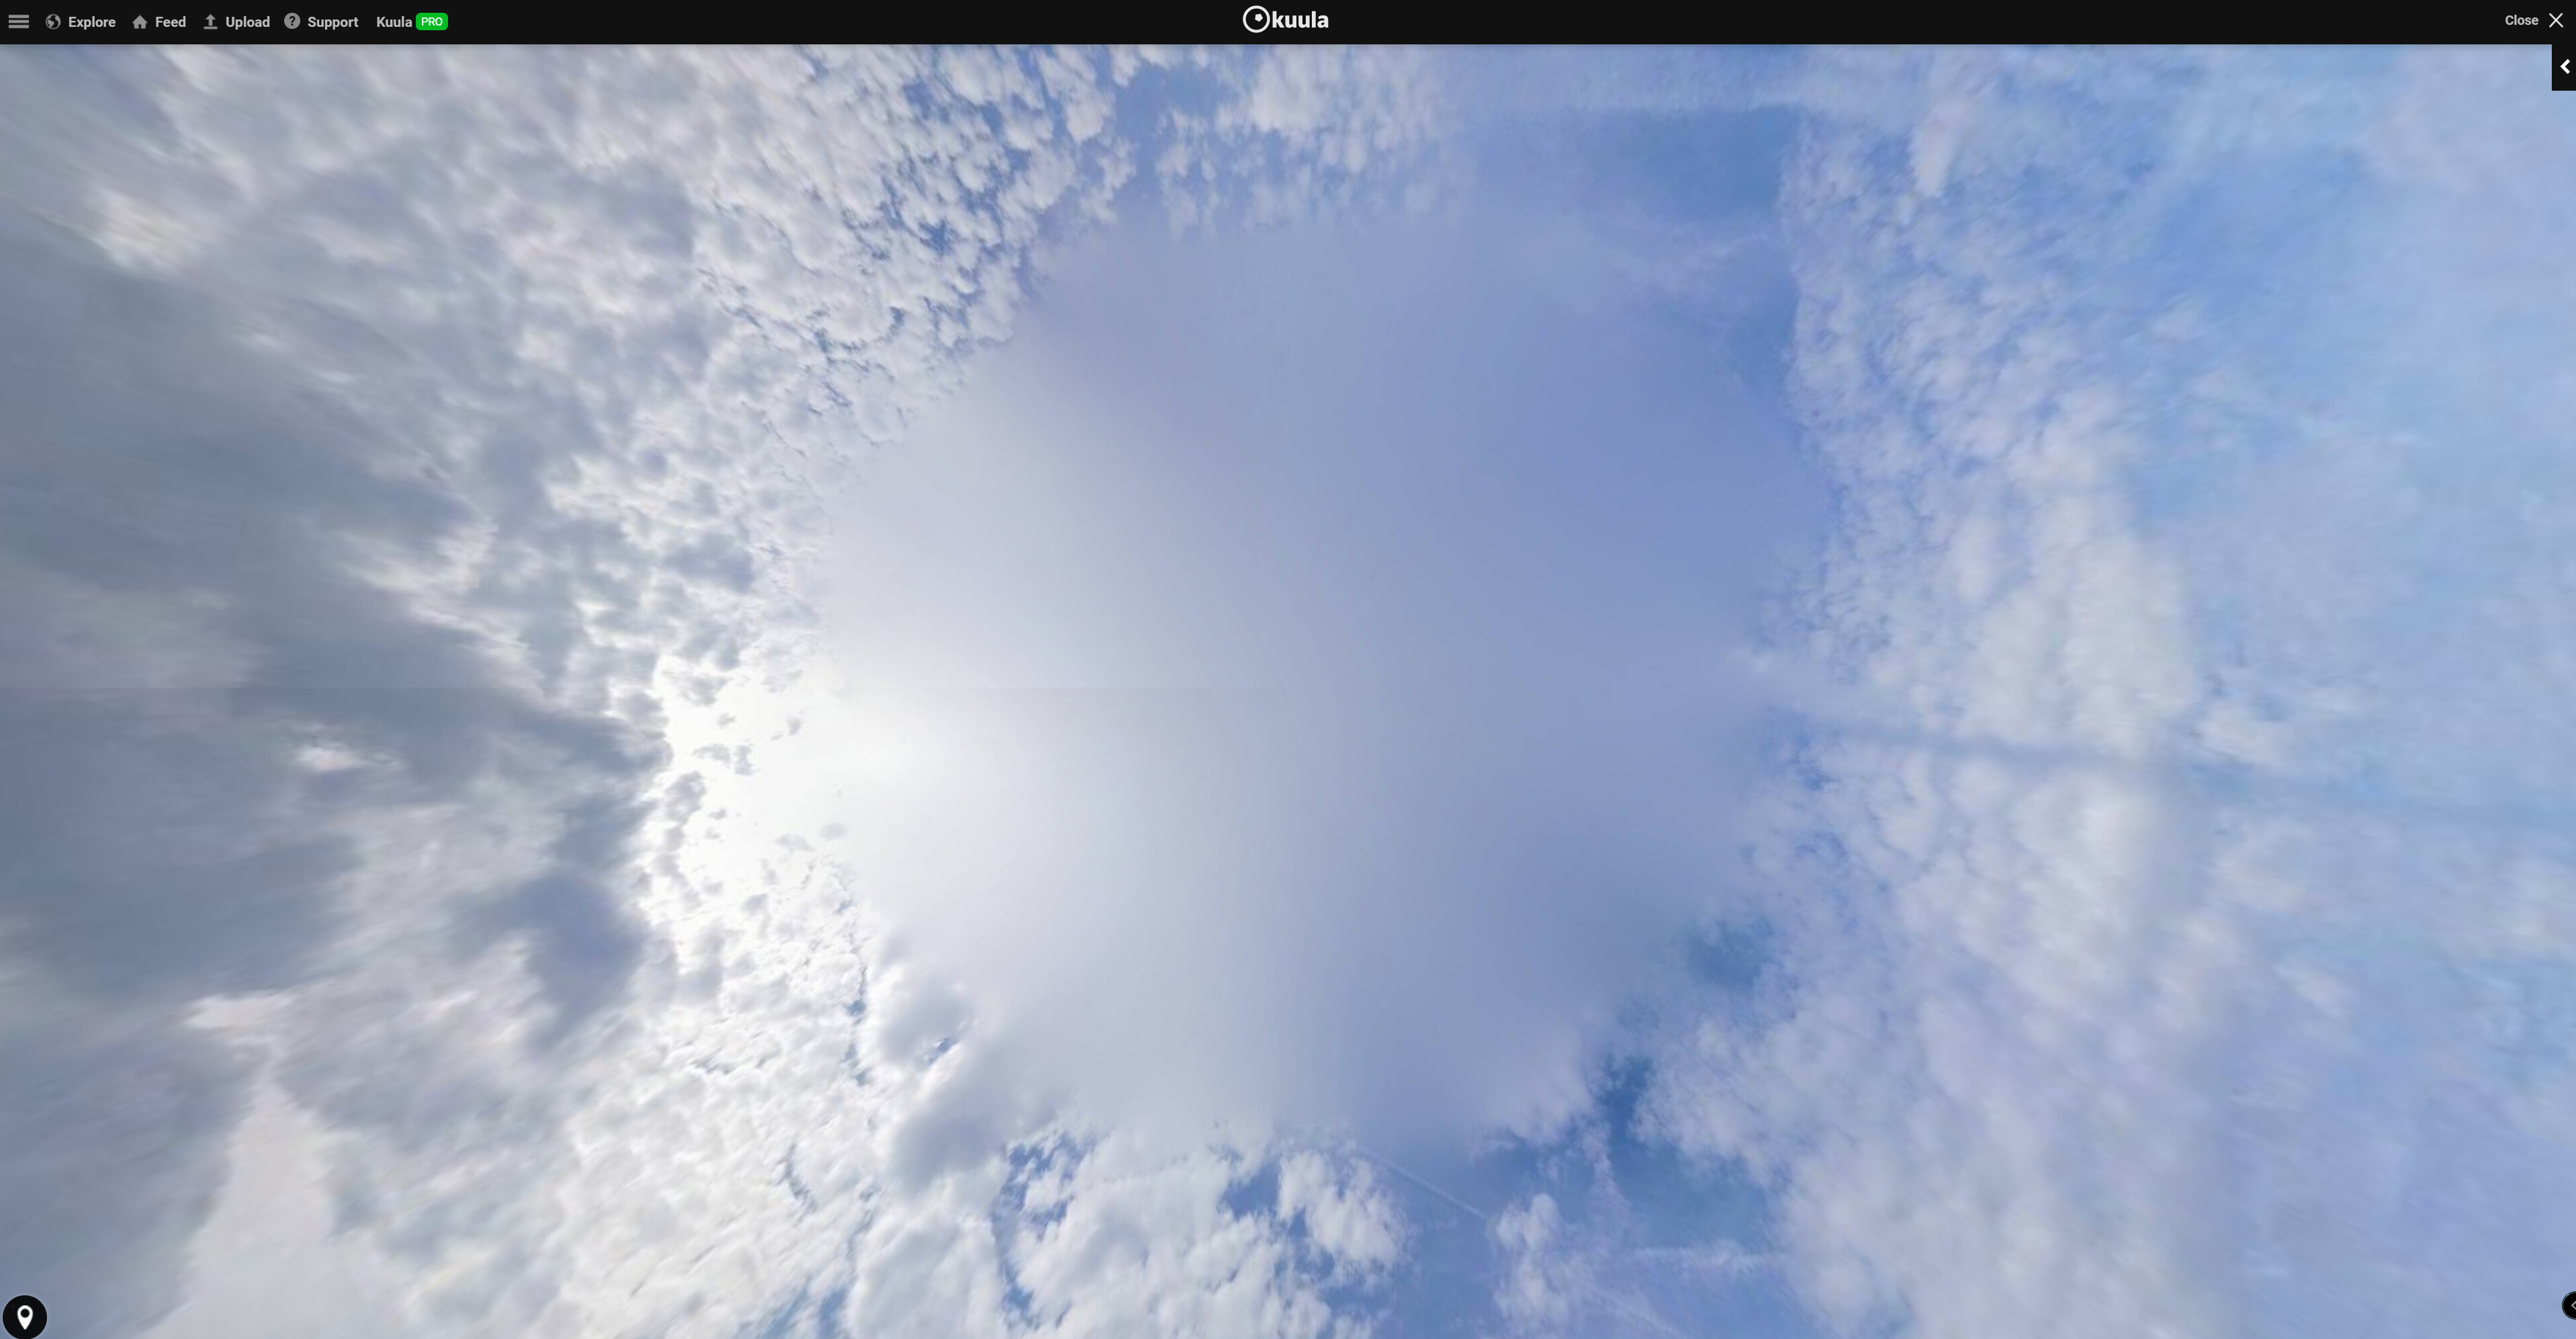
This is a 360 Pano generated using the DJI Fly app, which uses the low resolution JPG files:

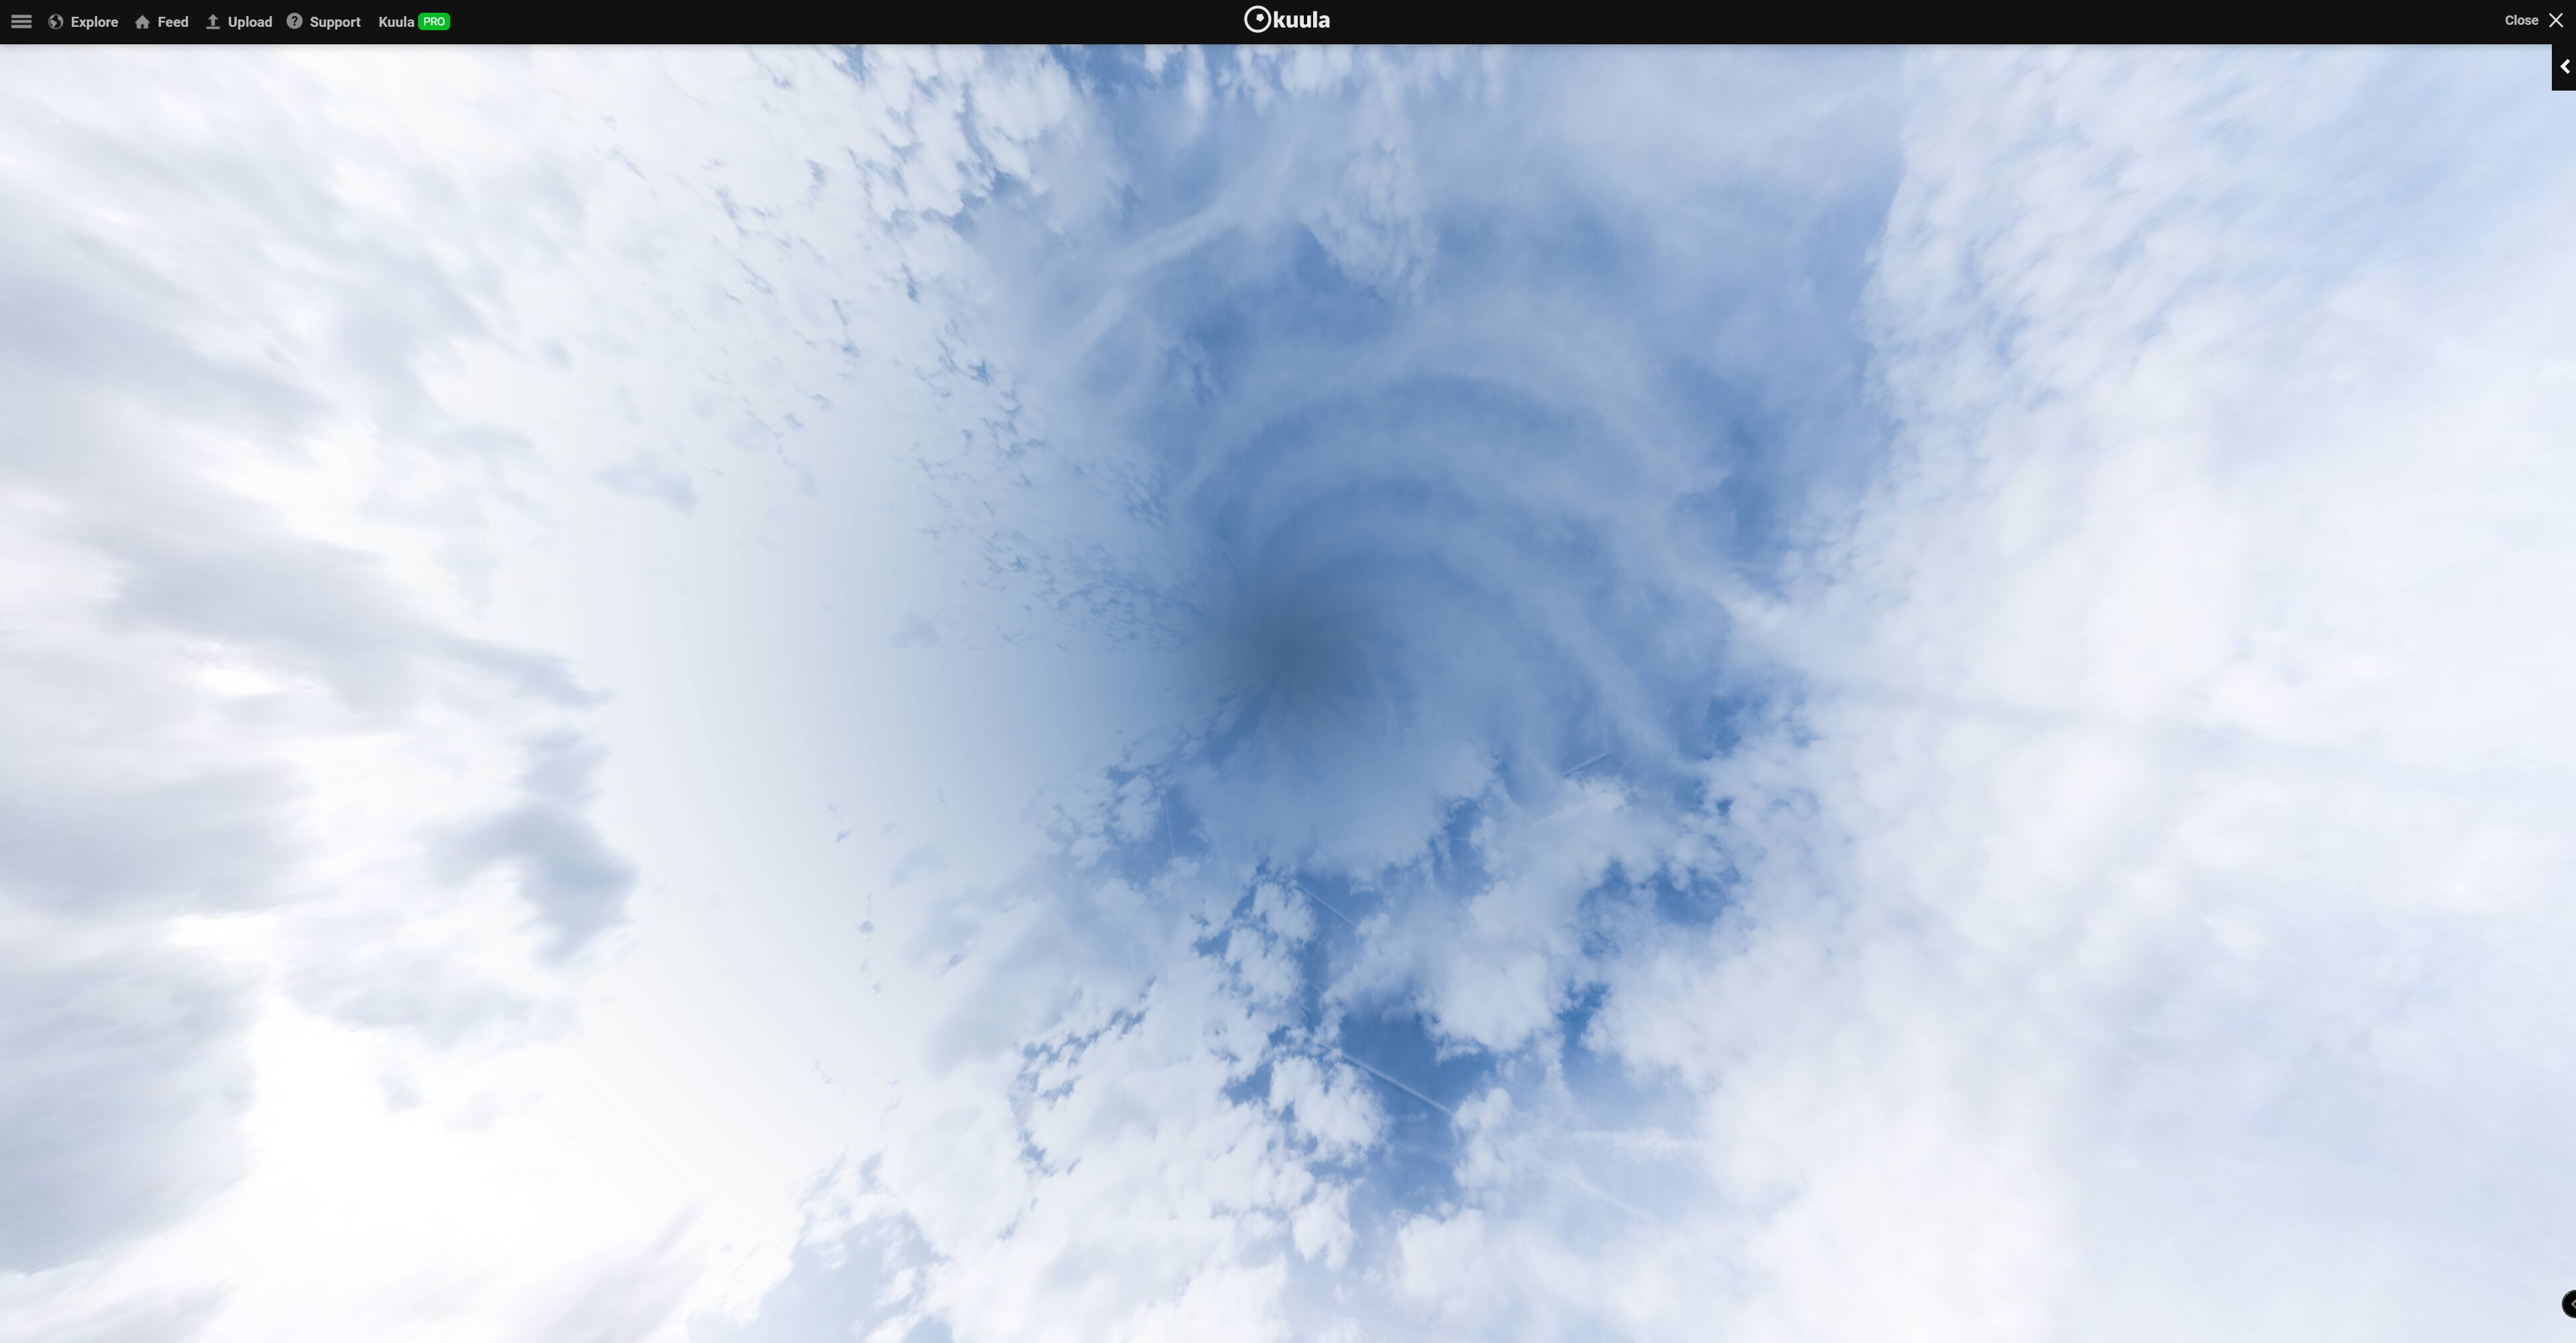
This is a 360 Pano generated using the above workflow with the high resolution DNG files:

I hope this helps. Feel free to message me if you have any questions :+1:

11 Likes

Thanks for taking the time to write all that up and share Chris @clinkadink

And thanks for using the #tutorial tag too, it’ll help people find this in the future :blush:

More than welcome. I will gladly ‘give back’ wherever/however I can :wink:

Cracking this workflow turned into a year-long obsession for me. I thought I’d better post it … before I forgot it :rofl:

1 Like

Good work Chris Very well presented. Thank you

:star: :star: :star: :star: :star:

2 Likes

Never got that on my school report! Cheers pal :wink:

1 Like

Excellent presentation, will definitely be giving this a go myself soon. However if I have one gripe it would be the view looking straight up, although not the most interesting view of course, it does show a problem. On the lower resolution 360, while it looks like an alien spaceship from Independence Day, is hiding in the clouds or a large disc of cotton wool floating in the sky, it’s far smoother than the very harsh, stitching job, of the much higher resolution version .Whether there is a way to smooth that out, who knows. Other than that, excellent job.

1 Like

Hi Andy, many thanks.

It isn’t ideal, far from it. One of the trade offs at present. Hence the caveat …

That said, I think I have found a method to correct this. But it is work in progress. If it does work, then I will of course append this step to the thread.

Update: Fixing Stitchline at Top

As @Andy601960 has mentioned, there are some visible stitch lines right at the top of the 360 Pano in Kuula using this workflow. Whilst these are only visible if you are looking directly up, there are unsightly, as you can see from the image below:

DJI Fly’s method, using the low res JPGs, is to create to blur a circular section at the top covering the stitchlines. The problem with the DJI method is that it still leaves a very obvious (fake) round disc with little blending at the top, looking like an ‘alien spaceship’ (to quote @Andy601960), as shown below:

I have added my method below, which still uses the high resolution DNGs, but smooths out the stitchlines and feathers the image, leaving much of the original detail. It is far from perfect, but more realistic than the 2 methods above, in my opinion. See below:

:green_square: Fix Top Stitchline in Photoshop

From the Select menu, choose Sky

Then feather the selection, Select > Modify > Feather, or press SHIFT + F6. Add 10px of feather, click OK and then press CTRL + J to copy the selection to a new layer. We only want to edit the sky, nothing else. See box in red below.

With the new ‘Sky Layer’ selected, we need to add a new Gradient Fill Layer

With the new Gradient Fill Layer selected, we now need to apply it to the Sky Layer only - not all the layers below. We do this by holding the ALT key and clicking between the gradient and the white mask on the line between the layers. I have added a red dot where you need to click.

image

It should look like this afterwards. You need that arrow in the red box.

image

Now double click on the gradient (box in red, lower right) and change 90 degrees to -90 degrees.

Then select the gradient to open the Gradient Editor window, you will see slider at the bottom of the new window appear. The left side is the solid colour, slowly blending to the right side which is completely transparent.

We need to change the left side colour first to match our sky. Follow the numbers in the image with the steps below:

  1. Click on the bottom left pin under the slider
  2. Click on the colour field
  3. Select an appropriate colour to use from the Sky for the gradient
  4. Click on OK

Your gradient slider should now look like this

image

We need to add two new points on the slider to change the location of the gradient so that it only affects the top of the sky - where the stitchlines are, and leaves the rest of the sky in tact. Above the slider, click to add a new marker.

  1. 1st marker set opacity to 50% and location to 20%
  2. 2nd marker set opacity to 0% and location to 40%

image

Once done, click OK on both windows, save your image and upload to Kuula.

Result:

2 Likes

Quick add from me

If anyone needs a copy of AGP for Mac drop me a message

4 Likes

Nice one,. way better. Sure it will never be perfect, since very few drones, can look straight up, though some can. This is definitely a better 360. Had a similar problem years ago, when try to produce 360 visuals ( I do 3D architectural visuals for a living). I use a program called 3DS MAX and render the images in V-Ray, which has a spherical camera feature. You simply place the camera at the centre of the scene and hit render… However finding stitching software that could produce high resolution images, for the client to view, was a real pain and frankly it still is…

Now I am wondering if you could replace the sky using one of thousands of available 360 panoramic HDR sky images, which don’t have this problem with missing parts of the image. That would be really cool. Similar to the Luminar AI sky replacement feature, but instead of a simple sky image, you could use a 360 HDR image… What’s the betting someone is going to find a way to do that in the near future haha

Yes, of course, if that is what you prefer. I recall @milkmanchris having a shed load of then shared. This tutorial is only if you’d prefer to retain as much as the original image as possible. In PS, I can use use the Sky Replacement tool, it’s so easy, a new Sky in a couple of clicks. But personally, I would prefer to keep the image that I shot, with a the odd tweak here and there :wink:

1 Like

Easier than Luminar ?

I’m away to print that off, great write up!

1 Like

Never used it, so cannot say :wink:

1 Like

Thanks Chris!

Using this method are the exif items in place to upload it to Facebook?

Re the sky, the other alternative method is to restrict upwards movement in Kuula.

Pretty much the same, but if you’re using PS that’s no point in saving from PS and loading into Luminar.

1 Like

In PS using default settings, literally, only two clicks from …

… to …

2 Likes

That’s a nice ship :wink:

Excellent, I’ll have a play with that later :+1:

Edit / Sky Replacement.

Pass. I do use (condone) Fakebook or know. Sorry.