I’ve started this thread because I’m going to build an antenna tracker and I will document the steps as best I can in case anyone else wants to build one. If someone here has built one from scratch, all advice is welcome
I will be using an arduino, a wifi module, a tango 2 configured for wifi mavlink, a gps and magnetometer, 2 servos, a 3d printer and nice big patches and helical antennas to pick up the hdzero signal.
Hopefully when its finished it should work similar to the below clip.
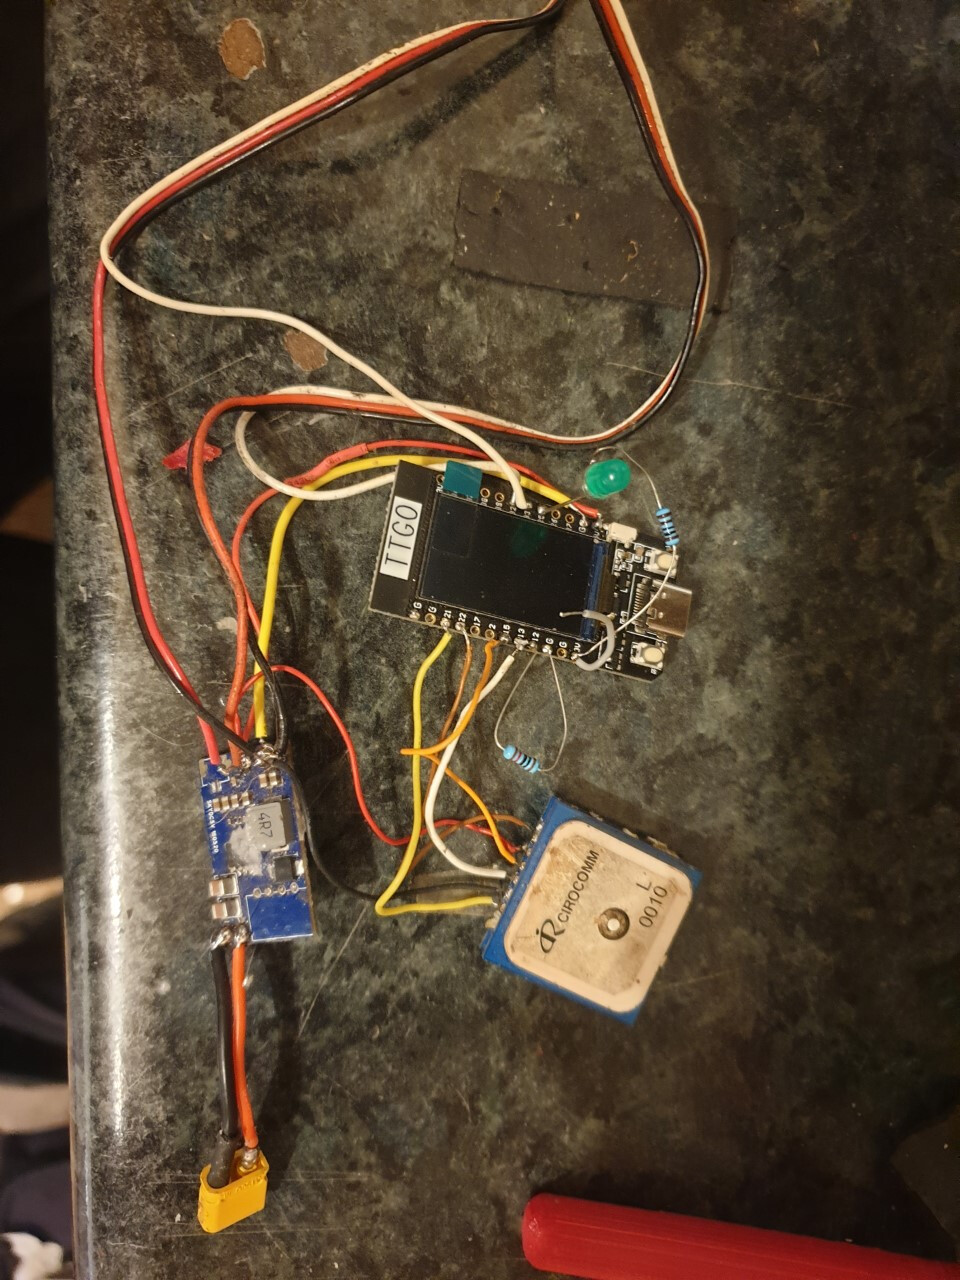
Firstly, after a little bit of reading, I wont be using my arduino and a wifi board, I’ll use the below. It is an Esp32 development board with integrated wifi. There are sketches on github to load into it so that it can convert the mavlink data from my uav from my tx to useable information to calculate the crafts position in 3d space. Hopefully!
My logic is that as its like an Arduino with wifi, I can use 2 servos with a bec for pan and tilt, a gps with mag, connect these up to the esp32, upload a sketch that I will find on github and the whole lot will receive mavlink gps from my rc transmitter via wifi, do some calculations and adjust the servos so my antennas point to the uav.
I received my esp32 board from Amazon. I have managed to get it to talk to the pc and upload a simple program to test.
All went well until I unplugged the usb cable. The socket decided it wanted to leave the circuit board too. So it has gone back to amazon.
I’ve ordered an upgraded one with a tiny screen for debugging. Hopefully I can get something working for the big meet
My ttgo esp32 board arrived today. Very easy to setup with the below yt video.
Just as a test, I’ve put tetris on it. The board is tiny, but has more than enough computing power for what I need
Next step is to wire 2 servos to a bec then to the board, a gps and mag too, upload a suitable pre-written antenna tracker sketch to the board and test.
I’ve found a build thread that I can use which has suitable software for multiple esp32 boards, including the one I have.
It’s a bit of a learning curve, but not too difficult.
I have uploaded a sketch which has a configurable text file and so far so good.
The lcd display is very useful.
That 5v pad is more than likely an output of a 5v regulator, check it has a blocking diode (or series resistor) after it or it might object to having a strong 5v shoved up it’s arse
Is it an open source board? if yes then you should be able to get the circuit for it.
After a day and a half trying to figure out the software and set it up, I have finally been able to get the tracker working.
I have set the tango 2 as the hotspot on TCP. The tracker connects to the tango 2.
The tracker has a gps and mag for dynamic tracking (the tracker can be moved and it will still lock onto the craft.
It communicates the telemetry via Mavlink Emulation, used by crossfire to get the telemetry from the crossfire serial link.
The next stage is to design and print a case to put onto a tripod that I’ll buy.


")