Question is directed @AlbionDrones , but feel free to chip in folks
Suzanne, could you possibly talk us through your typical workflow when you’re editing videos please ![]()
![]()
1 Like
OOOf, big question… Ok, I will pen you an answer, possibly tomorrow, if thats ok?
I was thinking about whether to make a video or two on how we do what we do, the whole workflow from researching locations and looking for TOAL spots, through to the flight and planning shots and then onto the processing and video production, is this something that folks would be interested in, or are there enough folks out there doing that already?
6 Likes
I would definitely be very interested in learning more about your workflow, you are a very active contributor to this forum and obviously have a great deal of experience to pass on.
Personally I am an Apple user so if it includes anything related to video editing on Mac or iPad that would be great, (I am a retired photographer so I’m fine for stills editing but I did very little video work professionally).
Cheers, Joe
1 Like
I was thinking more about the process and workflow of video editing, but if you want to show the whole thing from planning right through to the end, I’d love to see that Suzanne ![]()
![]()
1 Like
Thanks John… I am thinking perhaps a series of video’s, covering the basics from start to finish, that way those who want to see any specific aspect can do so…
1 Like
Hi AlbionDrones. I am brand new to drones and have just bought my first one being a mini pro 4. Some videos on the whole process from start to finish from someone with such great experience would be awesome.
Thanks
Lee
1 Like
Thanks Lee… Iam only 18 months into the drone journey myself, so can’t claim any ‘great experience’, but I am sure if I post something then others will join in - some of whom have many years more experience than I do - and perhaps we can build a bit of a resource for folks to use…
2 Likes
Suzanne, you might have only been doing this for 18 months, but the standard and quality of your drone videos is second to none. There’s not many members on here who have had their footage shown as much on TV, and I’m sure not many have won awards ![]()
![]()
![]()
![]()
2 Likes
Lol, thanks… I have only been on ITV twice so far, with another coming tomorrow…
![]()
![]()
![]() I shall look out for it ( if I get up early enough )
I shall look out for it ( if I get up early enough )![]()
![]() Nah seriously Suzanne, your videos are something I aspire to ( but can never emulate)
Nah seriously Suzanne, your videos are something I aspire to ( but can never emulate) ![]()
![]()
![]()
![]()
1 Like
Our Workflow for editing Videos, DaVinci Resolve 18 – Suzanne Read, Albion Drones
Ok, before I start on the nitty-gritty of our workflow, I would like to give you a bit of our background, who we are, our equipment and experiences, and the basics of our Drone Journey, in the hopes it will help to normalise who we are and perhaps allow others to understand that with the right understanding and focus, anyone can do what we do.
I will add, I don’t claim to be an expert on Colour Grading or using DaVinci Resolve, I am just someone that is producing content that I am happy with and that others seem to think highly of, nothing more and nothing less.
I am no-one special and to be honest don’t consider my editing or workflow anything special, I am just an average woman with a lot of photography experience who 18 months ago moved into Drone flying and videography.
I don’t own any hi-tech software or use a top of the range computer, we have a 5-year-old mid-range laptop, a Dell Inspiron 3793 – Intel i5 with24GB of RAM, we use the free version of DaVinci Resolve 18, I have a 2TB external HDD, and the laptop has an internal HDD of just under 1TB and an operating system SSD of 98MB.
I tell you this just to illustrate that what I do and the results we get are nothing to do with the quality of the system or the amazing software used, instead it is about the process I follow and having an understanding of what to do to improve an image – and also perhaps the sheer bloody mindedness not to stop until I am totally happy with what I am producing.
We started our drone journey in August 2022 when after much deliberation we purchased a MINI3 Pro, having always had an interest in aviation – I had a PPL with an RAF scholarship many years ago when I was aged 17/18 – and a passion for photography. I have always been someone who has the ability to be self-critical with anything I do, so on seeing our footage I was able to critique it and to plan how to improve my flying, and also look at whether I could improve my editing to make the footage look as good as possible.
Flying a MINI3 Pro I have always been amazed with how good the footage is, I tend to leave it in AUTO for most of the settings and use the Exposure Compensation to reduce the exposure by -0.3 to -1.0 in order to prevent burnout on the highlights. I have not bothered changing the settings from what it came with – if it isn’t broke, then don’t fix it -which means I don’t use with DLog or DCinelike, instead I have recorded in the normal mode the drone came with, which means I am recording in H.264 and DaVinci YRGB Colour science with REC.709 colour space. I tend to hit record when I take off, and then record the whole of my flight and then create clips to use when I start editing – I do this prevents me from forgetting to press record, after doing that once at the Glenfinnan Viaduct and not realising until I got back to download the footage! Yes, it means have large video files, but
We added a second drone – an AIR3 – in September 2023, in order to better cope with the potential winds that we were expecting on our planned Autumn trip to Skye and Lewis and Harris – and a third drone in early October 2023 – an AVATA – in order to add another perspective to our footage – plus the AVATA is just so much fun to fly!
So, for starters, that’s the background of how we got to where we are…
Now, tomorrow I will start to share how we do what we do…
8 Likes
I surprised Suzanne, I honestly thought you’d be using some sort of colour grading in editing, ( thought you’d downloaded some LUT’s and applying them. ![]()
![]()
I do colour grade, but I do it manually, rather than adding LUT’s…
Ahh ok, you’ll have to show me how to colour grade with the free version of DaVinci Resolve. At the moment I limit myself by simply editing video clips and adding a sound track. I’ve looked online at various tutorials, but most of them seemed aimed at folks who’ve paid for the full version. Tried a few weeks ago to do one of these “tilt shift “ videos with a short clip, but DV Resolve ain’t having that unless you pay for the full version. ![]()
![]()
1 Like
Don’t worry, I shall go over what I do and how we use the DaVinci controls to get the footage to look its best.
1 Like
I for one will be reading this thread with avid interest.
In a similar way I have enjoyed photography for many years but the Video side scares the shit out of me.
Yes I have videos from the mini 4, usually straight up and a 360 video of what’s about then back down again. Have tried a few different approaches but will be interested in how you prepare and the thoughts about the “blank canvas” ahead of you.
One point I did take from your intro above,
and also perhaps the sheer bloody mindedness not to stop until I am totally happy with what I am producing.
Total Respect.
2 Likes
Hi Suzanne your footage caught my eye when browsing thorugh the site and I love you sharing this thank you so much… I’ll also be following this thread. Where are you based?
1 Like
Hi @LStorey, it looks as though you’re quite new here ![]()
Why not nip over to the Introductions page, and say hello properly and tell us a bit about yourself. ![]()
Hi Louise, thank you for the kind words… I am based in Manchester, but do have the opportunity to travel a fair bit, both with work and for holidays… What about you, are you local to us?
Part Two – creating the timeline from the raw footage
Ok, perhaps a future missive will look at the planning and videography part of the process, but for today we will assume the footage is taken, and transferred to the computer, and now we are ready to fire up DaVinci and start to create our new video! I only use DaVinci Resolve – other editing software is available - so cannot talk specifics about how to use any other editing software, but the principles of how to edit and grade the footage should be pretty much the same. If anyone else uses other software and want to contribute a user guide for that software to this thread, please feel free!
Today we will look at thee basics of building the timeline, using the first 3 tabs on the Bottom task bar, the Media, Cut and Edit screens.
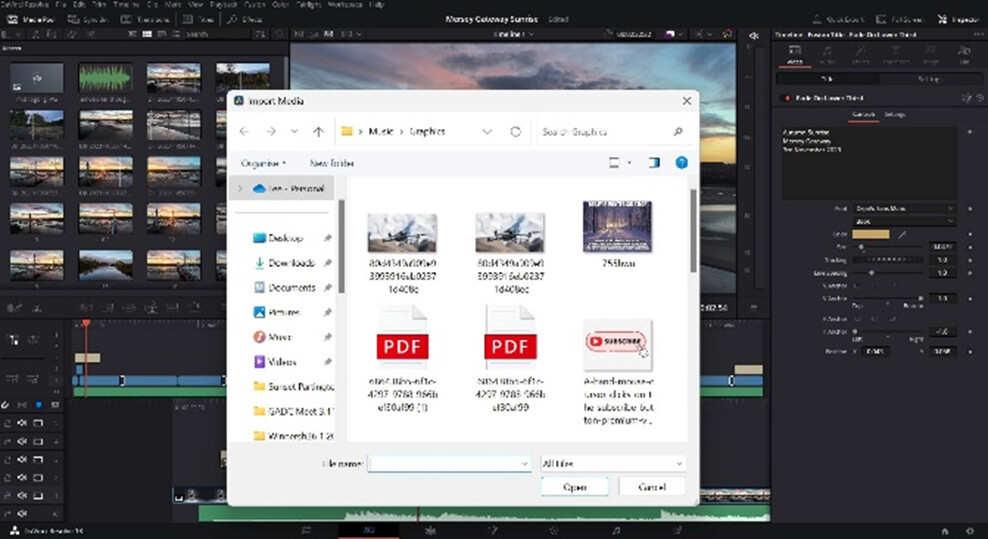
First things first, using the Cut Screen on the Bottom Taskbar in the MEDIA Pool Tab use the Import Media option to load the footage and any other things you want to use – graphics, music and sound effects.
Always start with the footage though, as this will then warn you if the DaVinci Frame Rate you have set is different to the native Frame Rate of the imported clips, and you will have an opportunity to synch it to the native frame rate – failure to do so could result in your video footage rendering in a jumpy manner. I have been there and done that, and dont recommend it…
Once the footage and extras are all available in DaVinci I then move onto the Media Screen (first option on the bottom taskbar) and select the footage, use the screen to watch what is there and when you find something you want to use then right click on the video timeline and Mark In your clip, then Mark Out the clip and use the Create Clip option to save it as a clip, name it as something you will remember.
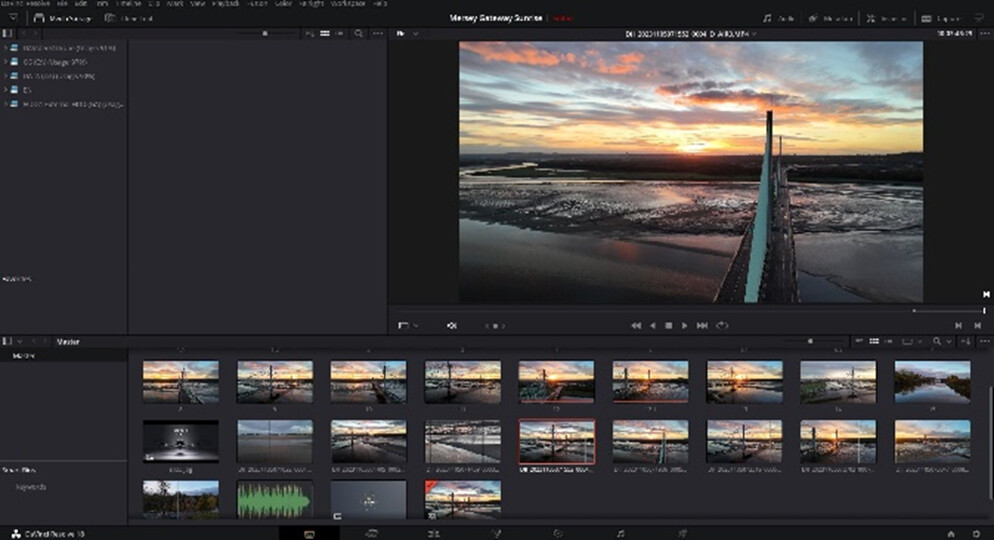
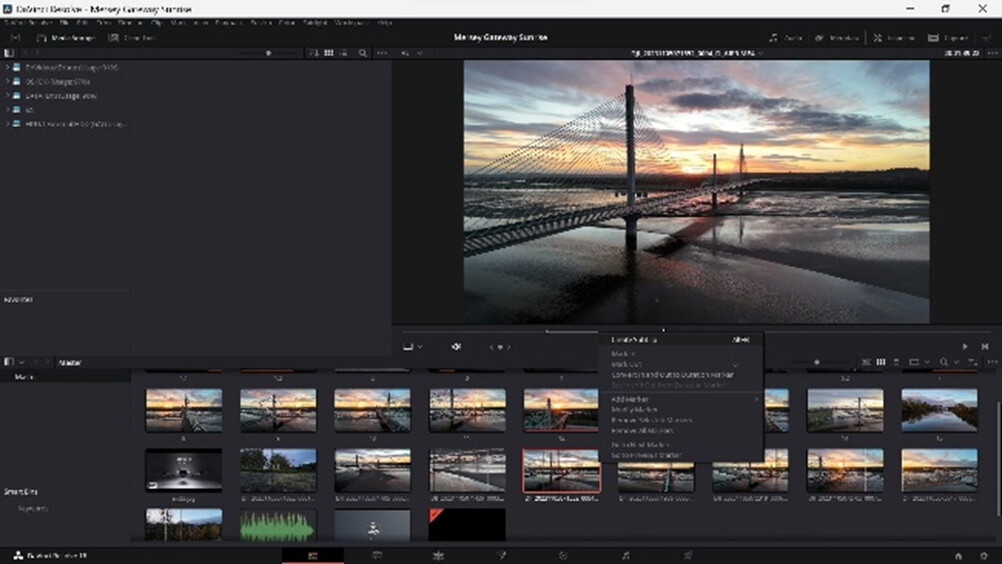
o.
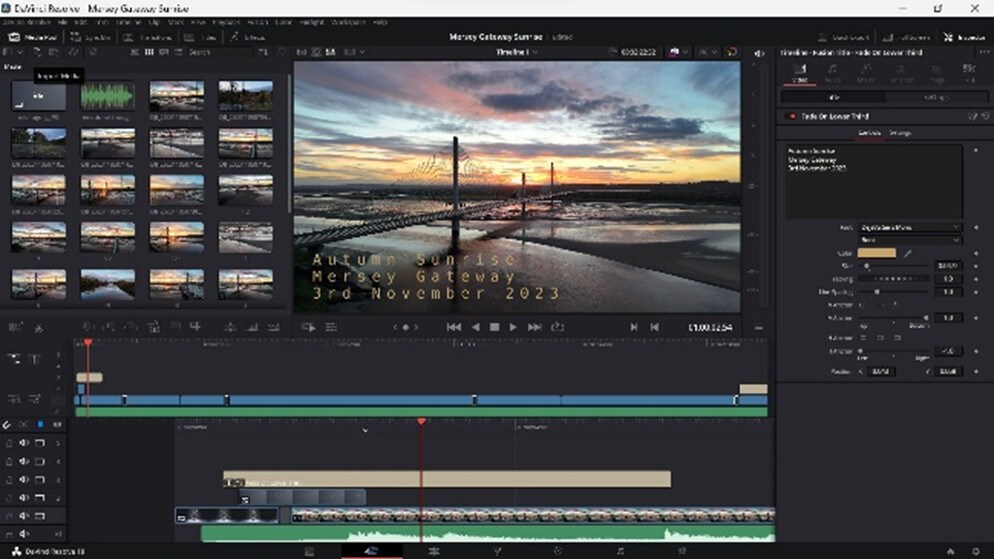
Once you have created all your individual clips then you can move onto the Edit Screen (3rd Tab on the bottom Taskbar). This is where we start to build the video. Normally I will start with my intro screen and title, and add the music track, simple drag and drop works well here.

The Media Pool lists all your footage and the clips you have made, plus music and graphics elements. The Effects Library gives access to the title screens, transitions and other effects, some of these are only available to the paid version of DaVinci, but there are sufficient for most uses…

You can toggle between the timeline views using the ruler tools, this allows you to look at the overview of the whole timeline, or to zoom in to see individual frames for synchronising with music or editing the clip length. You can cut the clip using the razer or alter the length of the clip by dragging the start or end point. You can also adjust the clip in the Video area of the Inspector on the top right of the screen – this allows you to change to speed of footage, zoom in and move the focus area, add dynamic effects and also to edit the transitions that have been applied, to use the inspector just click n the clip you want to edit.
So, build your timeline by dragging the clips, graphics and music / audio effects into order on the timeline bar, there are various video and audio channels that can be stacked above one another, useful to add overlays of graphics, sound effects, opaque overlays etc.
Once you are happy with the video then you can add the transitions – best to keep these simple and use one or two styles only – such as a fade in for the start and end from your intro page and exit page and then a single type of transition (or not) between the clips so as not to confuse your viewer.
Once you are happy with the timeline, have checked your transitions work and all elements are where you want them, then it is time to start on colour grading your footage in order to get it looking its best for the final render.
Next time we will explore the Colour Tab on the bottom task bar, and how to use the options in there to Grade your footage….
8 Likes