Soooooooo!
You may recall, I spent a ridiculous amount of time last month wrapping my DJI Inspire in vinyl because I wasn’t happy with any of the wraps available online, mainly because they had bloody gaps on every line due to the complex shape of the Inspire body shell and nose cone.
My wrap attempt came out “ok”… I was kinda pleased with it because there were no white gaps all over the place, but my OCD was playing havoc with me still as it wasn’t 100% perfect  The batteries were the hardest part to do because they have ‘fins’ on the sides which you press in to release the battery, these were literally impossible to wrap so I left them white
Enough was enough, it was time to get it done properly and hydro dipping was the only way.
First port of call, strip the Inspire naked 

Here you can see the complex nose cone, three sides on the front, plus a left and right. NIGHTMARE to wrap in vinyl.

Those battery fins!! IMPOSSIBLE to wrap.

Naked batteries! I had to be really careful taking these apart because they were all ‘live’. One false move with a screwdriver or one dropped screw could be game over. And at £180 quid a pop it doesn’t bear thinking about.

Under the hood of an Inspire 
Lower gimbal plate needed to be removed in order to get to the screws under the nosecone.


Right then!
I did a load of research in to the DIY hydro printing options. I looked at all sorts of kits on eBay and I watched all sorts of tutorial videos on YouTube.
After weighing up the cost of buying everything you need it worked out about the same as getting the professionals to do it. Plus, my costs were based on me getting it 100% right FIRST TIME. Probably wasn’t going to happen.
So with the drone and batteries stripped, I shipped the whole lot the short distance up the M6 to the boys at Hydro Style UK:
These guys dip stuff all day, every day. Check out their web site, the amount of patterns they have is unreal. They can even print custom patterns for you. Your imagination is the only limit here.
Hydro Style UK were great, they kept me posted with updates and sent me various photos along the way too.
They first sanded all the parts by hand then sprayed the whole lot with a satin black base coat.

Here’s the carbon fibre pattern printed and floating in their tank, ready to be sprayed with the activator.

The attention to detail here is amazing.
They took the time to assemble a few pieces, stuck together from the underside, and dipped them in one go.
So when re-assembled, the carbon pattern lines up 

This is the top cover AND nose cone

Once dipped and left to dry, then they spray several coats of clear lacquer over the top to protect it all.
A week later a box arrived 

Very well packed too, each piece was individually wrapped.

Drool time… 

Some close ups for you.
Nose cone.

Nose cone when positioned against the top cover.
THE CARBON PATTERN LINES UP

These guys are good, eh?

Battery tops.

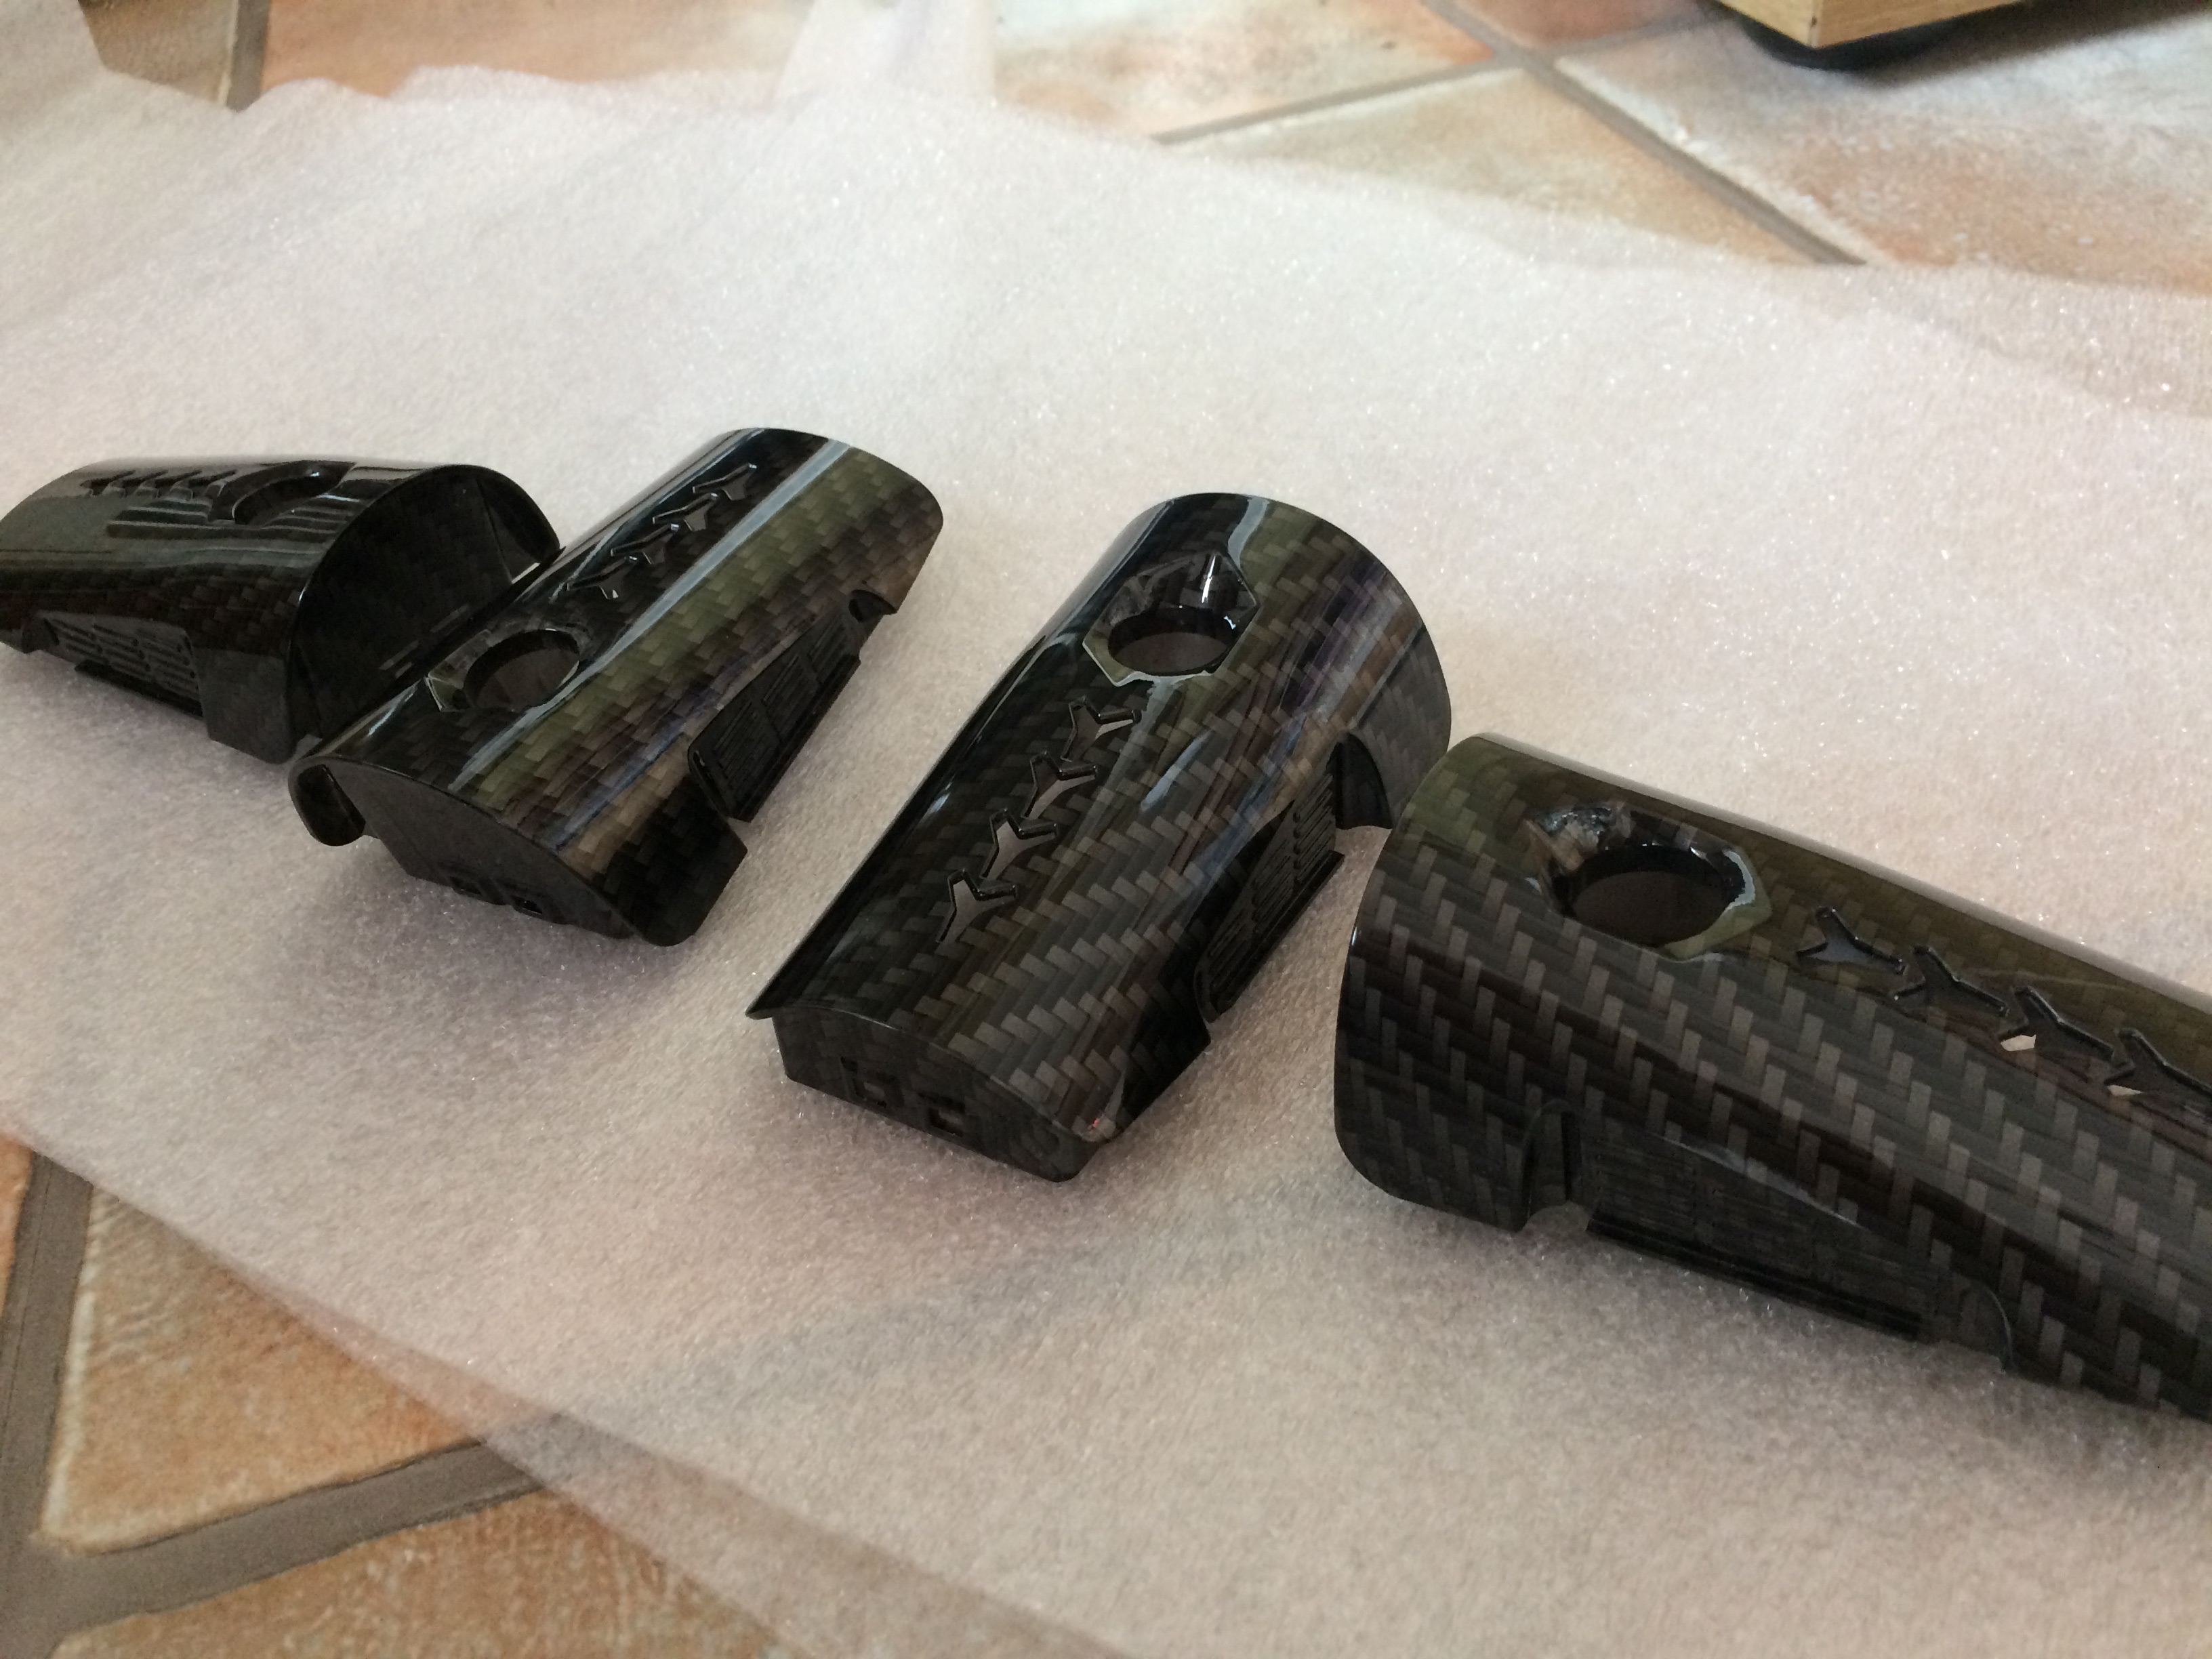
Those IMPOSSIBLE fins on the sides of the batteries.

I’m seriously impressed.

Rear end of the top cover.

Sneak peak underneath, satin black overspray, nothing much to see here.

Side braces and tail light:

Rear of the top cover, not a spec of white is left visible!

Lower air frame sides.

And now some re-assembly photos.
Tail light cover mounted to the rear of the top cover.

I used bits of foam in some places during the reassembly. I’d be gutted if I scratched this!

Lower sides reattached.

Top cover going on.

Hubba.

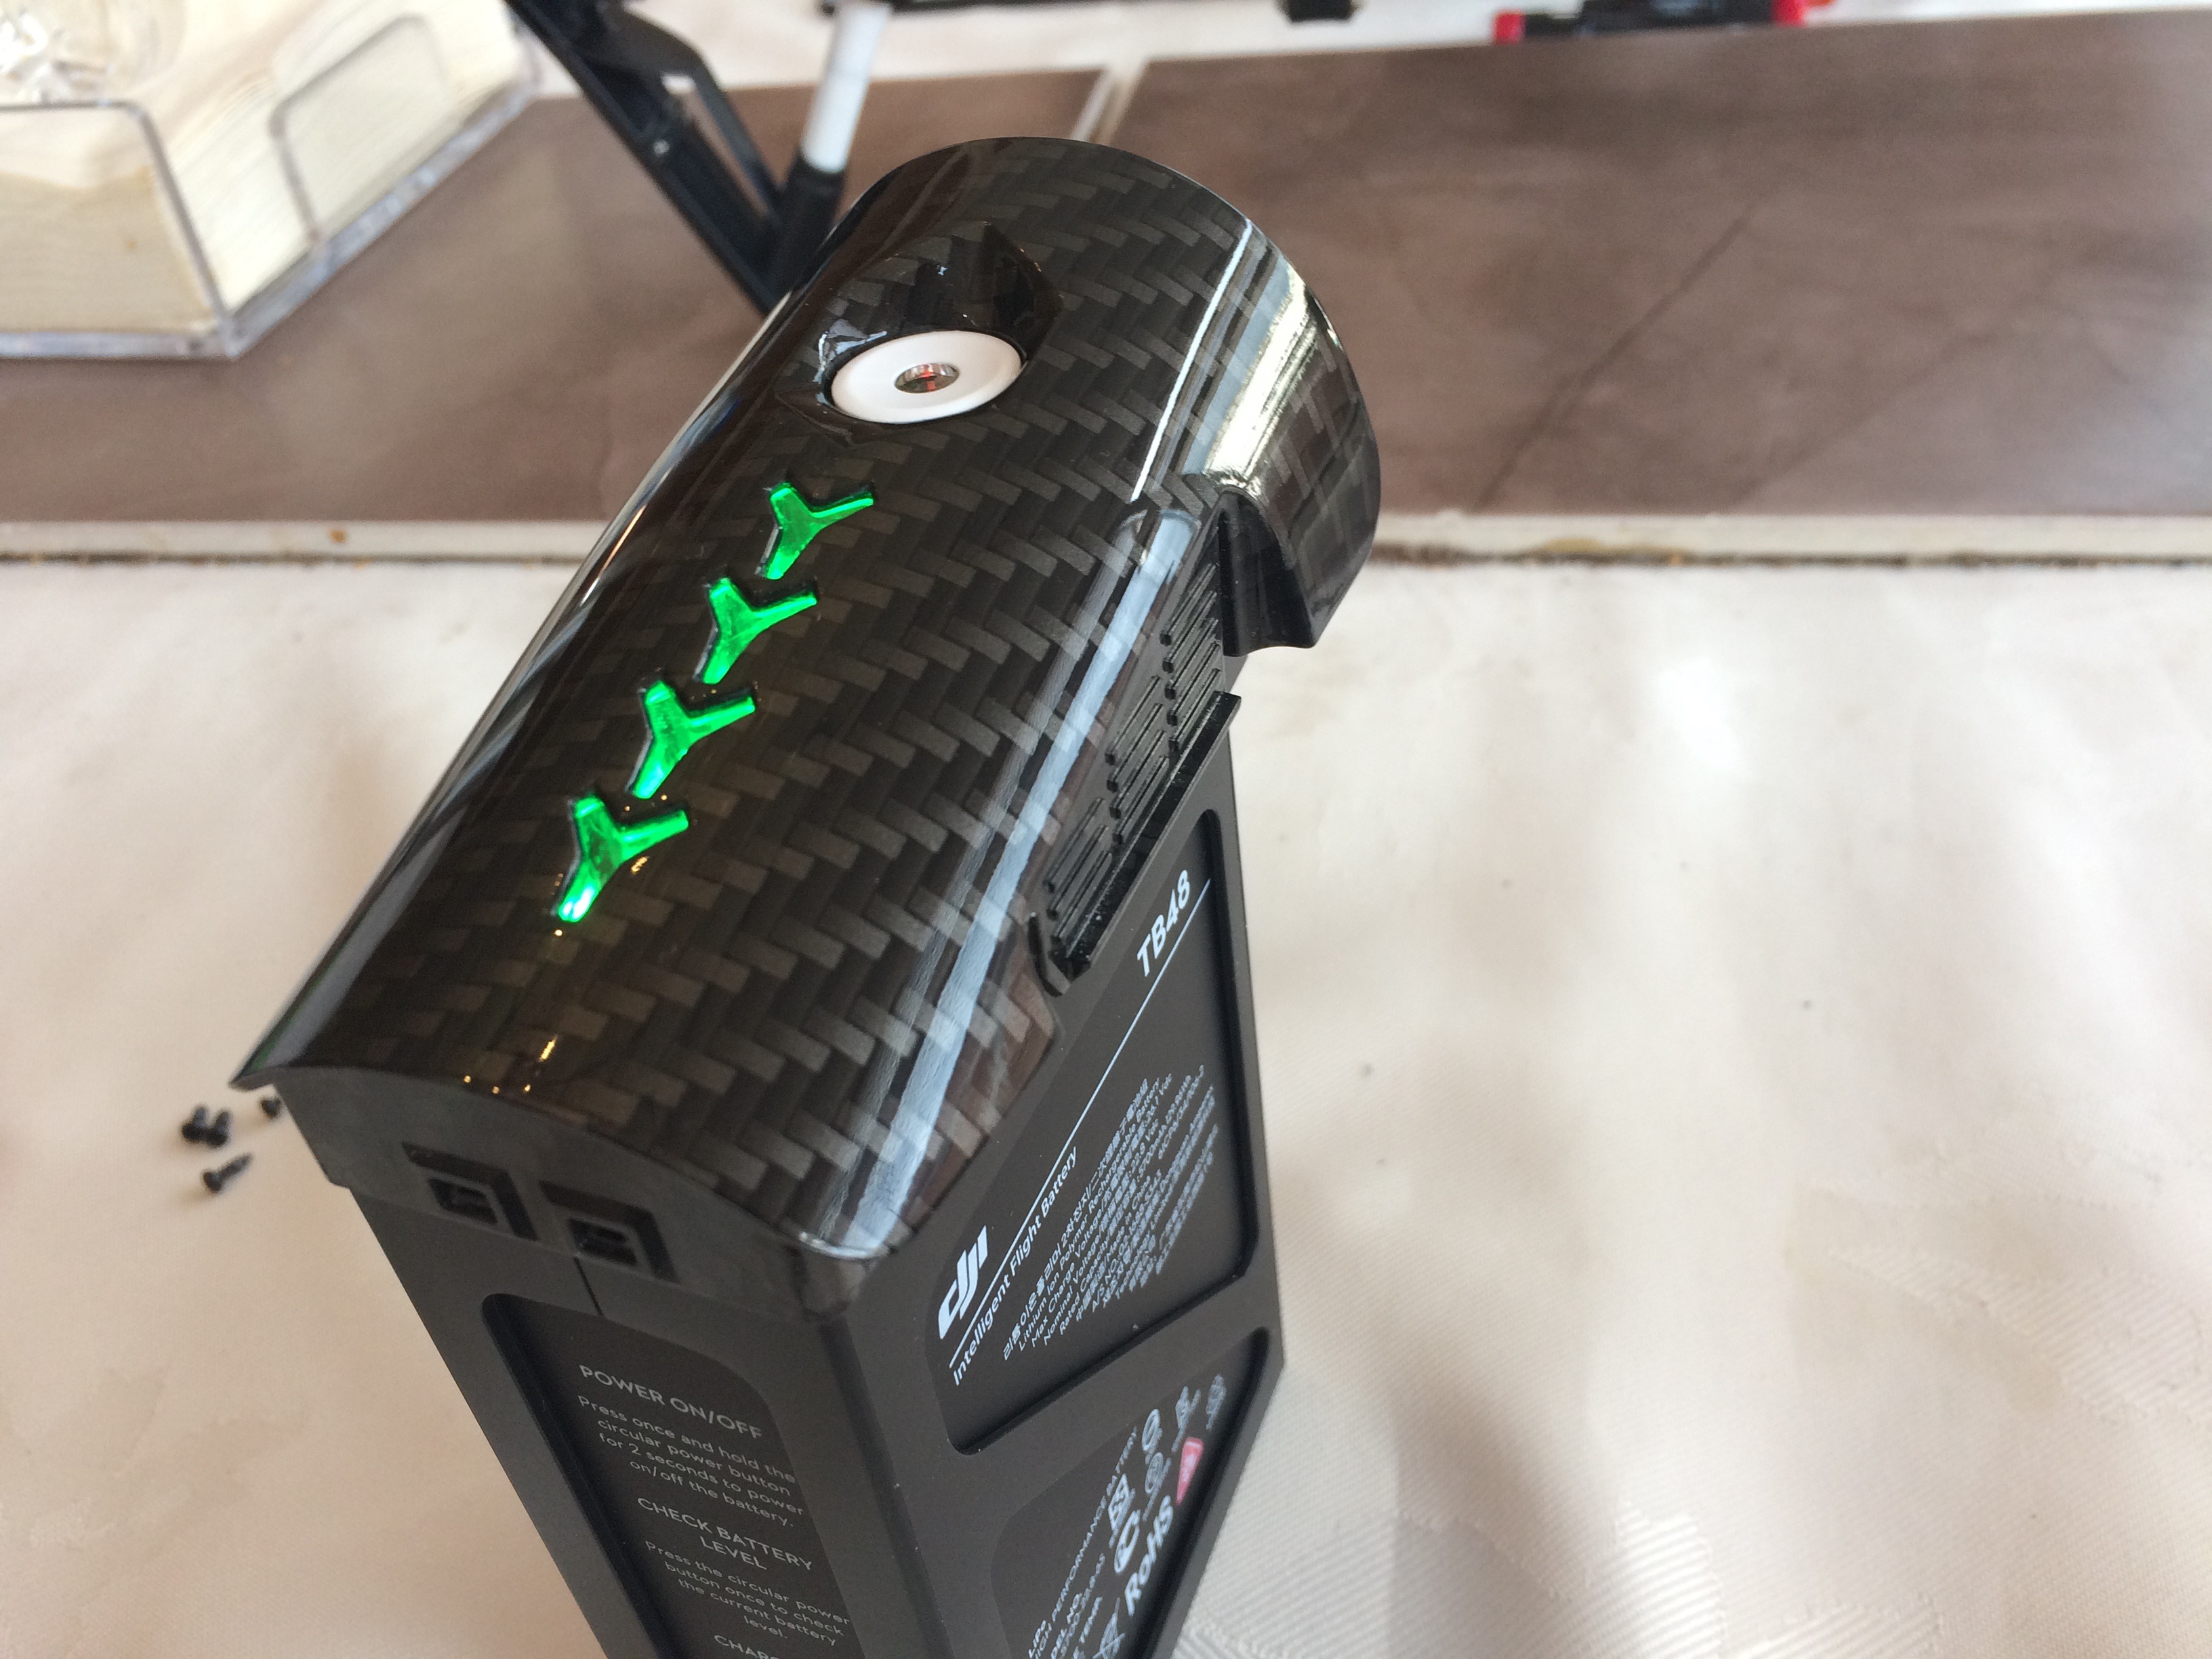
Battery reassembly, again minor satin overspray visible on the inside of the battery covers.

Even the FRONTS of the batteries are covered

Lookin’ goooood
Not a spec of white visible here either!

That’s it, all done!
Letting her back out in to the wild…


The end.
Sorry, that was a seriously pic-heavy post…
My OCD is now satisfied, I can sleep at night once more.
Shout if you have any questions 
Again, top marks to the guys at Hydro Style UK, they did an amazing job 


